Exporting
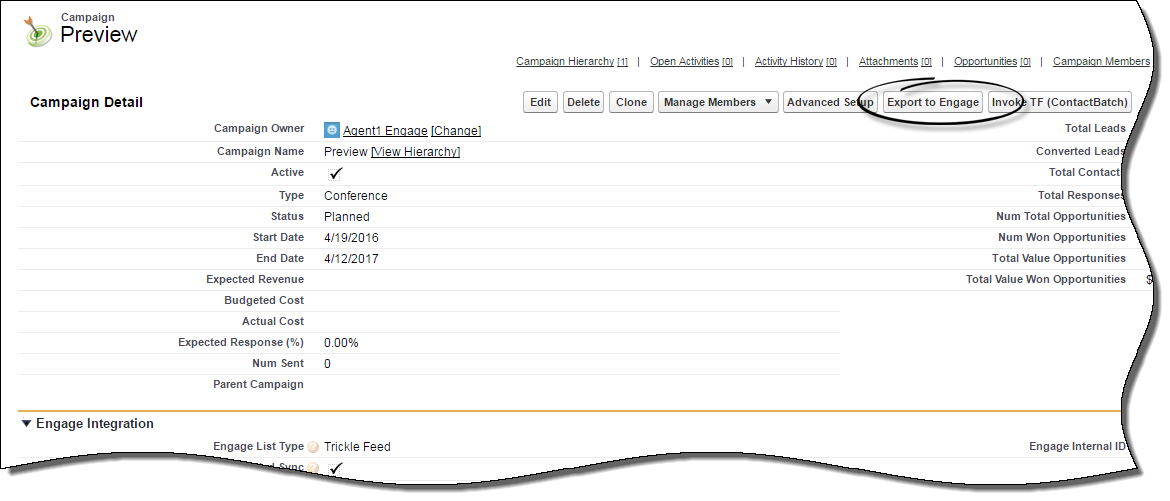
Now that you have your Engage SFDC Adapter for Outbound installed and configured, exporting your campaign information is easily done by clicking on the Export to Engage button from the campaign details view. Within moments you should have a message appear indicating that your export was successful. To verify that all details have been exported, simply log in to your Outbound account and check for the campaign name under your Lists tab.
Scheduling campaign exports
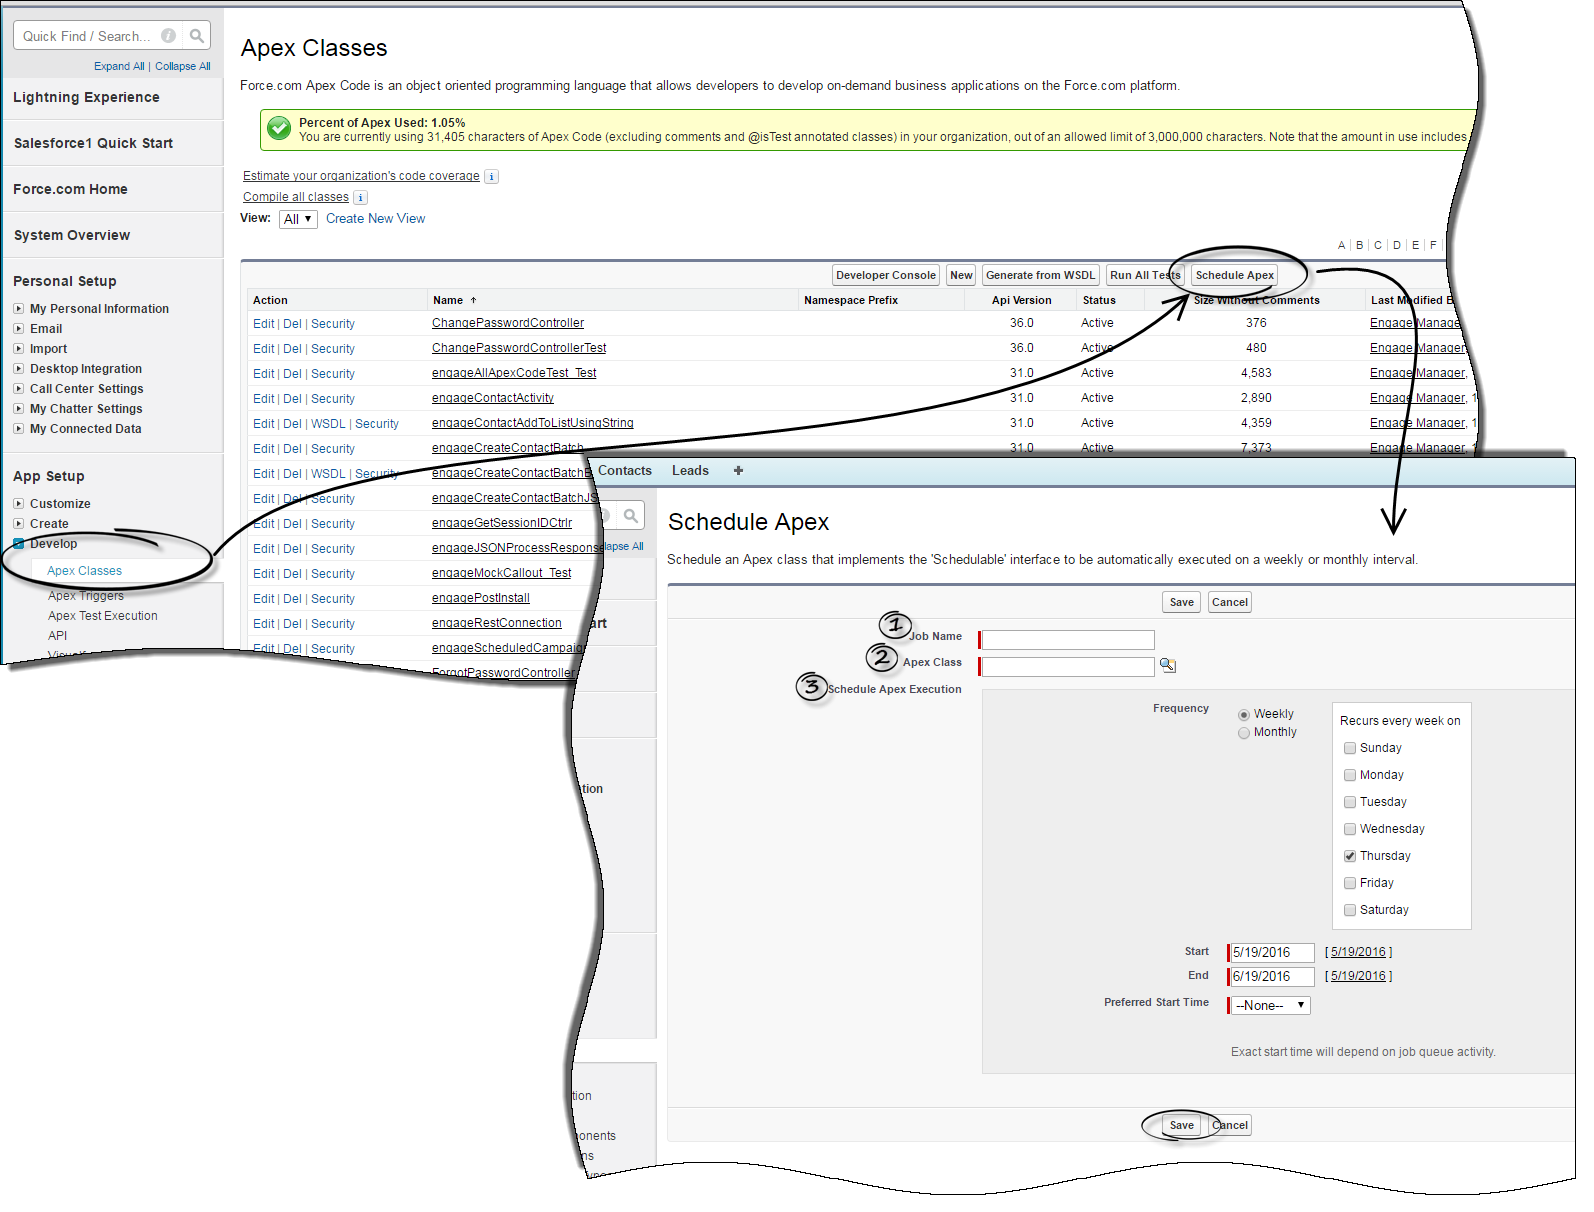
You can use the adapter to schedule an export. Use the Apex Classes found under the Develop section in the Setup menu. Once you click on the Schedule Apex button from the menu, another window opens asking you for the following information:
1- Job Name: this is a name you choose for your job
2- Apex Class: click on the Apex Class Lookup icon and choose engageScheduledCampaignSync
3- Schedule Apex Execution: these settings are up to you
Once you've completed all the sections, click the Save button at the bottom of the page and your export is now scheduled.


