Contents
Installing and Uninstalling
How to install the Engage SFDC Adapter for Outbound
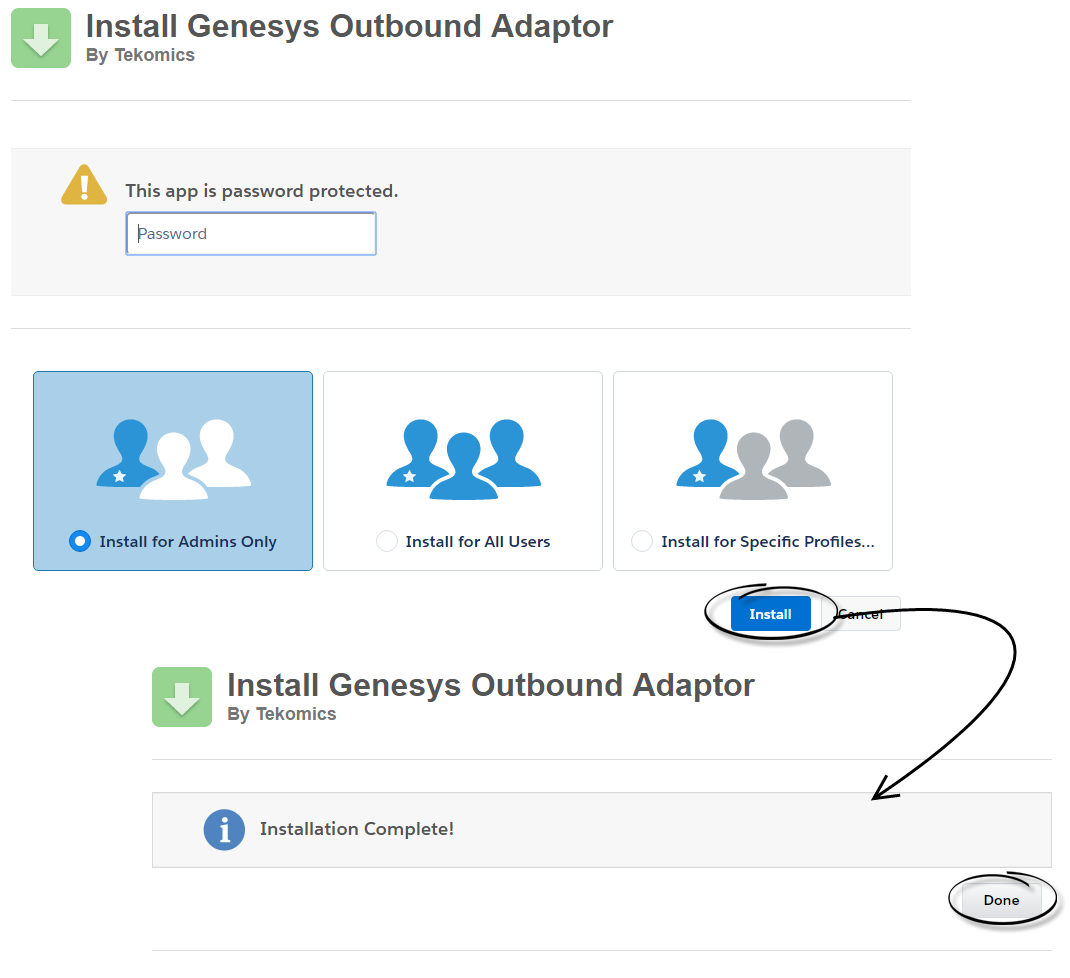
Installing the Engage SalesforceIntegration package in your Salesforce environment is easy. With just a few clicks the adapter is ready to use. Once you've logged into salesforce.com with your user name and password, simply click the following link to begin the installation:
Genesys Outbound Adapter (password is “Genesys1”)
Choose your security level to begin the download. As you follow the prompts at the bottom of the page, you will be asked to approve third-party access in order to complete the installation. Once the package has been installed successfully, you'll see the Installation Complete message displayed. Now you just need to verify the configuration settings are installed and that there is a remote site record. These next sections will help you with those tasks.
How to verify the configuration settings are installed
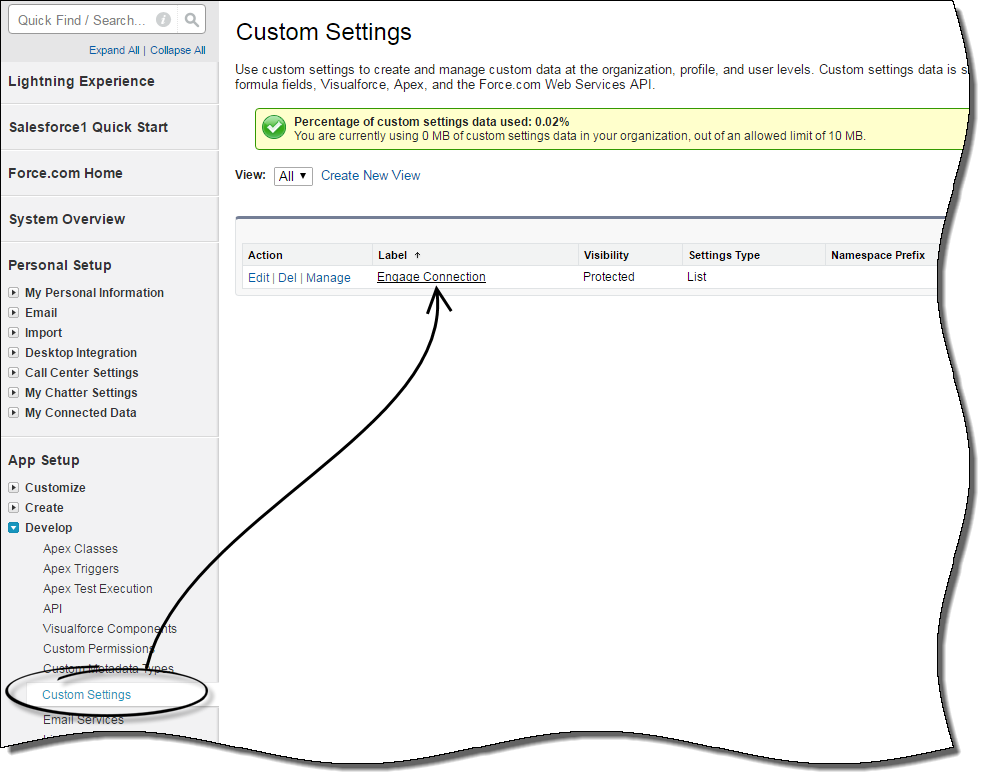
To check that your configuration settings were installed properly, navigate to Custom Settings found under Develop in the Setup area. Here you should see the Engage Connection record which stores the configuration settings for Engage.
One more step and you're done. Next, verify that there is a remote site record created.
How to verify a remote site has been created
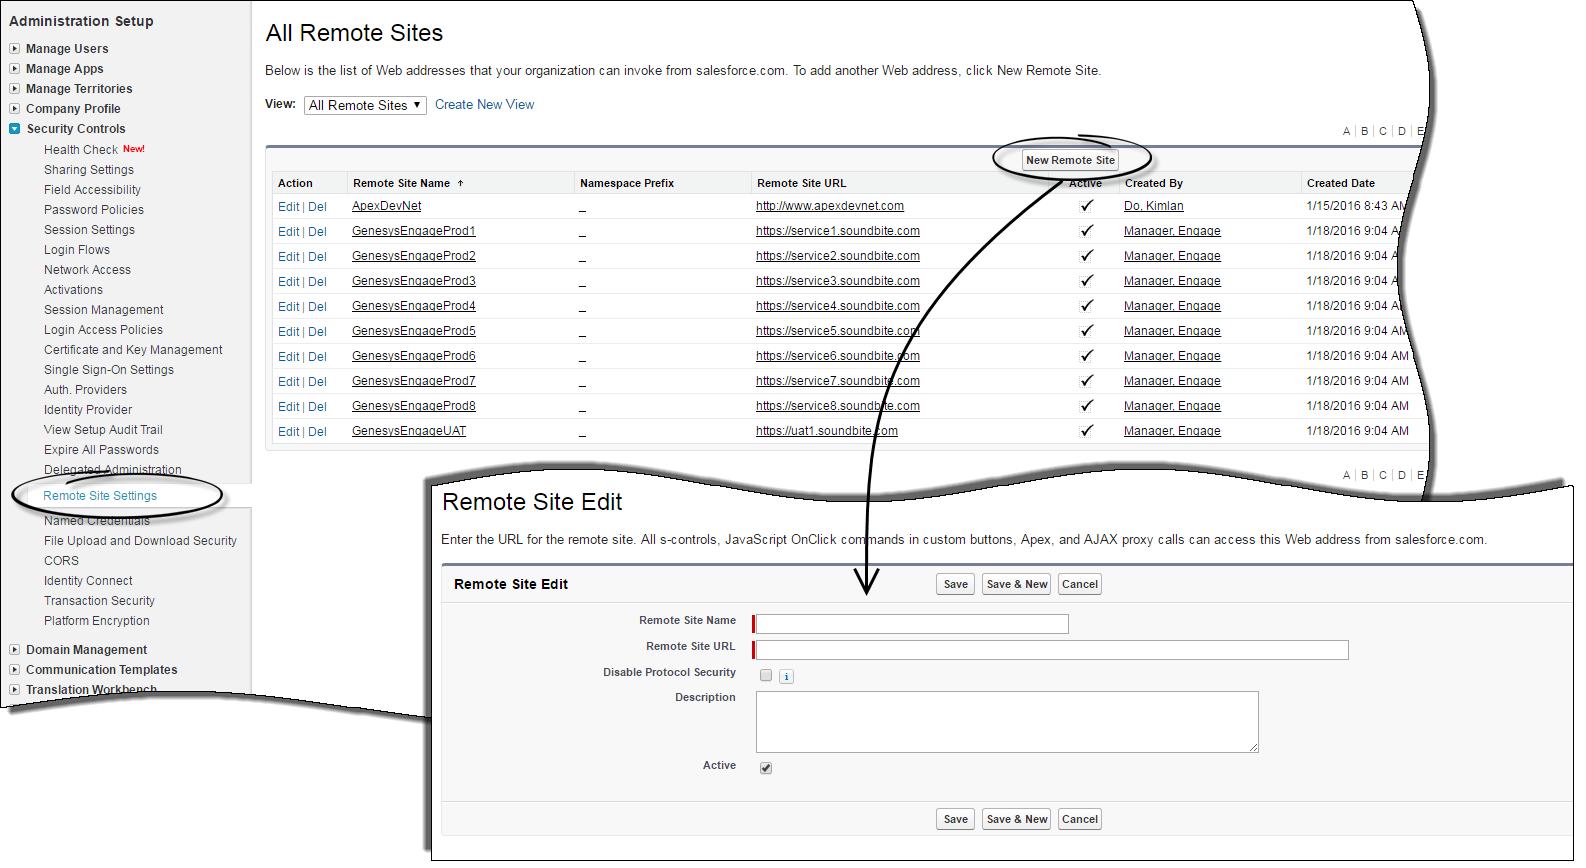
To check that there is a remote site created for Engage, you'll need to navigate to the Remote Site Settings option, found under Security Controls in the Setup area. Click on the New Remote Site button, add in your remote site details in the new window that opens and Save your changes.
Congratulations! Now that you've completed all the above steps, you're ready get started with your Engage SFDC Adapter for Outbound!
Uninstalling
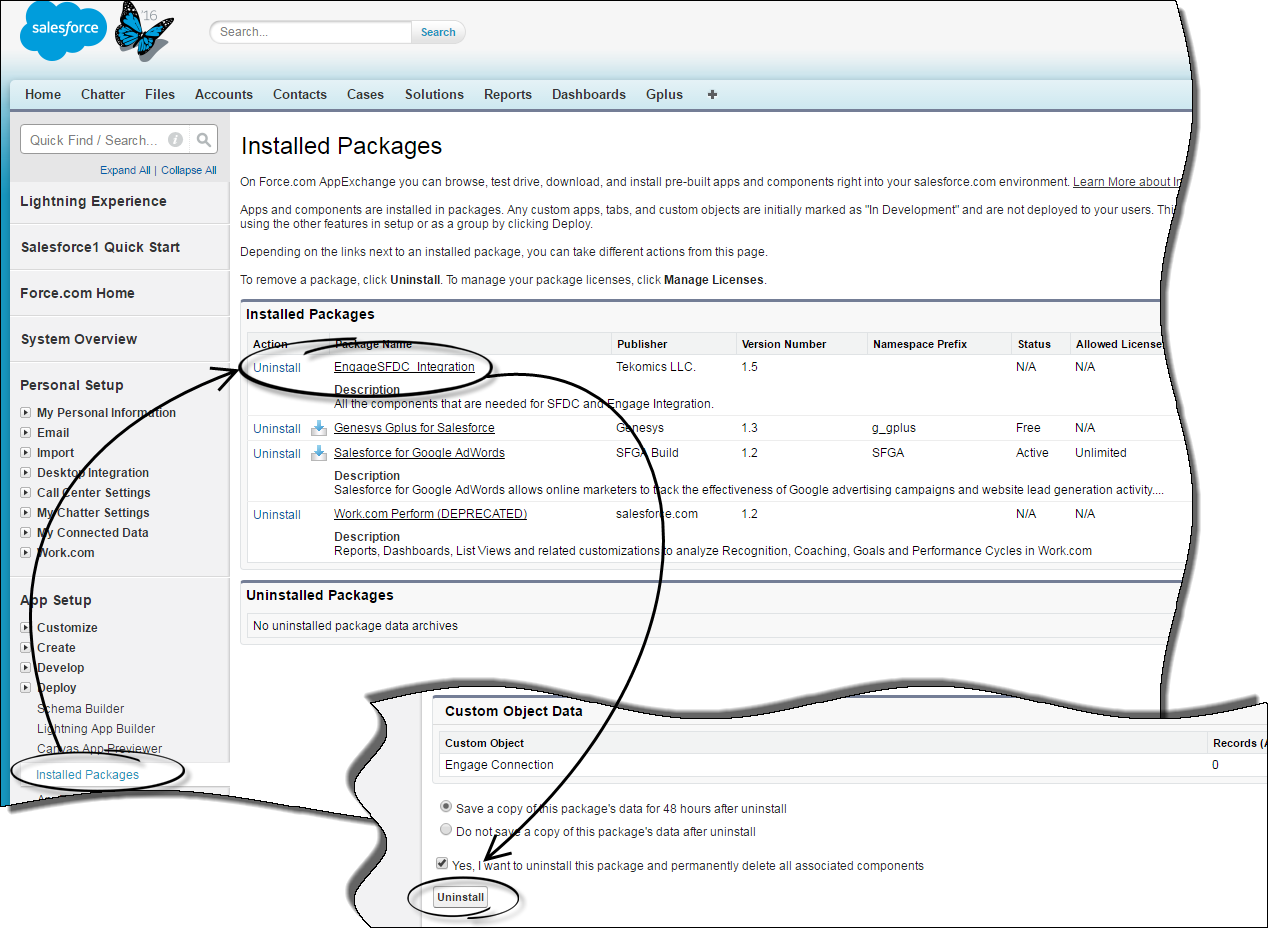
Should you wish to uninstall the adapter, you only need navigate to your Installed Packages, found under Deploy in your Setup menu. Simply click on Uninstall next to the adapter name and scroll to the bottom of the page where you'll find the removal options. Choose whether or not you wish save a copy of the data for 48 hours after the uninstall, check the check box next to the removal agreement and then click Uninstall. You're automatically brought back to the Installed Packages window where you'll now see the adapter name under the Uninstalled Packages section.


