Manage DID Groups with IVR Administration
All procedures begin in the DID Groups Main Page.
What is a DID Group?
Direct Inward Dial DID (DID) groups offer a more precise alternative to standard IVRs (press 1 for Sales, press 2 for Support, etc.). You would likely define a DID Group for each of those departments. The numbers listed in this function are the exact numbers that a person would need to dial to be connected directly to the respective team.
Why to create, provision, or modify a DID Group?
You might have a person join as a new training engineering supervisor. If you want to take special action when this person calls, then, you might have a DID Group for “special people”. You could give this person their own telephone number (provided by the telephone company) that they can call. This number could be added to that DID Group.
The application that is triggered when calling in (ref: IVR Profile Name) could be one that specially compares the number that was dialed with the number that the special person is calling from (Automatic Number Identification - ANI), and use that as an authentication method to validate the person without asking any questions.
So, DID group is a sorting/categorization feature which can be leveraged to provide special actions to people that hold a special number. Or, if not leveraged, then, the group might simply be named “XX Airlines – CFD (customer front door)", and, have only a single number listed (1-800-XX-ESKY).
Create a new DID Group
- In IVR Administration, select DID Groups from the Administration menu, and then click New.
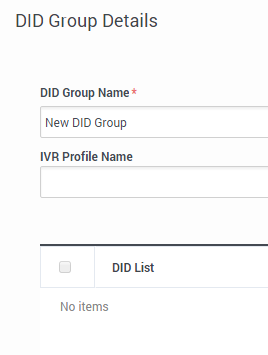
- Configure the DID Group details dialog:
- Enter an unused DID Group Name and an existing IVR Profile Name.
- Check the selection box of each DID in the DID List field, to include that DID in the group you are creating.
Optional Quick Filter field: Enter text to limit the number of DIDs displayed, or click plus (+) to query for additional DIDs not displayed.
Modify an existing DID Group
Remove items from the group
- Click on the name of an existing DID Group to open its DID Group Details dialog.
- Uncheck individual items to remove them from the DID group.
Provision conflicting entries
- DID group provisioning succeeds when you remove the conflicting entries in overlapping ranges (example: 100-200 and 150-250).
Sort an existing DID Group
- Click on the name of an existing DID Group to open its DID Group Details dialog.
- Click the arrowhead (a triangle) at the top right of the DID List field to sort it in the direction of that the arrowhead points (up=descending order, down=ascending order).


