
Route Agent Block
This block enables you to route to an agent based on the specified Agent ID and Virtual Queue, Agent Login and SIP Switch, or Last Called Agent.
You can use the Route Agent block in the Assisted Service phase to route calls to an agent based solely on:
- a specified Agent ID and Virtual Queue
- a specified Agent Login and SIP Switch, or
- the Last Called Agent that the caller spoke to
To route calls based on skills and other criteria, use the Route Call block.
You can sequentially place multiple Route Agent blocks with different settings, so that if routing fails in one block, your application proceeds to the next block. When a Route Agent block successfully routes the call to an agent, the application moves to the Finalize phase, ignoring any subsequent blocks in the Assisted Service phase.
Agent Routing tab
Agent Routing
Select a Routing type:
- Agent ID - Select the Agent ID (specified as a variable) and Virtual Queue that the call will be routed to.
- Agent Login - Select the Agent Login (specified as a variable) and SIP Switch (where the selected agent is logged on, also specified as a variable) that the call will be routed to.
- Last Called Agent - Select this option to route the call to the agent that the caller last spoke with.
Other Routing Settings
- Overall timeout - If enabled, you can specify how long the application must wait before moving on to the next block. Optionally, you can enable the check box to specify a variable.
- Route only if the Agent is ready - If enabled, a call is routed to an agent only if his status is set to Ready. If disabled, the call is routed to an agent regardless of his status.
Treatments tab
Specify a busy treatment to execute while waiting for an agent to become available. You can choose to play audio and/or execute a shared module.
Audio
Click Add Audio to add a Play Message child block underneath this Route Agent block. The collection of audio plays repeatedly until the call is successfully routed or times out.
Shared Module
Click Add Module to add a Shared Module child block underneath this Route Agent block. In the child block, you can select a shared module to execute.
A potential use case is to execute a shared module based on a specified set of conditions that can change over time and respond to external factors. For example, you might use a shared module that can play one announcement for callers if the estimated wait time (EWT) is beyond a certain threshold, and another announcement for when they are the next caller in the queue. To set up this feature:
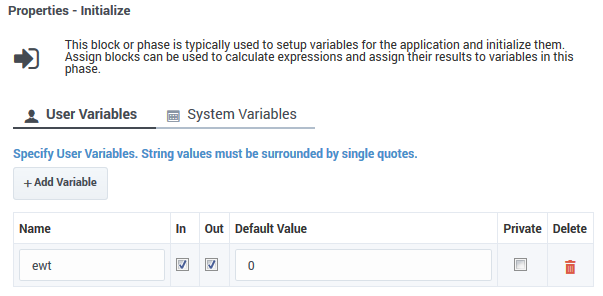
- In the application, create a user variable, ewt, and set its default value to 0.
- Create a Self Service type shared module.
- In the shared module, create a user variable, ewt, and set its default value to 0.
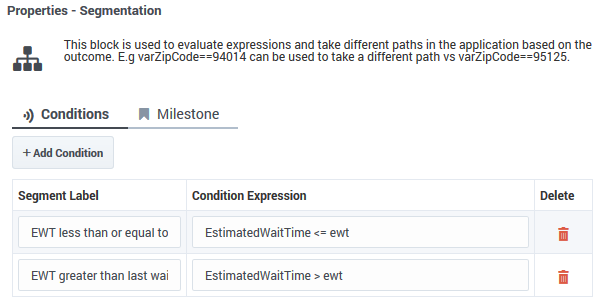
- In the Self Service phase of the shared module, add a Segmentation block. Add the conditions as shown below:
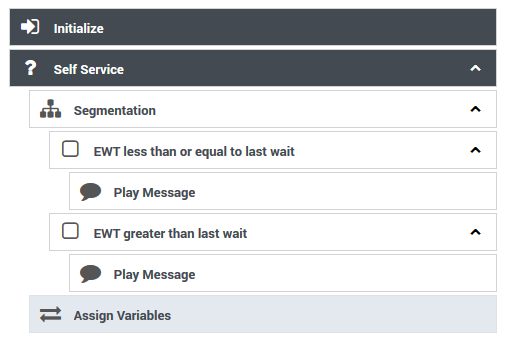
- Add two Play Message blocks as child blocks of the condition blocks, and add an Assign Variables block at the end. Your shared module should appear as shown below:
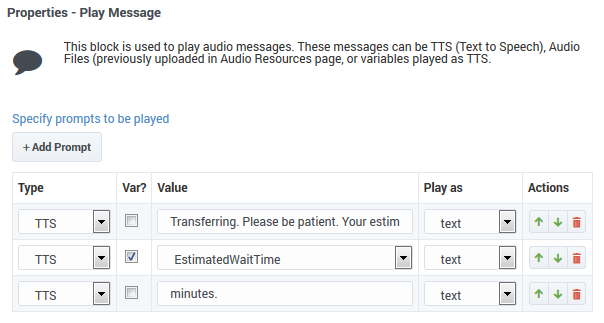
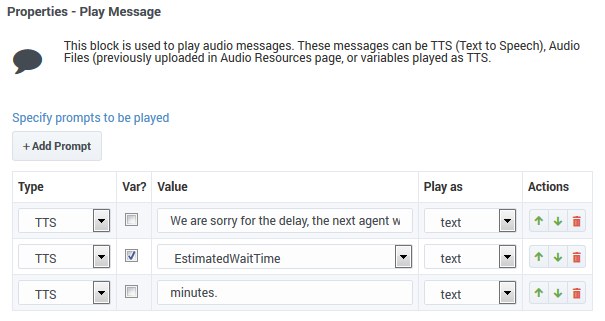
- Configure the first Play Message block. An example is below:
- Configure the second Play Message block. An example is below:
- Configure the Assign Variables block as shown below:
- In your application, select the Route Agent block and click the Treatments tab.
- Click Add Module. A child Shared Module block appears beneath the Route Agent block.
- In the child Shared Module block, select the shared module that you created in Step 2.
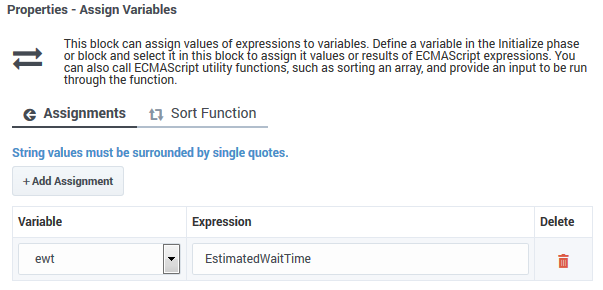
The application passes ewt to the shared module, along with the system variables, which includes EWT. The shared module compares ewt and EWT in the Segmentation block and executes a Play Message block, depending on which variable is larger. At the end, the shared module sets ewt to EWT before returning to the application.
Advanced tab
Targeting
Use Agent Status
If checked, the routing engine uses the status flag to route the call to an agent. If not checked, the routing engine uses the loggedin flag to route the call to an agent.
Threshold Expression
This option enables you to use an ECMAScript (or JavaScript) expression to further refine a routing threshold for the specified target(s). Threshold expressions for the Route Agent block can be used for the following routing types:
- Agent ID
- Agent Login
- Last Called Agent
Threshold expressions can contain variables or reference queue-specific values, such as sdata(target, statistic) or callage(). Strings must be enclosed in single quotes. For example:

For more information about using ECMAScript in Designer, see ECMAScript Expressions.
Extensions
Use this section to add an extension as a key-value pair to this block.
Use JSON format
This option allows certain special characters to be used in extensions, such as full stops (.), single quotes ('), double-quotes ("), and At signs (@).
Add Extension Data
Click Add Extension Data to add an extension as a key-value pair to this block. The value type can be a string or integer.
If you want to use a variable for the Key or Value, select the Variable checkbox and then select a variable from the drop-down menu. If the Value is an integer, select the Integer checkbox.
You do not need to enclose extension values in quotes. However, if the quote is part of the value, you must escape the quote character by using a preceding backslash. For example:
- Incorrect: Joe's Pizza
- Correct: Joe\'s Pizza
This example shows a few different ways that key-value pairs can be added as extensions:

Results tab
Select a variable to store the result of this Route Agent block execution.
