Workbench Upgrade - Linux - Primary Node
The Workbench installation files will be contained in the Genesys My Portal obtained downloaded compressed file.
Important
- Workbench requires the installation of a Primary Node at each and every Workbench Data-Center.
- The Workbench Primary Node must be installed/upgraded prior to installing/upgrading Workbench Additional Nodes.
- Workbench ships with its own pre-bundled Java distribution, OpenJDK11; all Workbench components will be configured through the installation to use this Java distribution and should not affect any other components that may be installed on the host.
- The Workbench installation uses the Ant Installer component, if during the Workbench installation a Network Account install is selected, the Ant Installer prints the username and password details to the "ant.install.log" file. Genesys therefore recommends, post installation, at a minimum the "ant.install.log" file be manually edited and the password be masked/deleted.
- Use an sudo level account when running the Workbench install.sh file.
- If the Workbench installation is cancelled mid completion, please ensure the Workbench install directory is cleaned/purged prior to attempting another install
- For Workbench 9.0 to 9.2 Kibana uses port 8181 and Workbench IO uses port 8182
- For Workbench 9.3 Kibana uses port 8182 (localhost access only) and Workbench IO uses port 8181
Warning
- Before commencing the Workbench upgrade - please ensure the Workbench Host(s) have 'free' at least 3 times the size of the "<WORKBENCH_INSTALL>/ElasticSearch/data" directory - else the Workbench upgrade process will fail and Workbench data integrity and operation will likely be compromised.
Please use the following steps to upgrade Workbench 9 on Linux:
- Run tar zxf Workbench_9.x.xxx.xx_LINUX_Pkg.tar.gz to extract the downloaded Workbench_9.x.xxx.xx_LINUX_Pkg.tar.gz compressed file.
- cd into the ip\linux folder.
- Run tar zxf Workbench_9.x.xxx.xx_Installer_Linux.tar.gz - to extract the Workbench_9.x.xxx.xx_linux.tar.gz compressed tar file.
- Run ./install.sh (Do NOT prefix ./install.sh with sudo)
- Genesys Care Workbench 9.x
- Press Enter to start the Workbench upgrade.
- Genesys Workbench License Agreement
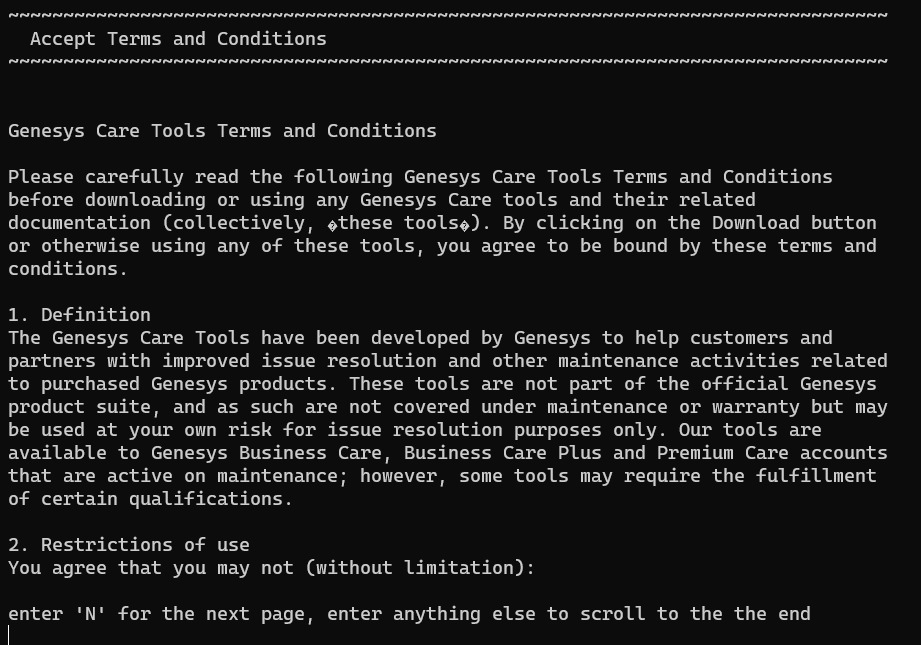
- Press Enter to view the Genesys Workbench license agreement
- Review license agreement
- Enter N for the next page, or press Enter to scroll to the end of the Terms and Conditions
- Genesys Workbench Terms and Conditions
- Press Enter to continue, if you agree to the Genesys Workbench Terms and Conditions
- Workbench Installation Mode.
- Enter 2 for Upgrade - given there is already a previous release of Workbench running on this host/node.
- Workbench Base Properties - Installation Path.
- Press Enter to accept the default /opt/Genesys/Workbench_9.x.xxx.xx installation path
- Or provide a new installation path - i.e. /home/genesys/Workbench9.x.xxx.xx and press Enter
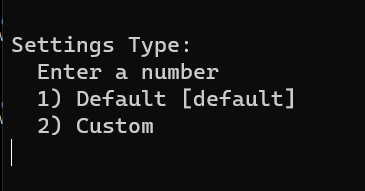
- Workbench Base Properties - Default or Custom
- For Settings Type, either Default or Custom
- Press Enter to accept the Default option - which enables provision of Default paths, ports etc
- Type 2 and press Enter to choose the Custom option which enables provision of specific custom paths, ports etc
- Workbench Primary ZooKeeper IP Address:Port.
- Enter the Workbench Primary Zookeeper IP Address and Port
- Press Enter
- Workbench Data-Center.
- Type the Data-Center name for this Workbench instance/Cluster (i.e. "APAC", "EMEA", "Chicago" - do NOT use "default")
- Press Enter
Important
- Workbench Data-Centers is a logical concept to categorize and optimize the respective Workbench Hosts, Applications and ingested data for event distribution, visualization context and filtering purposes
- Each Workbench host, and the respective applications within that host, are assigned to a Data-Center, this is mandatory
- Note: The Data-Center name is case-sensitive, limited to a maximum of 10, Alphanumeric and underscore characters only.
- Installation Progress
- The Workbench installer will now upgrade the old Workbench version to the new Workbench version
- Installation Complete
- The message message indicates the Workbench upgrade process is complete
Important
- Once the new Workbench version is installed, new Workbench 9.x.xxx.xx Services will be registered in the Service registry
- The previous Workbench version Services will be automatically Stopped and set to Manual.
- The Workbench port configuration of upgraded components will be same as the Workbench old components.
- The Workbench data and log folders will be automatically created in the new Workbench installed location.
- At the end of the upgrade process, Workbench 9.y.yyy.yy Cluster, data and configuration will be restored as per the prior Workbench 9.x.xxx.xx installation.
- Next Steps
Important
- The Workbench Primary Node has been upgraded
- If there are Additional Workbench Nodes at this Data-center, please continue to upgrade those using the Workbench Upgrade – Linux - Additional Node section as a reference
Warning
- The respective Workbench Agent Remote (WAR) components, installed on hosts such as SIP, URS, GVP etc, will be upgraded based on the WAR Upgrade Time (default 02:00)
- For WB 9.3 the WAR [General] Log File Location, Segment and Expire fields will be blank post an upgrade until the WAR Upgrade Time (default 02:00) is triggered and the WAR upgrade is completed
This page was last edited on June 22, 2022, at 08:39.
Comments or questions about this documentation? Contact us for support!


