
Contents
Data-Center Synchronization - Configuration
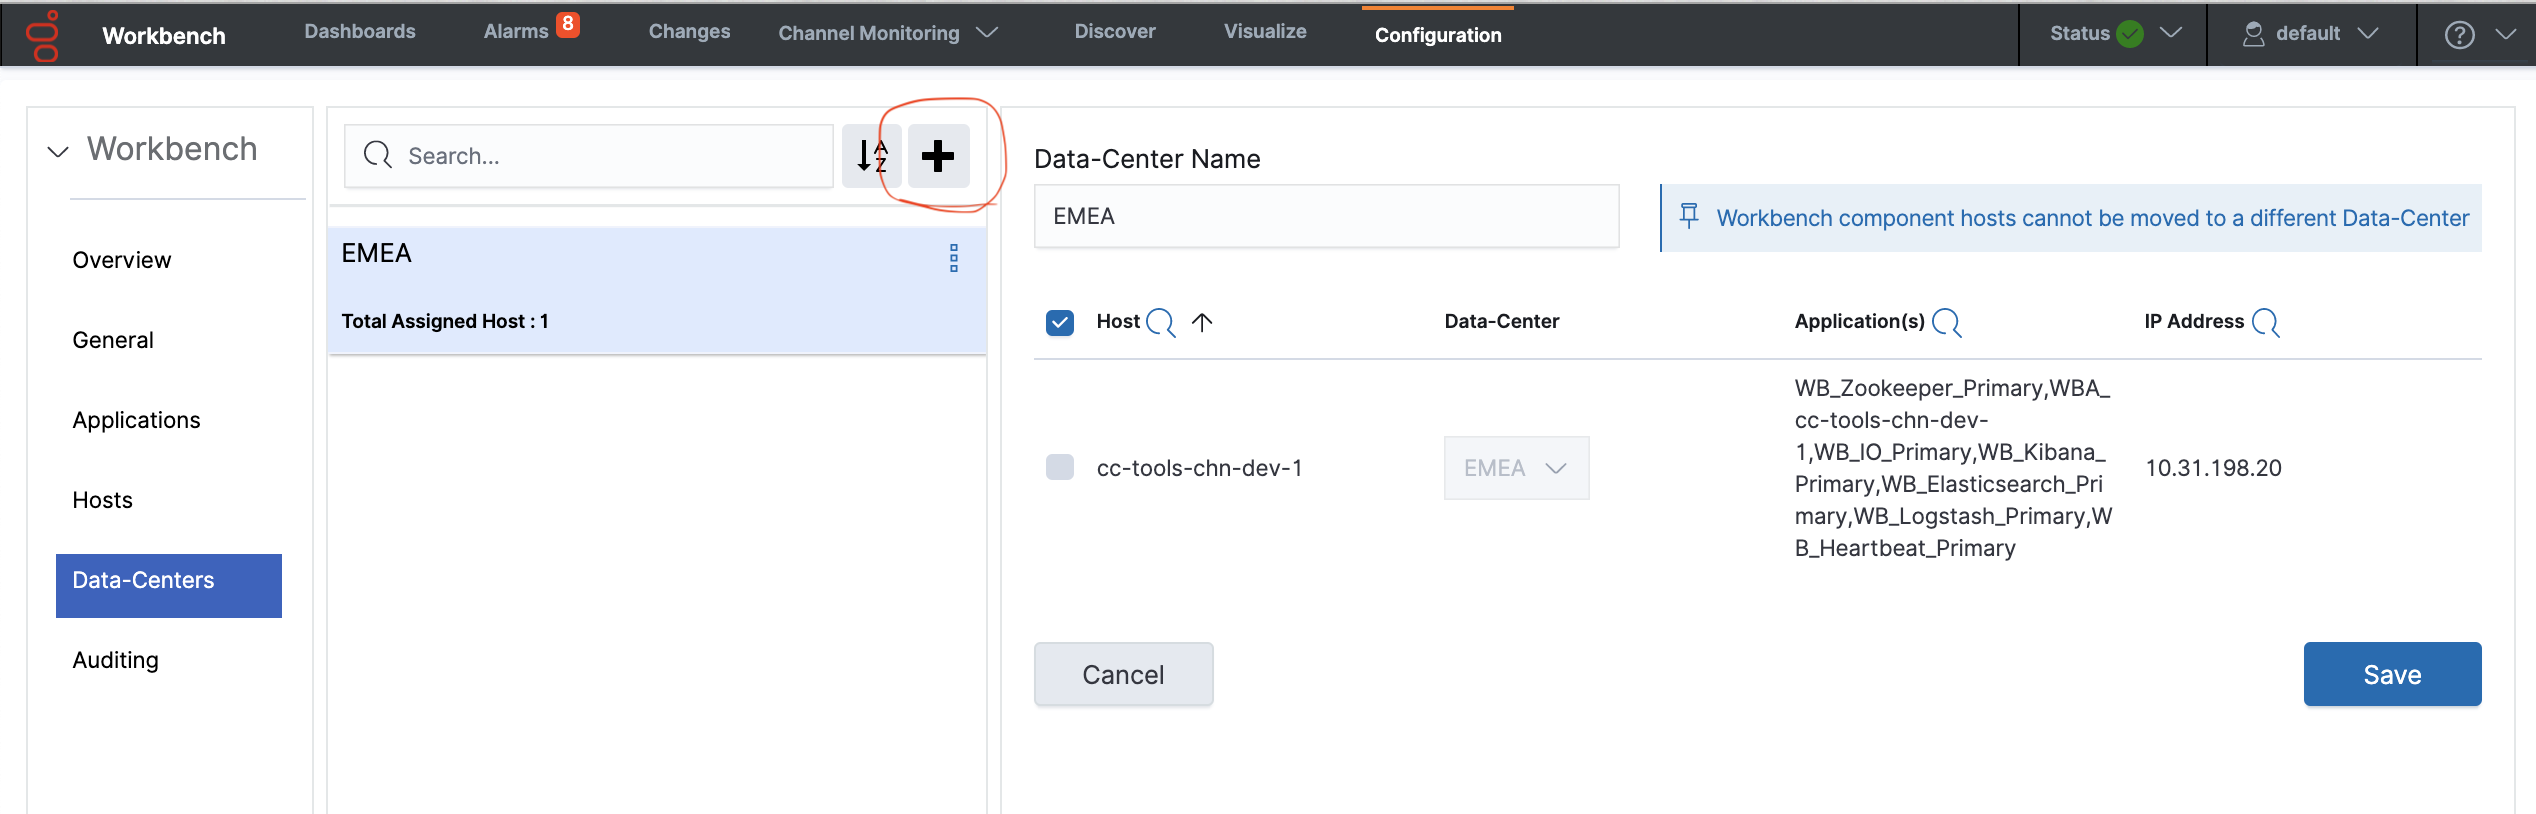
This section details the steps necessary to perform a Workbench Data-Center Synchronization:
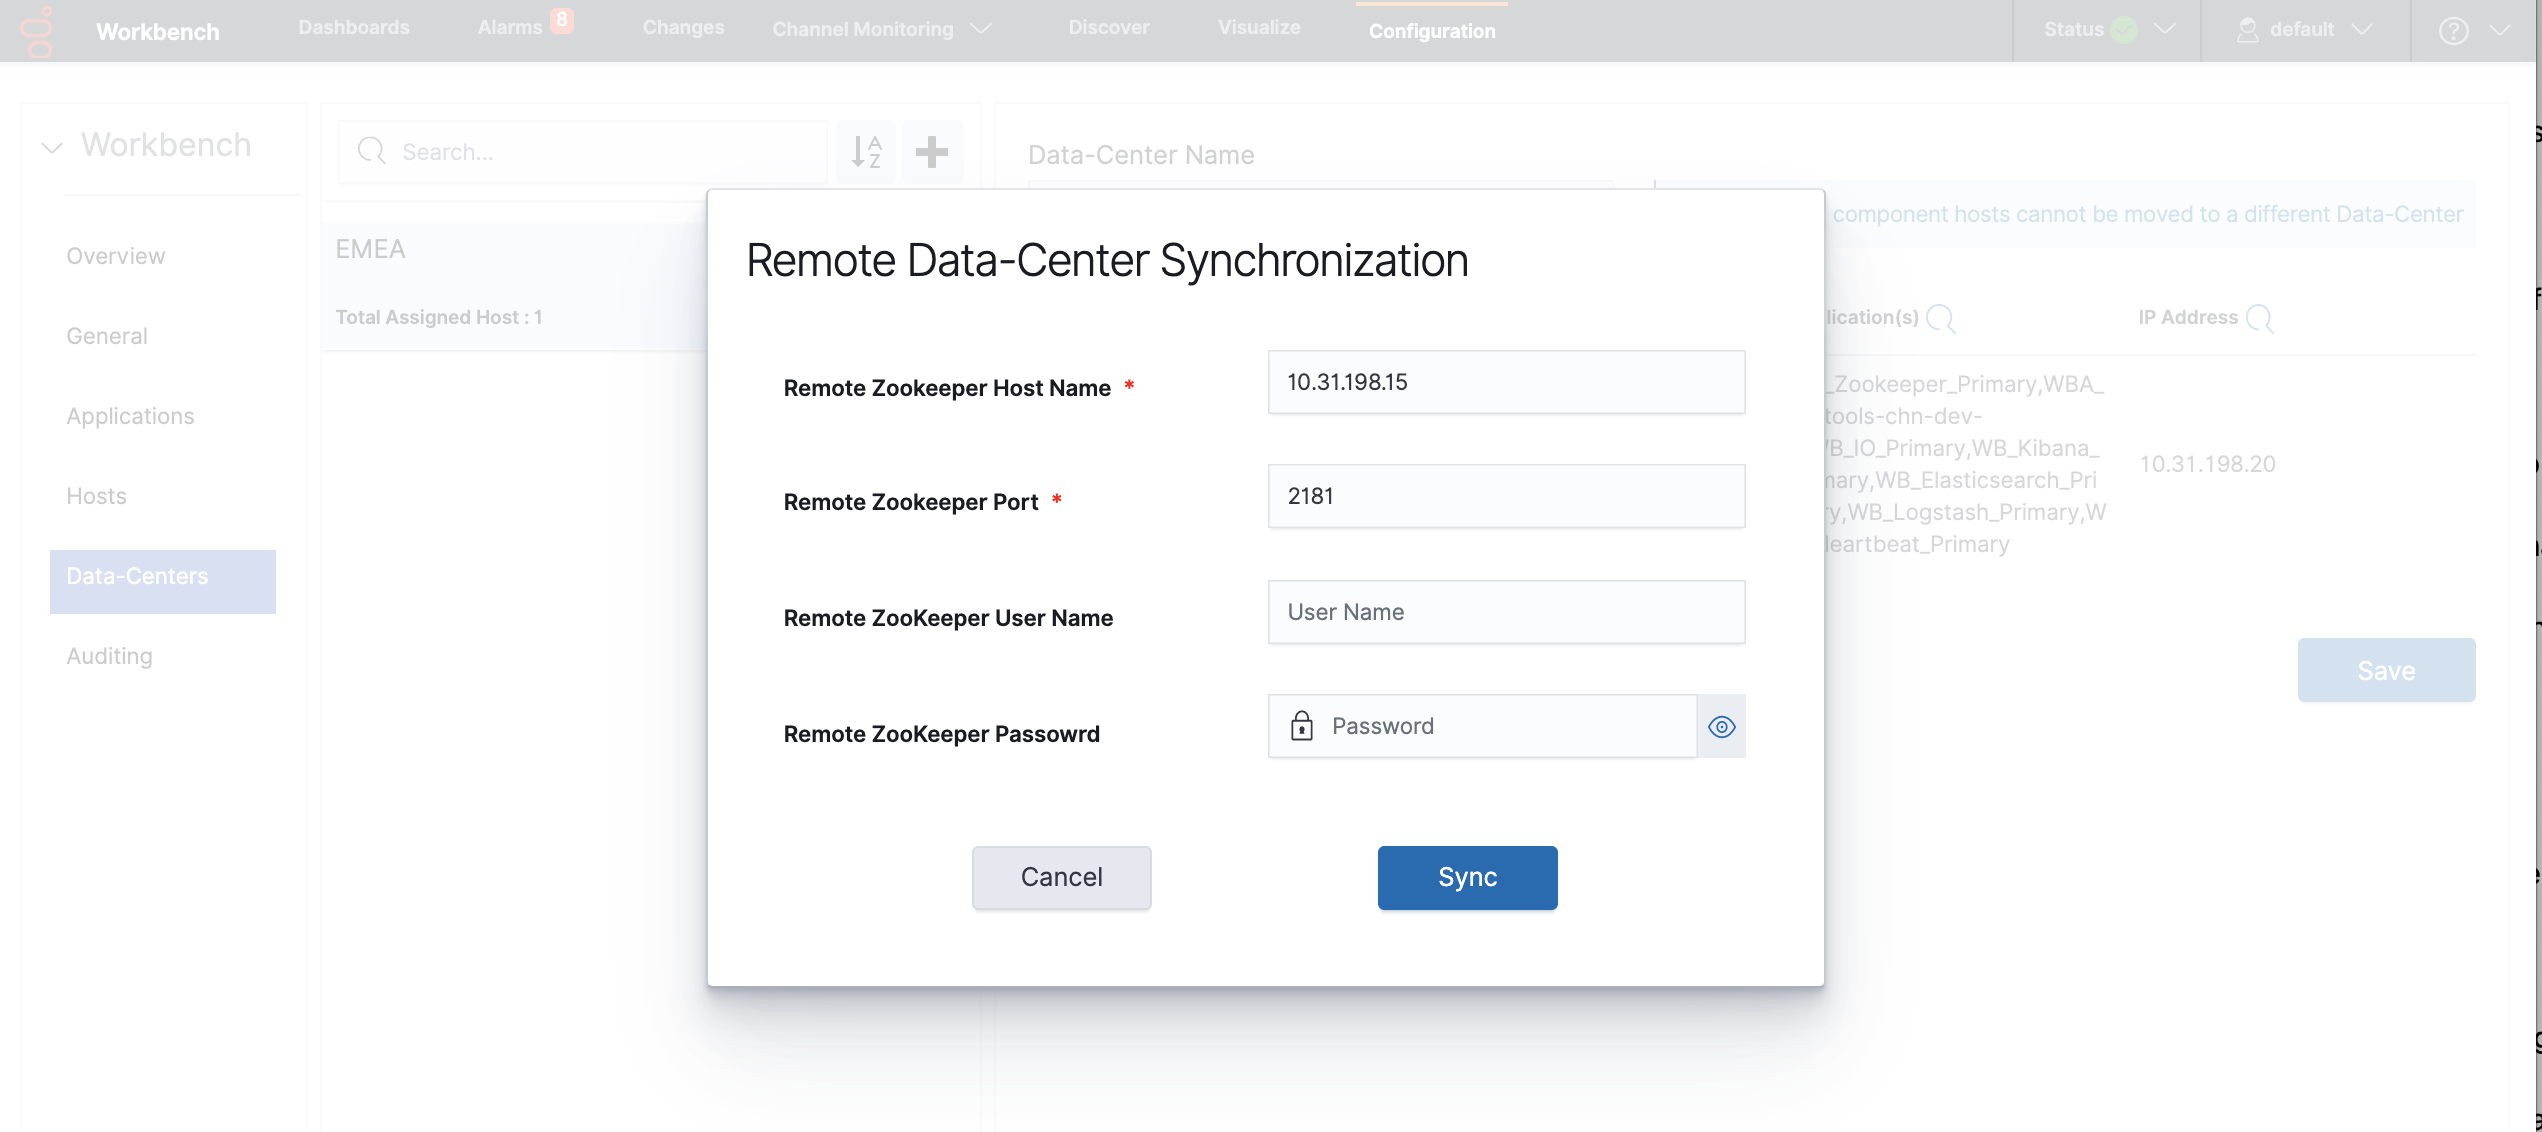
- Go to the configuration page -> Data-Center section and click the below button to display the remote Data-Center synchronization form
- In the displayed form, please fill the mandatory fields, remote zookeeper hostname and port. If remote zookeeper has enabled authentication, enter the username and password as well.
- After filling the form click the sync button and wait, If your remote Zookeeper address is valid and able to connect, it will start progress synchronization and display the progress status on the screen
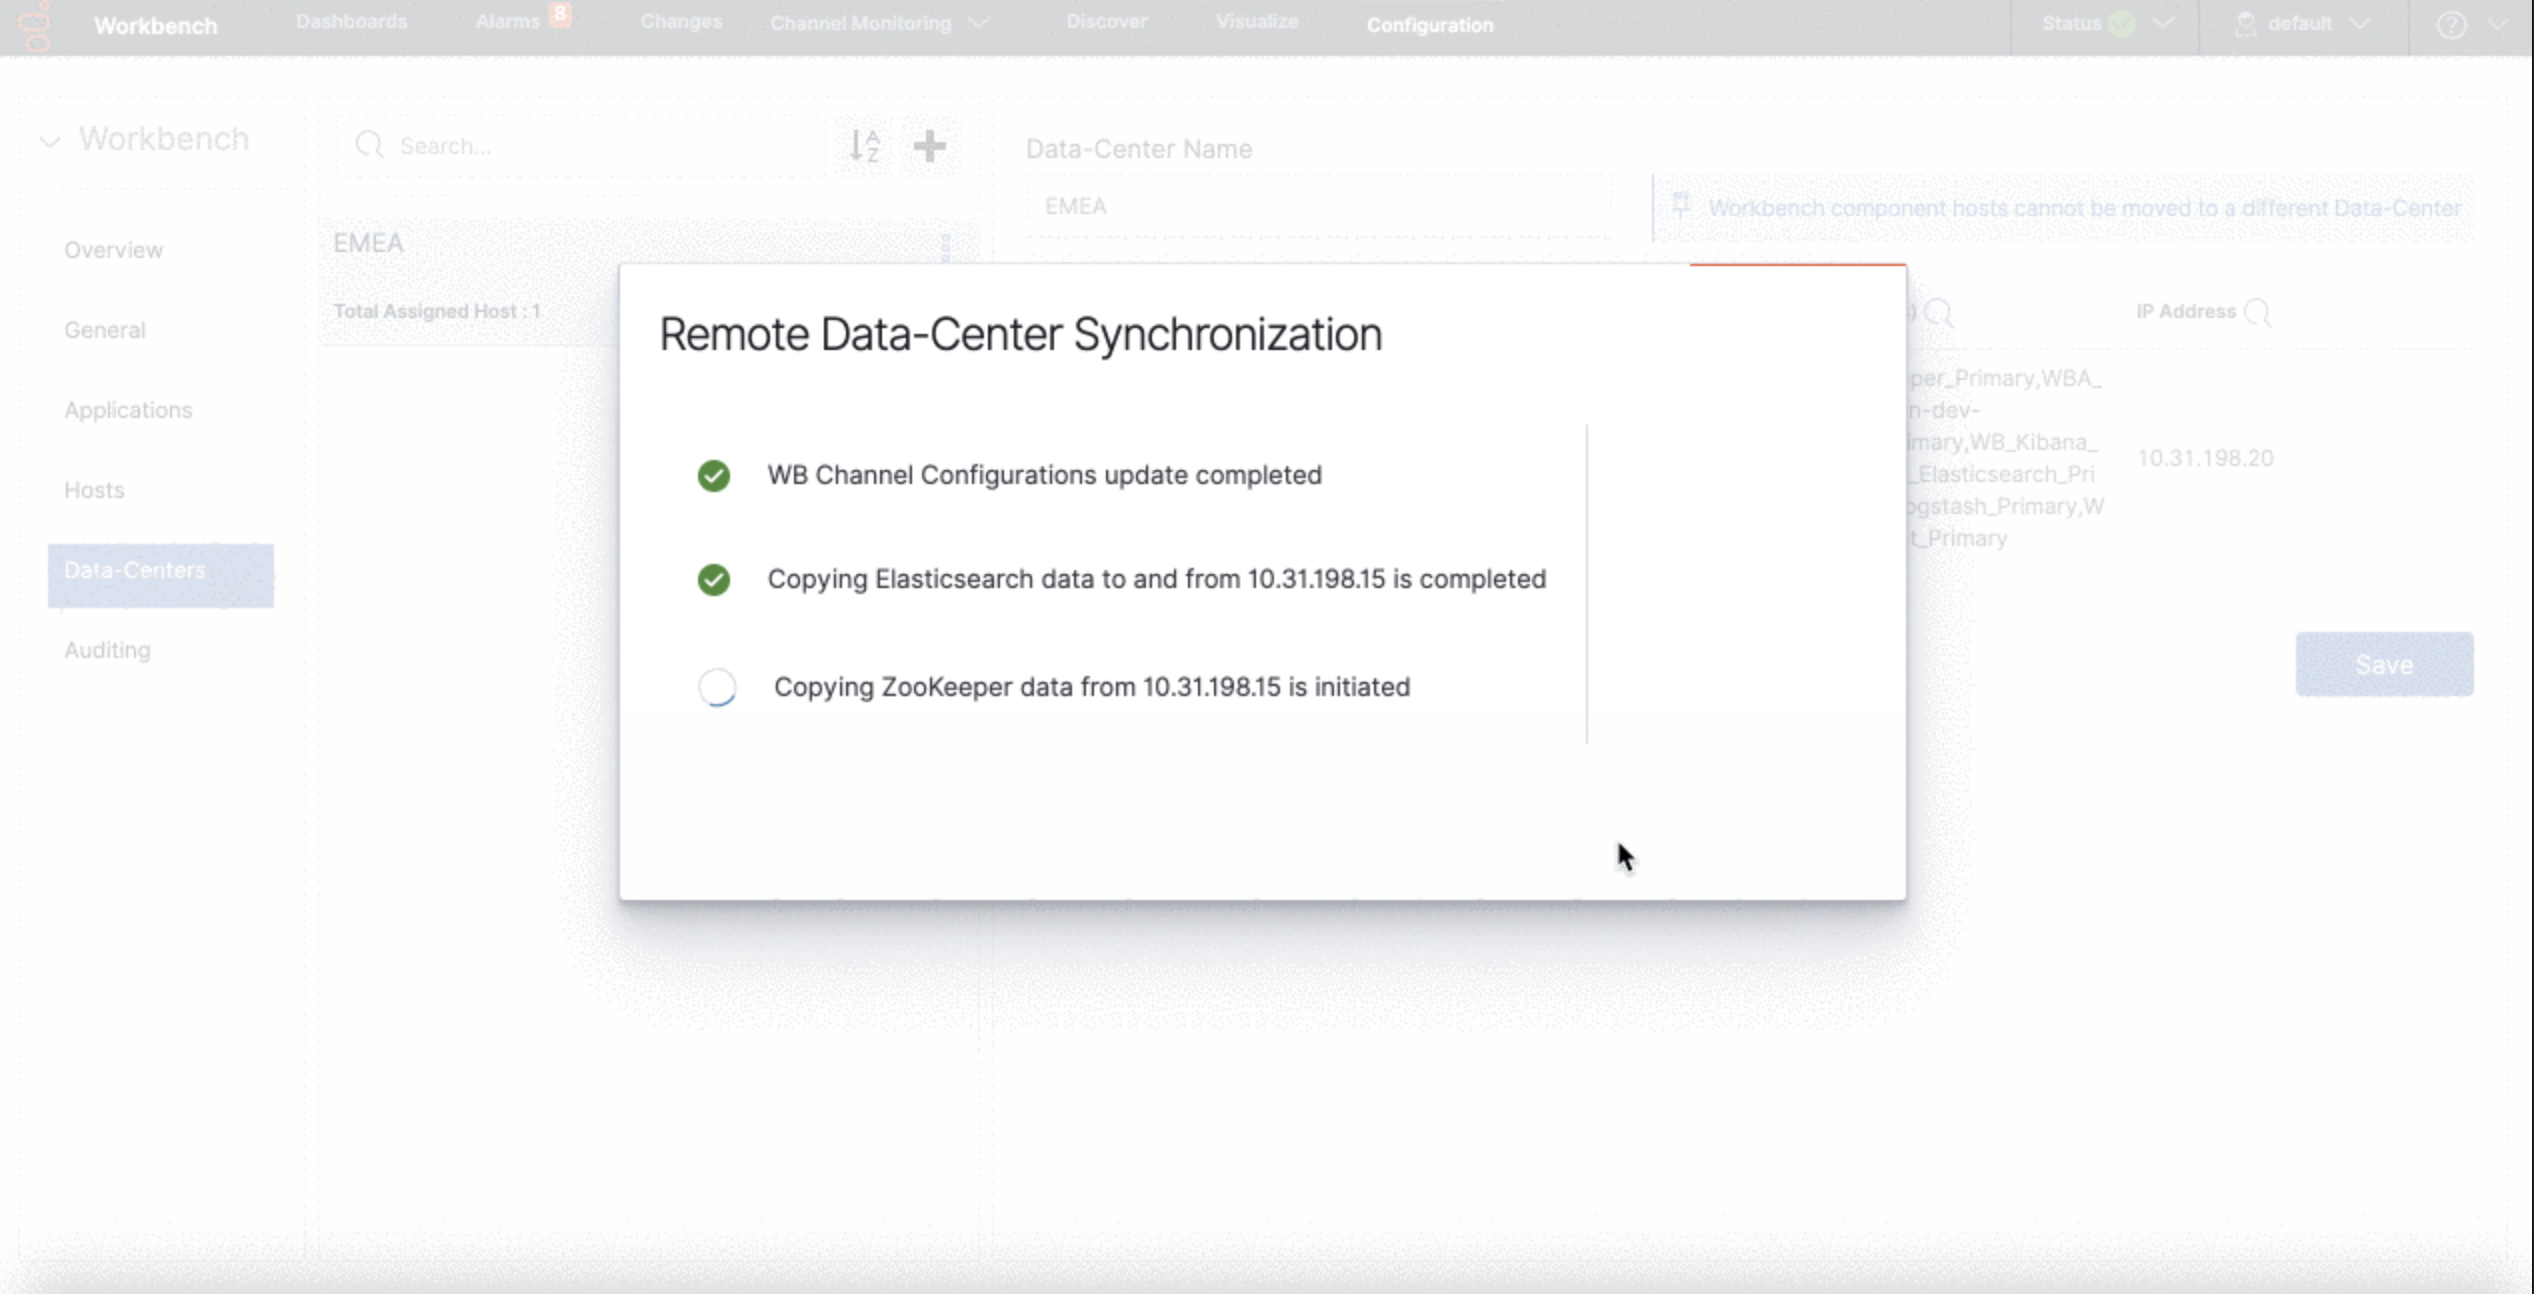 WarningPlease wait for the Workbench Data-Center synchronization to complete; do not perform any Workbench Configuration Changes during this time
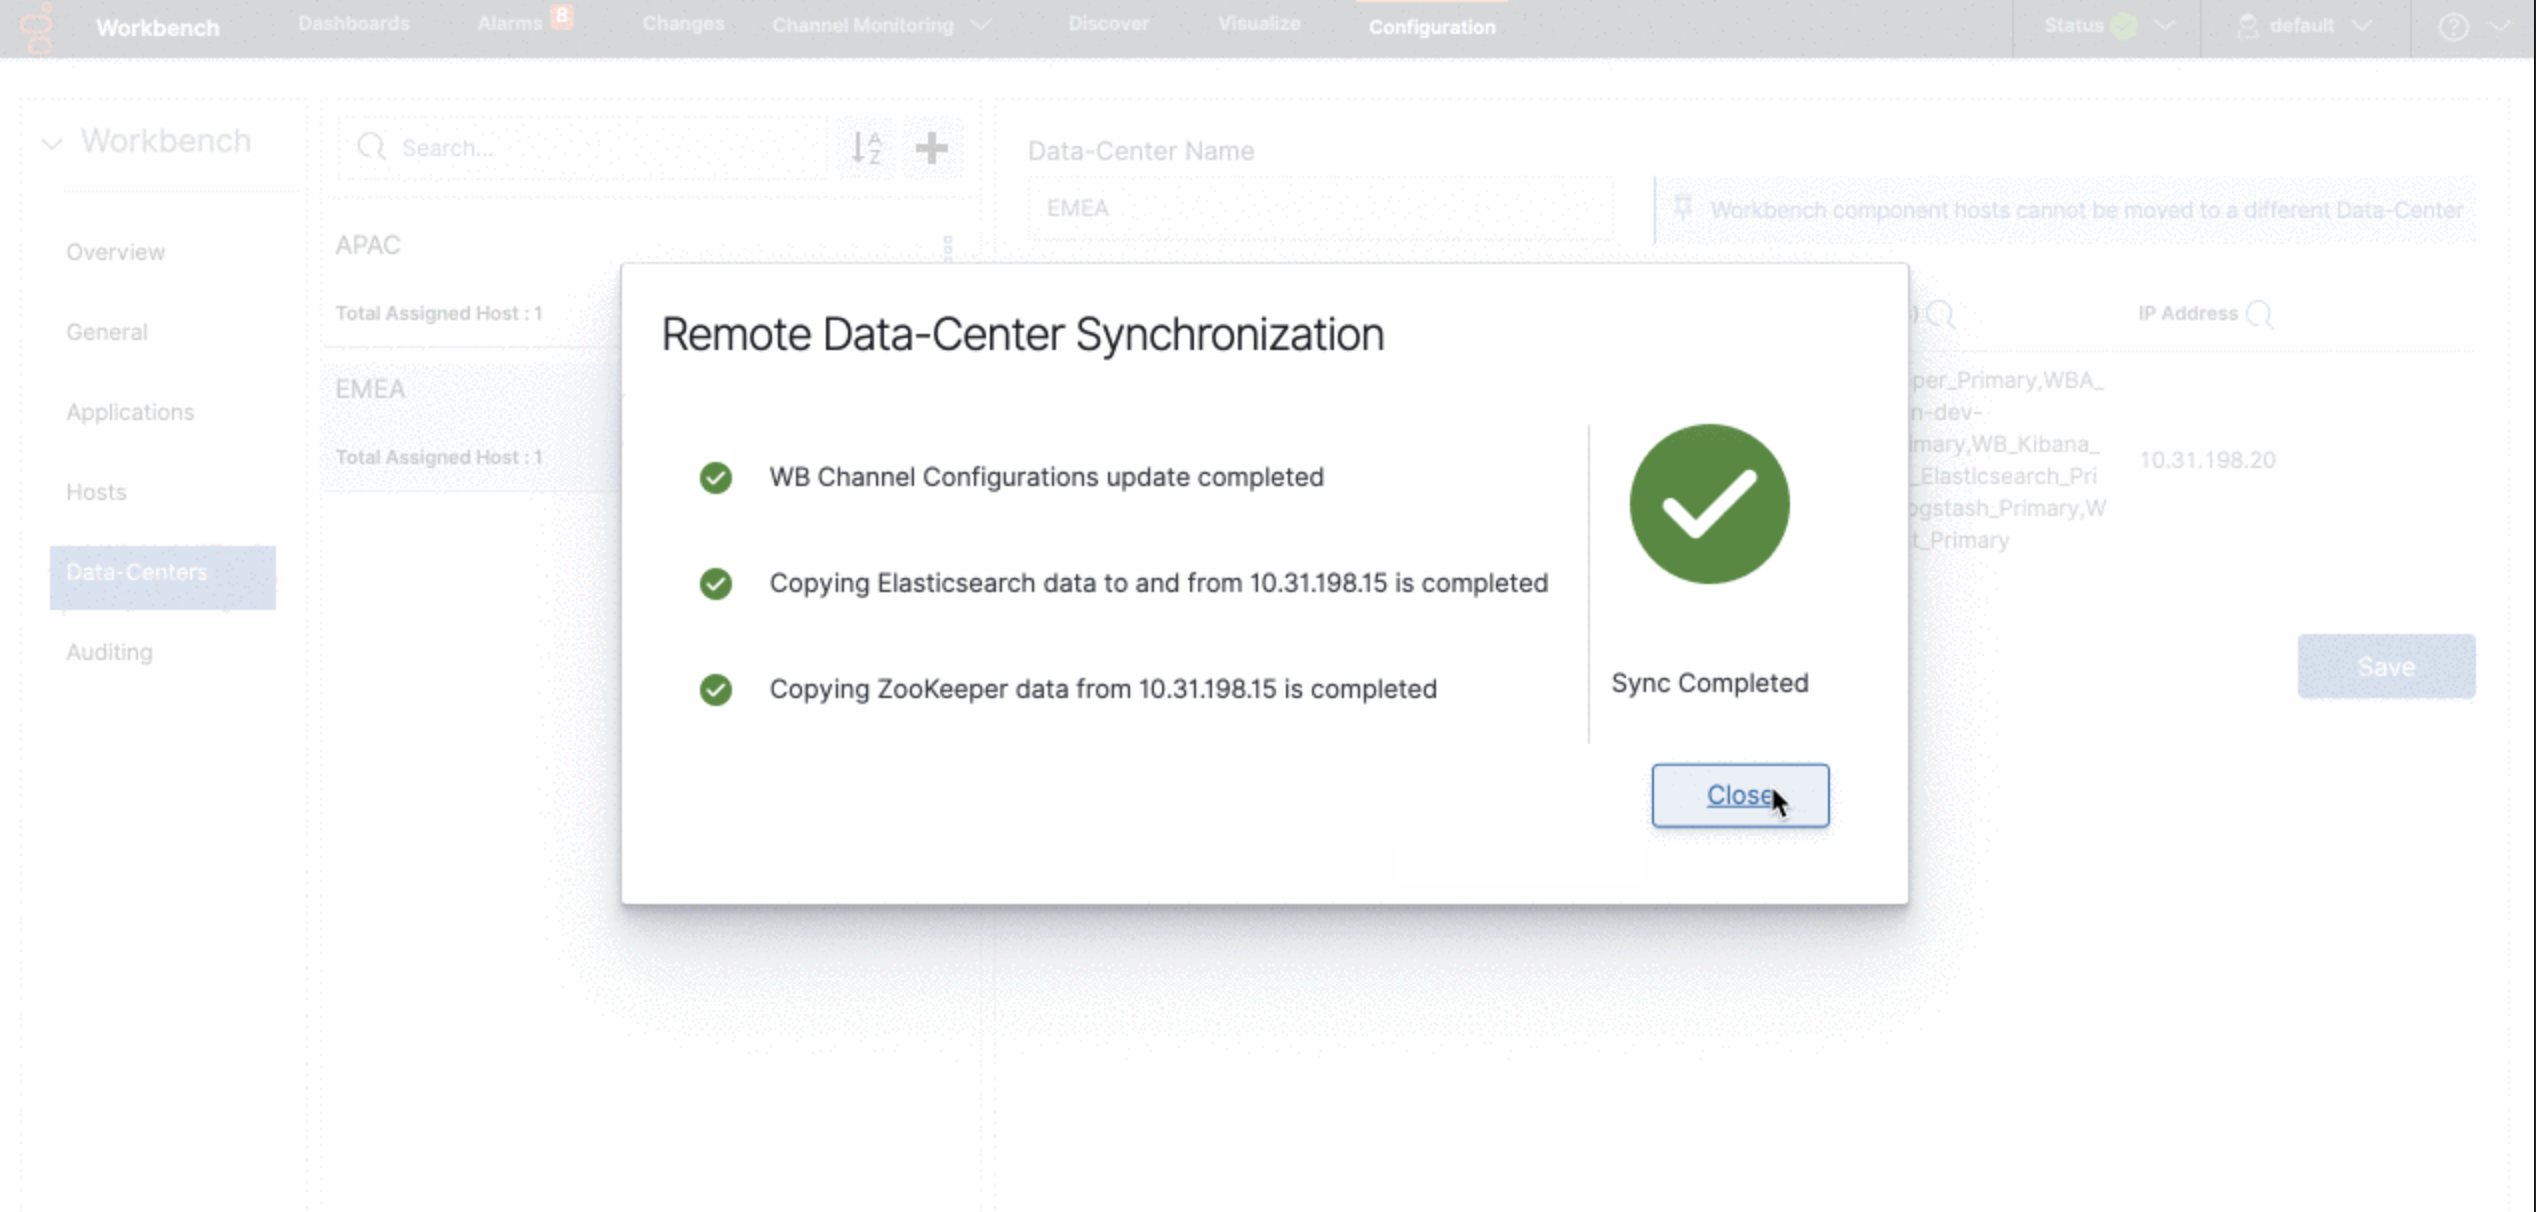
 - Once synchronization completed you can close the modal window and able to see the synchronized remote Data-Center information on the page.
- Check the new/additional remote Workbench Data-Center Host(s) are present in Workbench\Configuration\Hosts
- In the example below, CC-APP-DEC-DEMO-3 is the remote EMEA Data-Center host
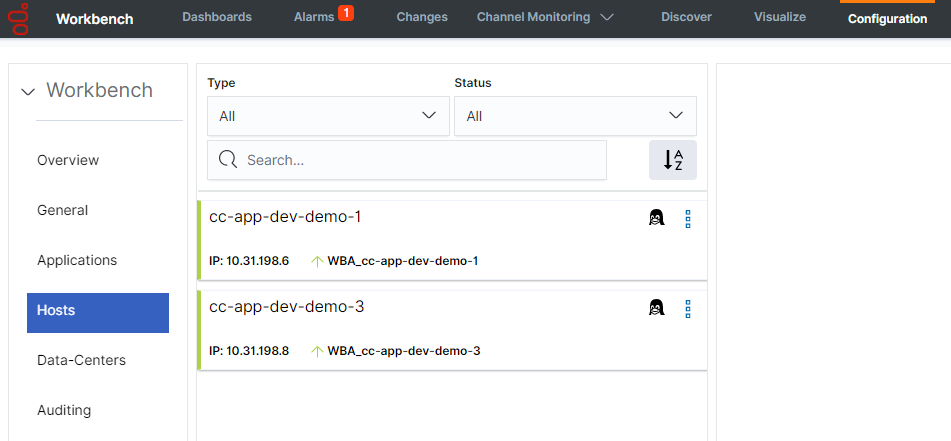
- In the example below, CC-APP-DEC-DEMO-3 is the remote EMEA Data-Center host
- Check the number of Data-Centers and their names are present in Workbench\Configuration\Overview
- In the example below, we have 2 x Data-Centers - APAC (the initiator) and the remote EMEA Data-Center
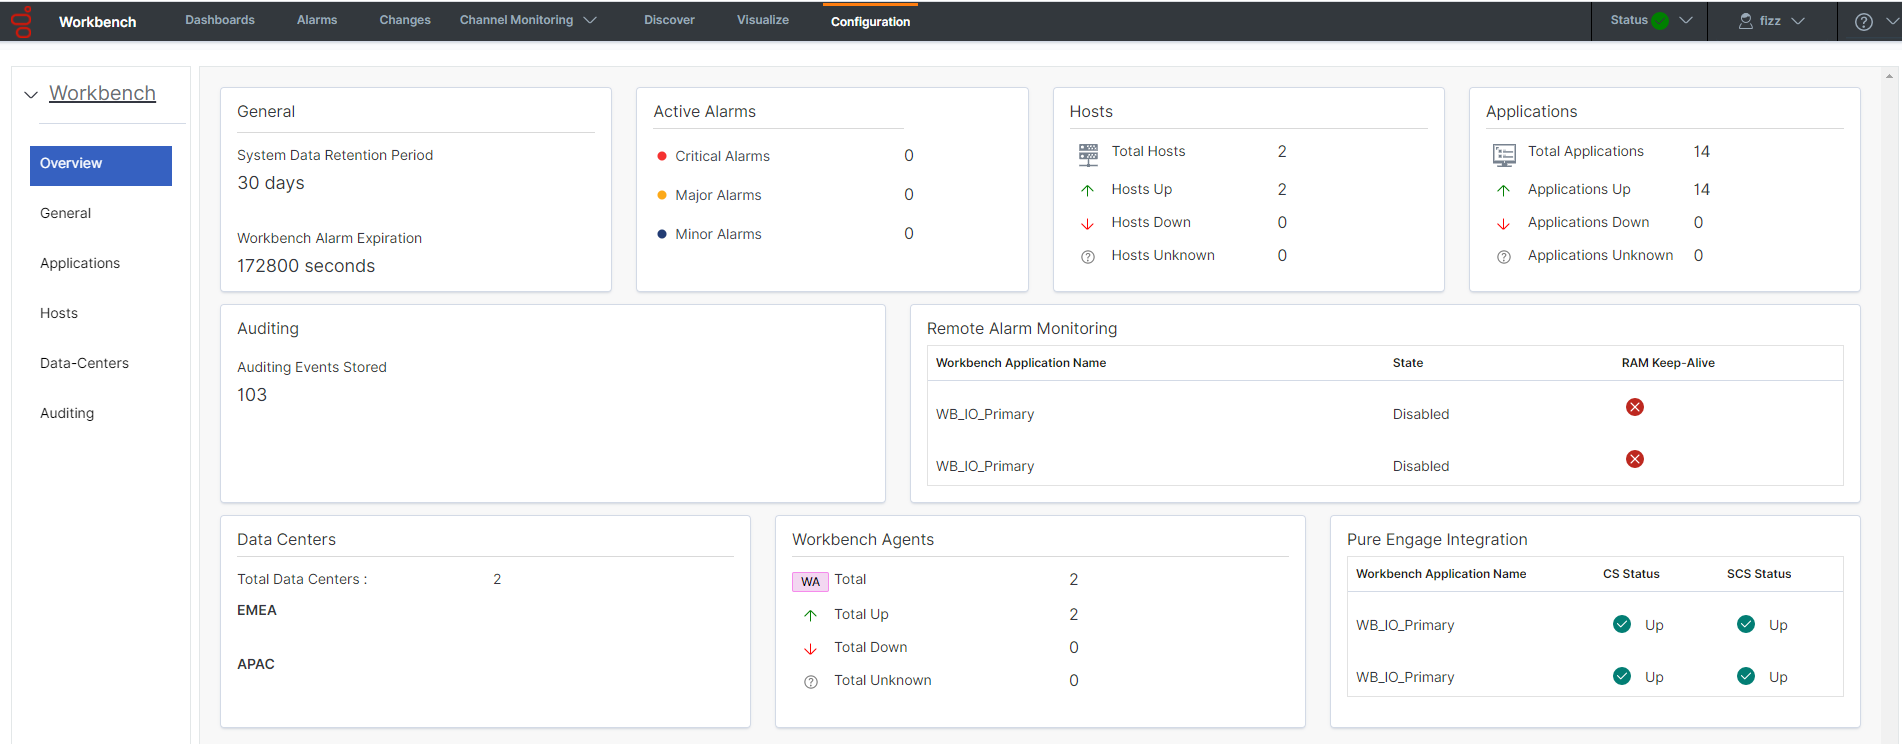
- In the example below, we have 2 x Data-Centers - APAC (the initiator) and the remote EMEA Data-Center
- Repeat the above steps for any other Workbench Data-Center deployments that you wish to form in a Workbench distrbuted architecture


Workbench Data-Center - Post Formation
Warning
- The folders ‘<WB_HOME_FOLDER>\Karaf\resources\windows\wbagent_9.x.xxx.xx_installscripts’ directory (Windows) and ‘<WB_HOME_FOLDER>/Karaf/resources/linux/wbagent_9.x.xxx.xx_installscripts’ directory (Linux) WILL NEED to be *DELETED* first as new folders will be created with the updated details
- When forming a Workbench Cluster, for example adding a Workbench Node 2 or Node 3, or Node N, on completion of forming the Workbench Cluster, the Workbench IO (i.e. WB_IO_Primary) Application now needs to be restarted to regenerate the correct Workbench Agent Remote JSON configuration file”
Workbench Data-Center - Renaming
Warning
- The folders ‘<WB_HOME_FOLDER>\Karaf\resources\windows\wbagent_9.x.xxx.xx_installscripts’ directory (Windows) and ‘<WB_HOME_FOLDER>/Karaf/resources/linux/wbagent_9.x.xxx.xx_installscripts’ directory (Linux) WILL NEED to be deleted first as new folders will be created with the updated details
- If/when a Workbench Data-Center is renamed, the Workbench IO (i.e. WB_IO_Primary) Application needs to be restarted to regenerate the correct Workbench Agent Remote JSON configuration file”
Workbench Data-Center - Renaming - Workbench Agent Remote
Warning
- Post the renaming of a Workbench Data-Center, if an existing host requires a Workbench Agent Remote re-installation, the newly generated binaries in the folders ‘<WB_HOME_FOLDER>\Karaf\resources\windows\wbagent_9.x.xxx.xx_installscripts’ directory (Windows) and ‘<WB_HOME_FOLDER>/Karaf/resources/linux/wbagent_9.x.xxx.xx_installscripts’ directory (Linux), will first need to be copied to the host before running the “installer.exe” (Windows) or “installer” (Linux) executable”
This page was last edited on May 13, 2022, at 09:36.
Comments or questions about this documentation? Contact us for support!