Contents
Notification Channels
Workbench Notification Channels enable integration from Workbench to other external systems.
Currently Workbench supports Notification Channels of type Webhook.
The Webhook Notification Channel type is a standard in the monitoring/observability/tracing vendor space, it is a simple and efficient method to send information (currently that information is limited to Active Alarms within Workbench; either Engage [i.e. Host Unavailable] Alarms received from Engage SCS and/or Workbench [i.e. Channel Monitoring - Call Flow - No Answer] generated) from Workbench, to a customer developed, or external, HTTP[S] endpoint.
Once the Workbench Alert payload is received from the Workbench Notification Channel, by the customer developed HTTP[S] Webhook endpoint, the customer has the flexibility to transition further, for example, send the Workbench Alert payload/event to Slack, Teams or a Case Management System for empowered observability.
With the Workbench Webhook Notification Channel feature you can:
- Create a Notification Channel of type Webhook by configuring HTTP request properties that define the internal/external HTTP[S] service that is going to expose the HTTP endpoint.
- if required, secure HTTPS connections can be specified and different authentication mechanisms can be used (username/password, API Key, TLS)
- Keep a list of existing Notification Channels that allows to edit/delete any of the existing Notification Channels
- Test a Notification Channel to guarantee that the configuration created in Workbench correctly represents the external HTTP endpoint
- these tests can be performed during creation/edition as well as from the list of Notification Channels.
The diagram below shows the internal context of Workbench Notification Channels and how Workbench Alerts use those Notification Channels to send events to external systems and/or services:

The following sections describe the steps to "Create, Edit, "Delete" and "Test" Webhook Notification Channels.
Create/Edit a Notification Channel
To create a Notification Channel for the first time:
- Navigate to the Workbench ‘Configuration Console’ on the top menu
- Click ‘Notification Channels’ sub-menu
The following page will be displayed:
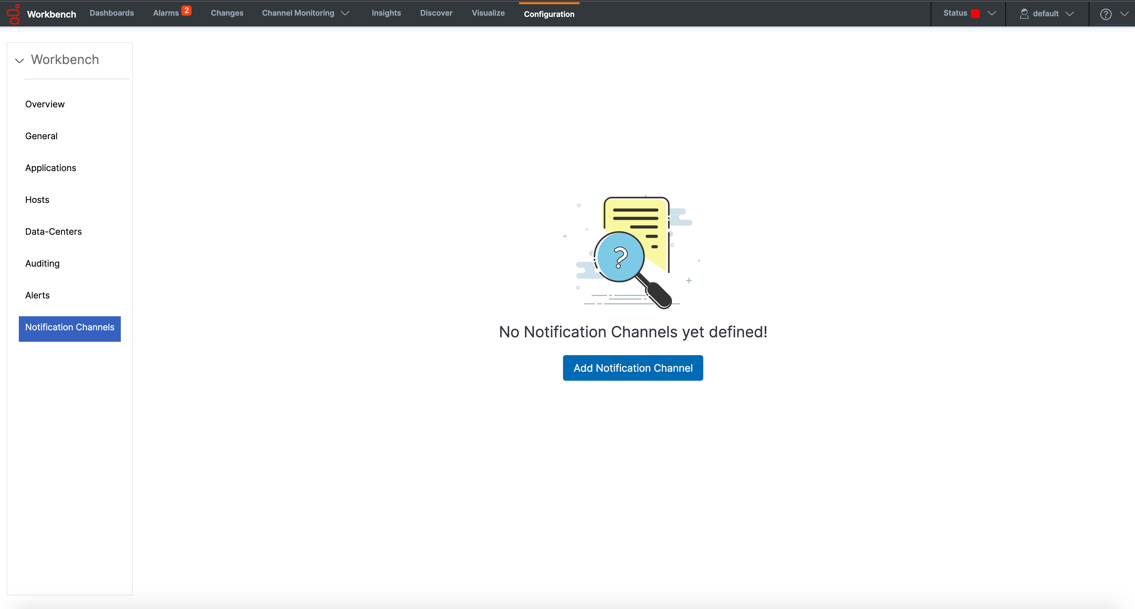
- Click the ‘Add Notification Channel’ button
- Review and complete the following Notification Channel configuration sections based on your requirements
1. Notification Channels
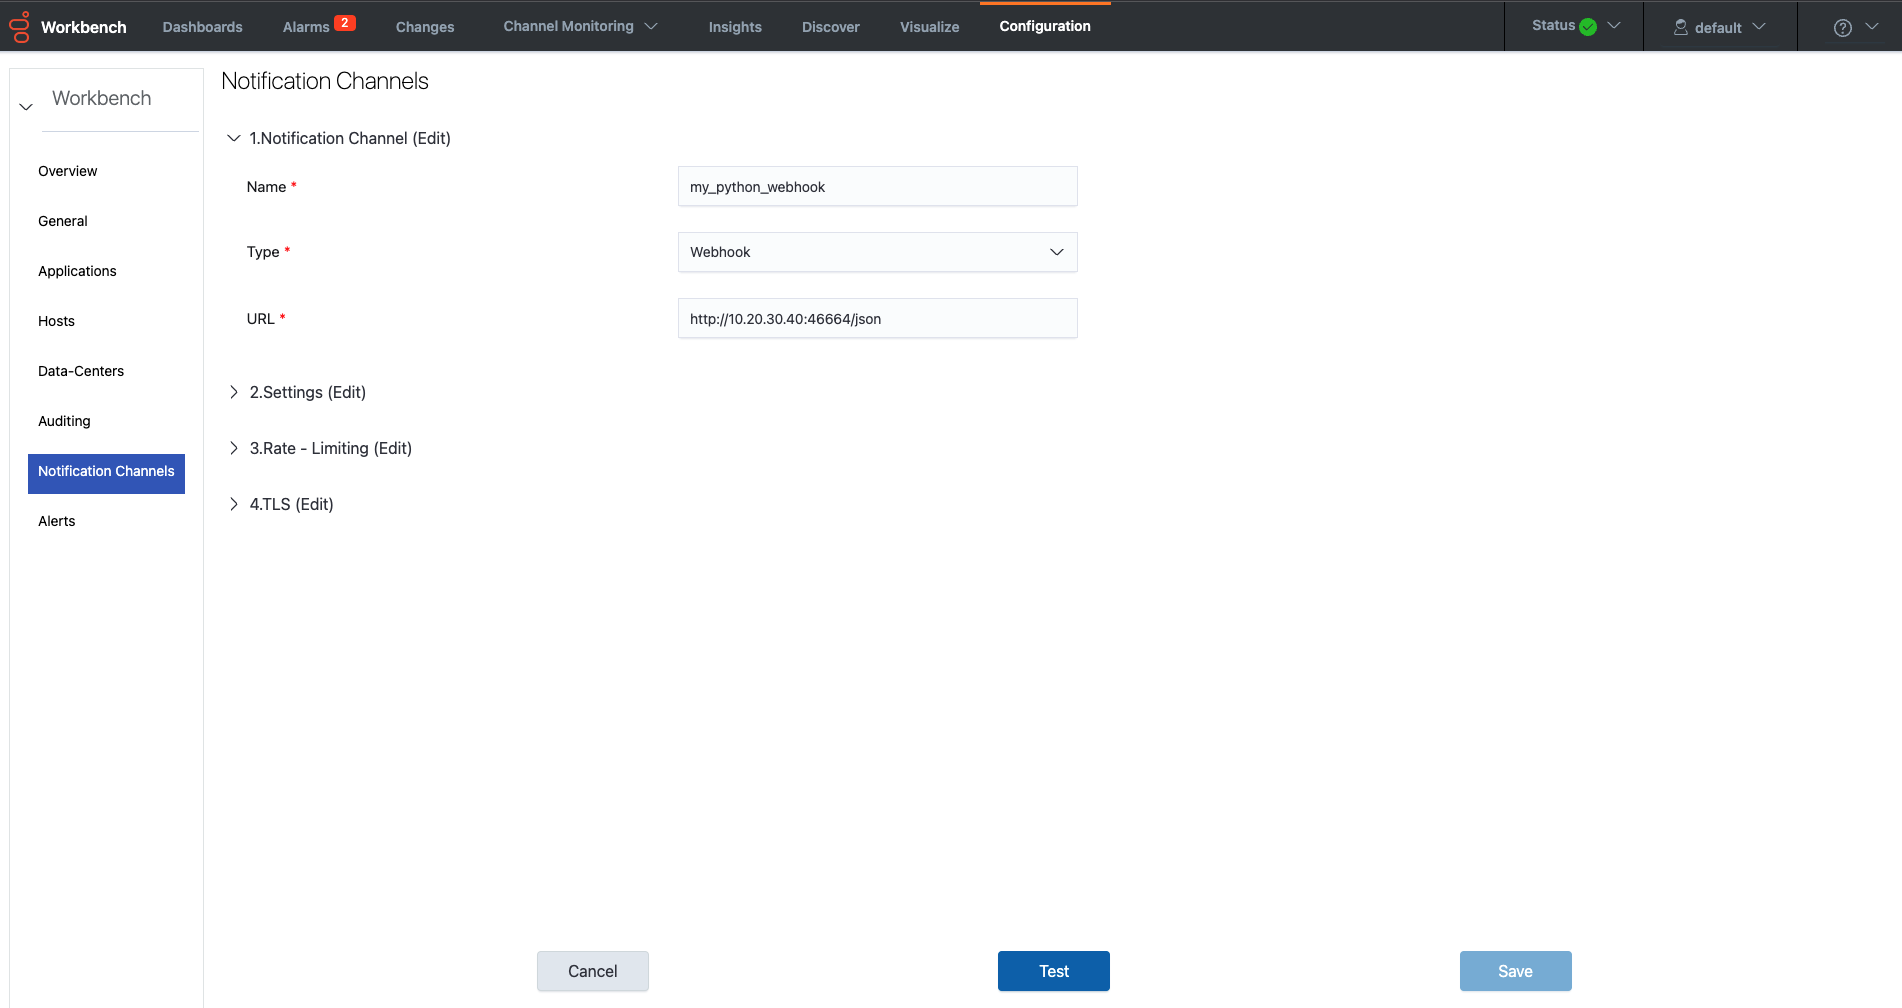
Details of the above fields being:
- Name (Required - i.e. my_python_webhook)
- A unique name used to identify the Notification Channel
- the name must be unique - max 25 characters - should only include alphanumeric characters, dot, hyphen, and/or underscore
- Type (Required - i.e. Webhook)
- Currently the only Workbench Notification Channel Type available is Webhook
- URL (Required - i.e. http://<HOSTNAME_OR_IP>:<PORT>/workbench_alerts)
- The URL of the customers developed HTTP[S] endpoint to which Workbench will send the Alarm payload to
2. Settings
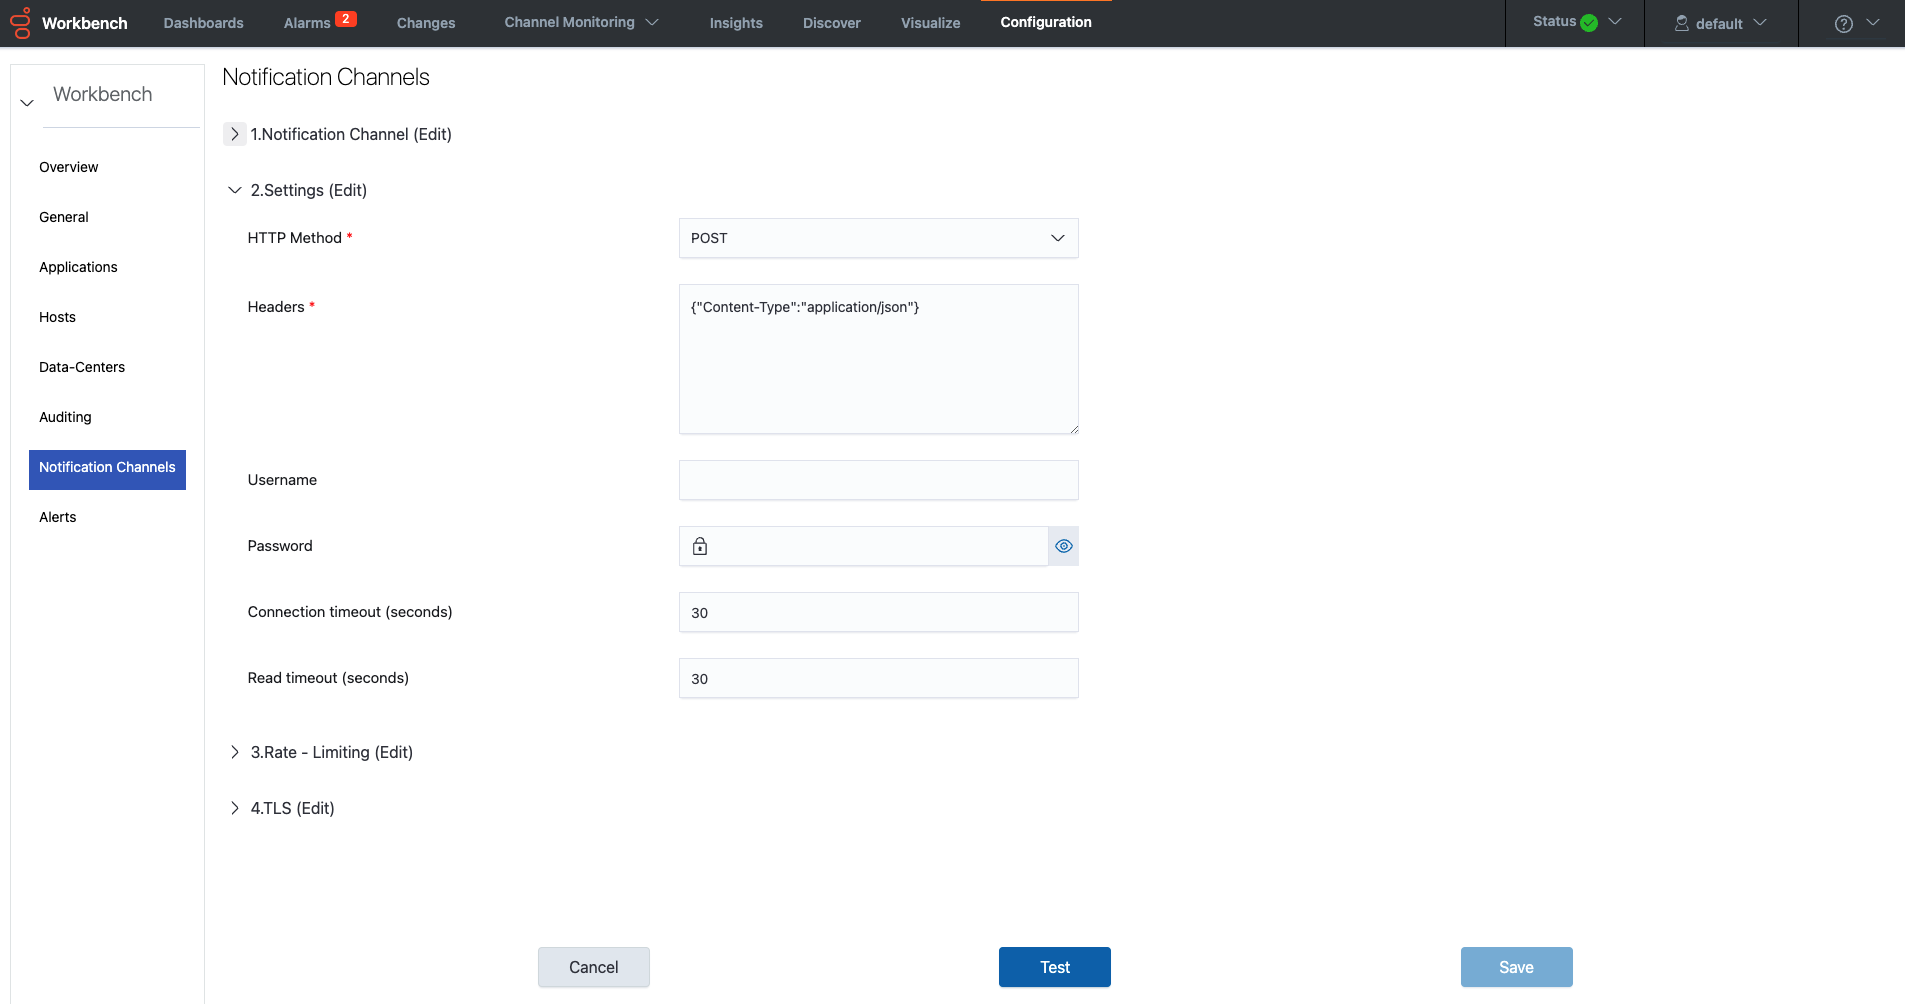
Details of the above fields being:
- HTTP Method (Required):
- The HTTP Method that should be used when invoking the HTTP Endpoint; possible values are POST (default) and PUT
- Headers (Required)
- Any additional HTTP headers required to be sent with the request
- Any additional HTTP headers required to be sent with the request
- Username (Optional)
- If the Endpoint has username/password authentication this field is required
- Password (Optional)
- If the Endpoint has username/password authentication this field is required
- If the Endpoint has username/password authentication this field is required
- Connection timeout (Optional)
- Expiration time for an attempt to create a HTTP[S] connection; specified in seconds
- Read timeout (Optional)
- Timeout for reading the HTTP[S] response after the connection was established; specified in seconds
- Timeout for reading the HTTP[S] response after the connection was established; specified in seconds
3. Rate - Limiting (optional)
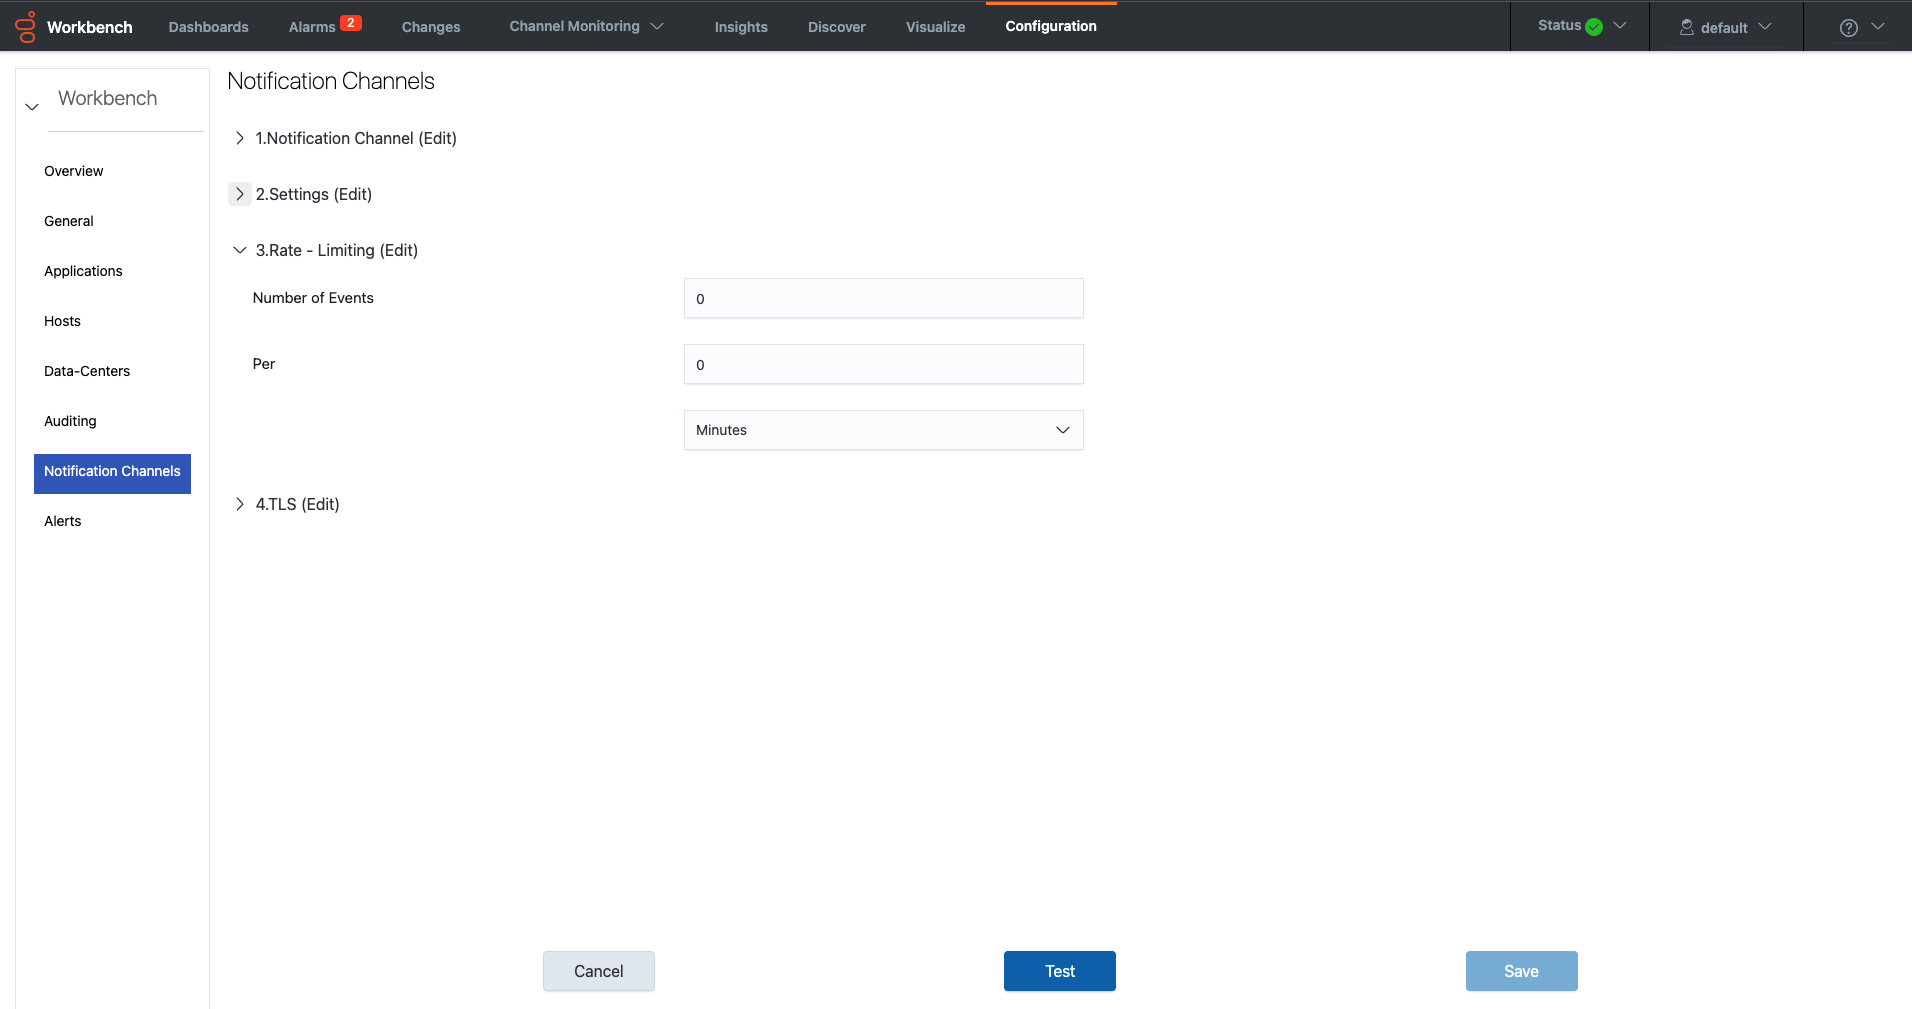
Details of the above fields being:
- Number of Events (Optional)
- The maximum number of Alarm events to be sent to the HTTP endpoint
- Used in conjunction with "Per" settings below
- The default value of "0" means there is no limit - ALL Alarms will be sent to the HTTP endpoint with no rate-limiting
- If/when set to a non-zero value then "Limit - Frequency" must also be set to a non-zero value - else setting will be ignored
- Per (Optional)
- The time interval between HTTP requests
- Used in conjunction with "Number of Events" above
- The default value of "0" means there is no limit - ALL Alarms will be sent to the HTTP endpoint with no rate-limiting
- If/when set to a non-zero value then "Number of Events" above must also be set to a non-zero value - else setting will be ignored
- Select either "Seconds" or "Minutes"
- To apply/enable rate-limiting, both "Number of Events" and "Per" settingsneed to be assigned non-zero values; else rate-limiting will be ignored/disabled
4. TLS (optional)
This is an optional section that allows TLS Authentication to be configure based on the customers developed or external HTTP Endpoint.
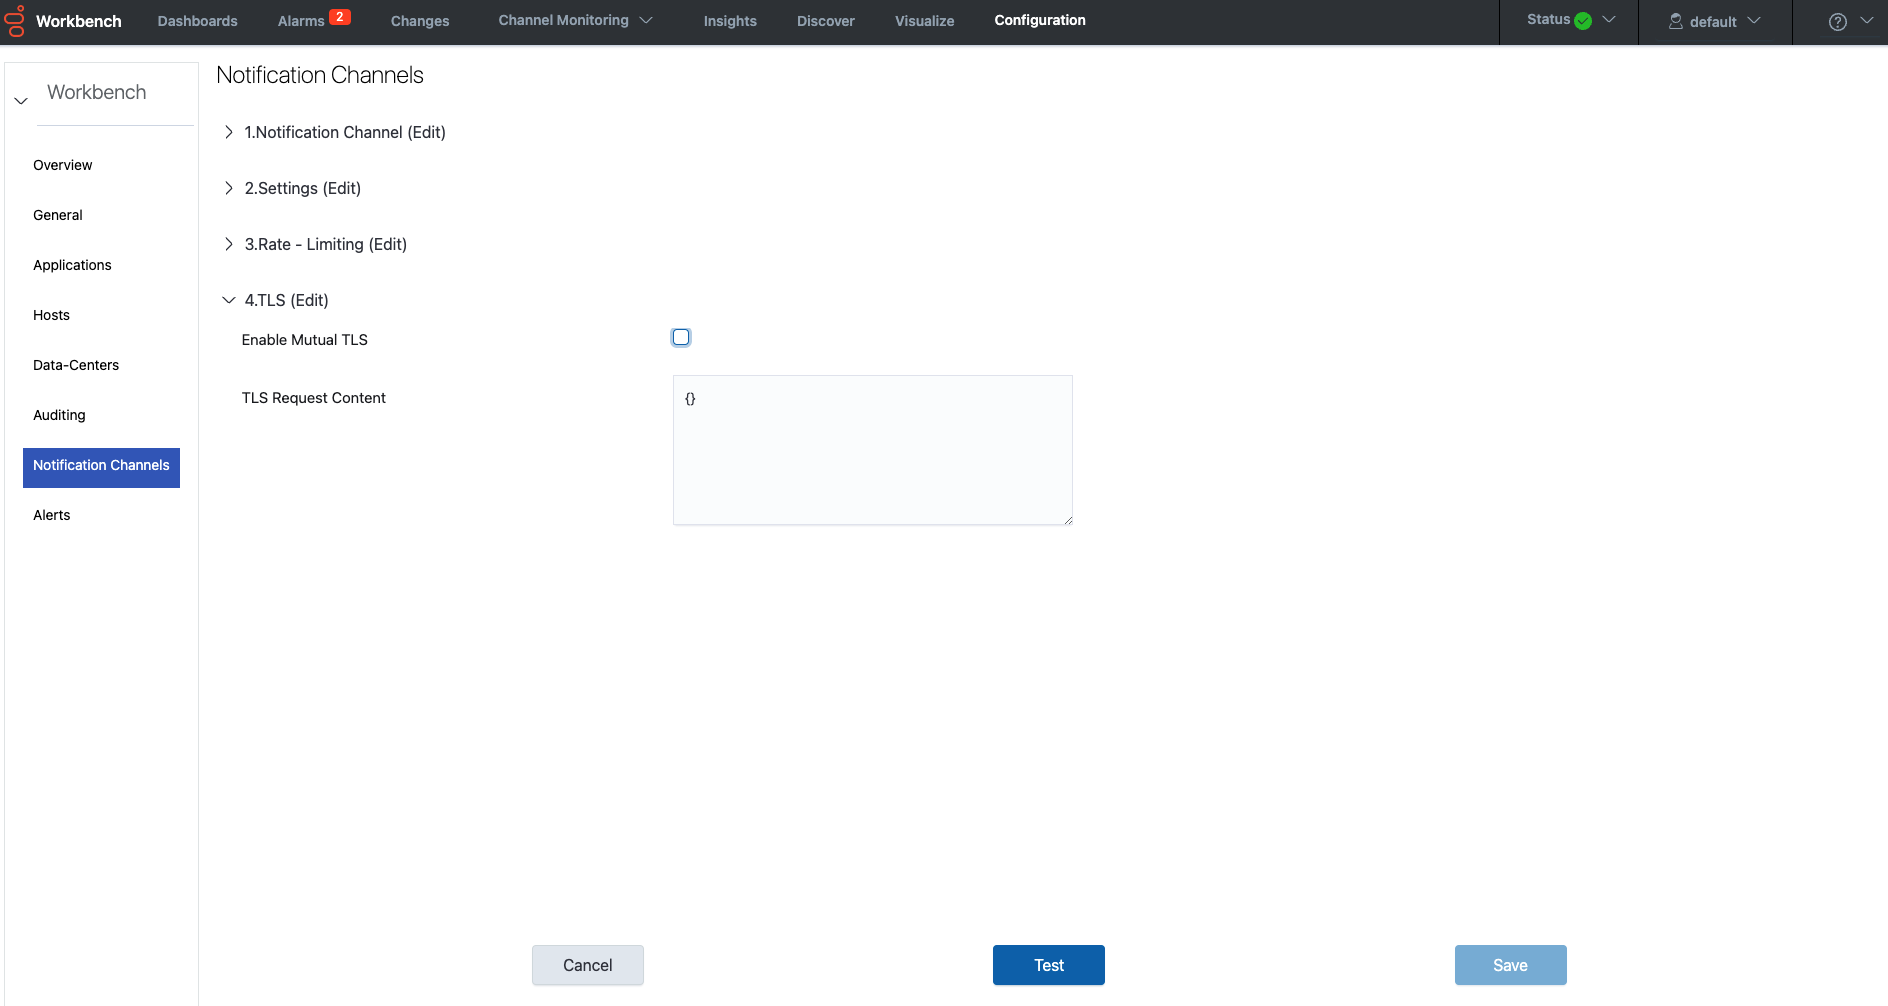
- When your configuration is complete
- Click Save to create the new Notification Channel
- Optionally click Test to invoke a test request to the HTTP[S] endpoint configured; the test functionality is detailed below
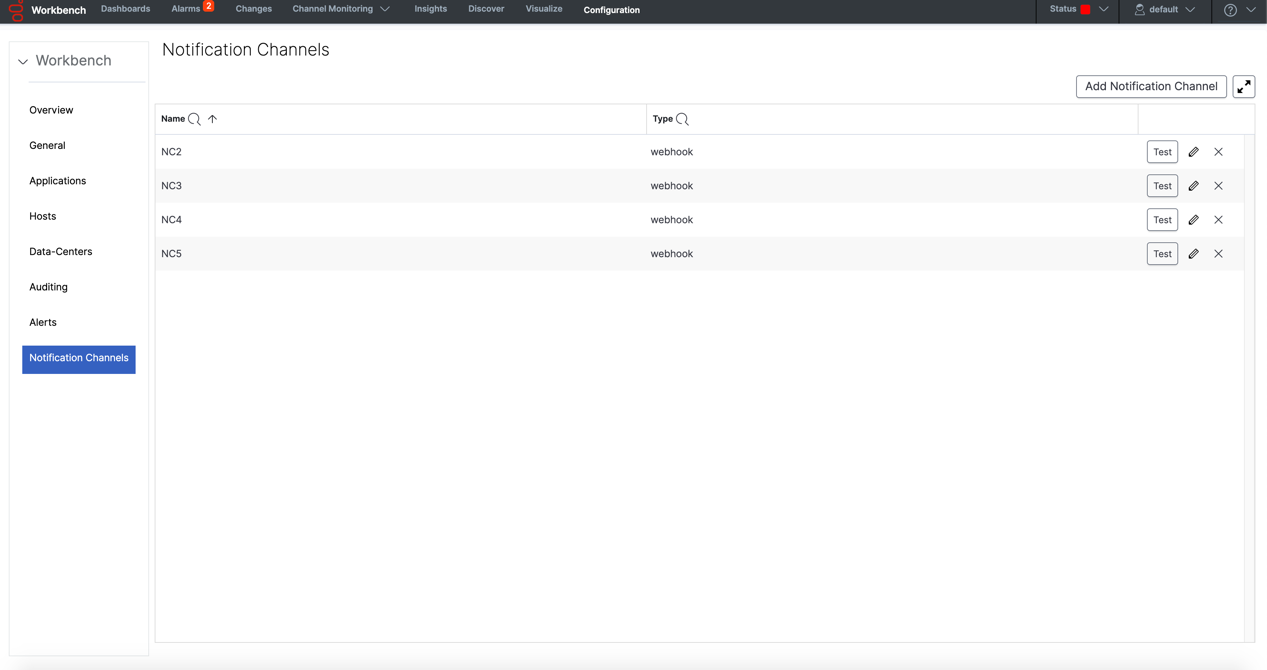
List of Notification Channels
If/when at least one Notification Channel exists, a list of Notification Channels is displayed.
- Name and Type properties are displayed to identify each Notification Channel
- Each Notification Channel has 3 action buttons: Test, Edit and Delete
Test a Notification Channel
When the Test action button is clicked, a test Alert is sent to the corresponding Notification Channel; specifically, for Webhook Notification Channels, all the configured values are used to make an HTTP[S] request and depending on the response of the call a message of success or failure is shown at the bottom right of the page.
Edit Notification Channel
When the Edit action button is clicked, the Notification Channel form is opened in Edit mode, and it is populated with all the configuration properties that are associated to that Notification Channel; the form is the same as per the ‘Create Notification Channel’ section.
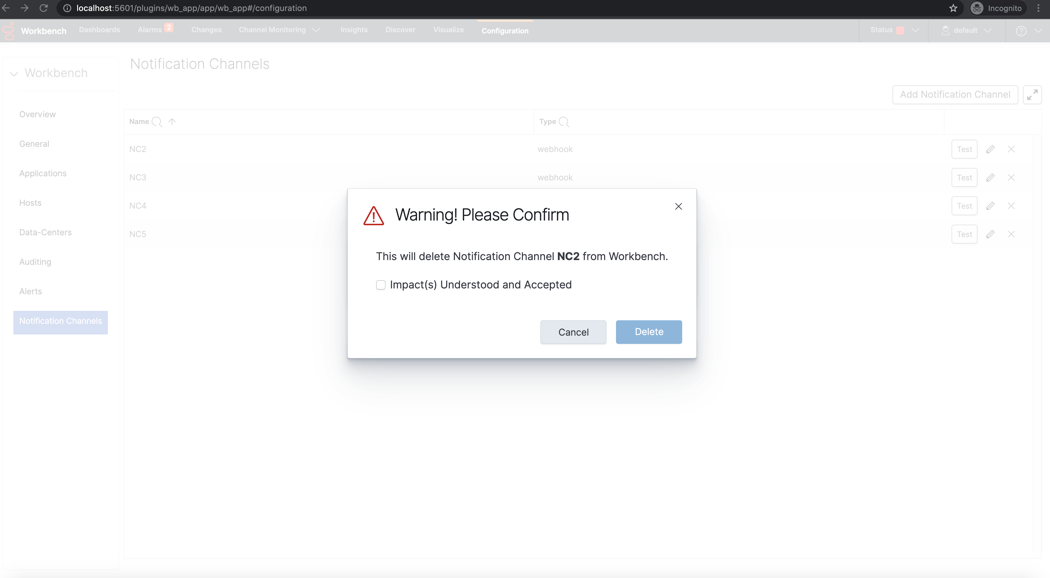
Delete a Notification Channel
When the Delete action button is clicked, a warning dialog is displayed to confirm the Delete action. If the delete action is confirmed, the Notification Channel will be removed from the Notification Channels list and a success dialog will be shown.
Example Python Webhook
The example Webhook code below provides a basic, test (not production), example Python code snippet that receives active Alarm payloads from Workbench, via the respective Notification Channel and Alerts configuration.
- The Python code below is not supported and/or warranted by Genesys - it's merely an example of how a customer can create a simple Webhook

