
AD Linux Install - Additional Node
Review this link for details on downloading Workbench AD: Downloading Anomaly Detection (AD).
Important
- Ensure you have an installed and running AD Primary Node before installing any AD Additional Nodes
Please use the following steps to install Workbench AD 9.x.xxx.xx on Linux:
- Create a working directory (i.e. ~/tmp) adding the AD_9.x.xxx.xx_LINUX.tar.gz file
- Run tar zxf AD_9.x.xxx.xx_LINUX.tar.gz to extract the downloaded AD_Installer_Linux.tar.gz compressed file.
- Navigate into the ip\linux folder
- Run tar zxf AD_9.x.xxx.xx_Installer_Linux.tar.gz to extract AD Installer content; the following files should be extracted:
- install.sh
- jdk-11.0.2/
- lib/
- AD_9.x.xxx.xx_Installer.jar
- Run ./install.sh (DO NOT prefix ./install.sh with sudo)
- Genesys Care Workbench Anomaly Detection - Installation
- Press Enter on the Genesys Care Workbench Anomaly Detection 9.x screen to start the AD installation.
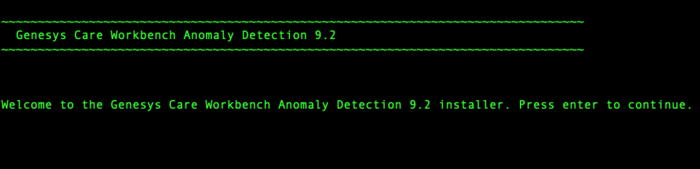
- Press Enter on the Genesys Care Workbench Anomaly Detection 9.x screen to start the AD installation.
- Genesys Workbench License Agreement
- Press Enter to view the Genesys Workbench License Agreement
- Review license agreement
- Enter N for the next page, or press anything else to scroll to the end of the Terms and Conditions

- Enter N for the next page, or press anything else to scroll to the end of the Terms and Conditions
- Genesys Workbench Terms and Conditions
- If you agree to the Genesys Workbench Terms and Conditions, press Enter (default=Y) or enter Y to continue.
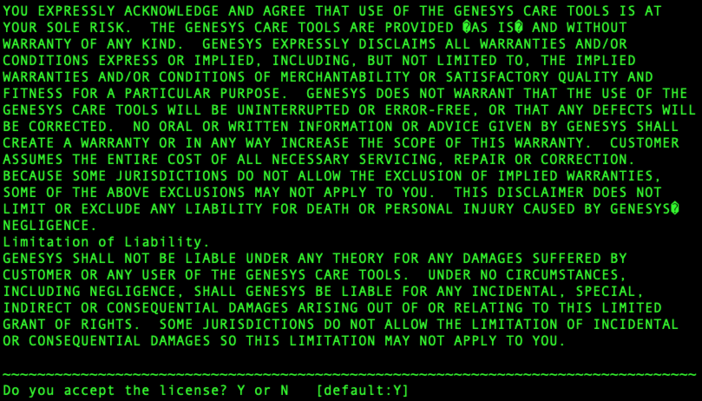
- If you agree to the Genesys Workbench Terms and Conditions, press Enter (default=Y) or enter Y to continue.
- Workbench Installation Mode:
- There are 2 Installation Modes:
- New Installation - no Workbench Anomaly Detection components are yet running on this host/node
- Upgrade - you already have Workbench Anomaly Detection running on this host/node and wish to upgrade
- Press Enter for default value (new installation)Warning*AD currently does not support upgrade capability
*Therefore select New Installation and not Upgrade during the AD 9.x.xxx.xx installation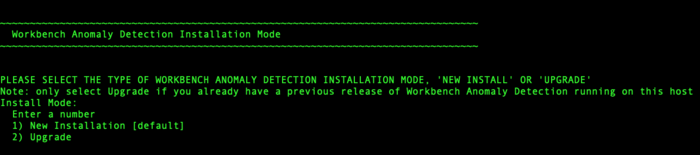
- There are 2 Installation Modes:
- Workbench AD Installation Type
- There are 2 Installation Types:
- Primary Node - master Anomaly Detection Node
- Additional Node - additional Anomaly Detection Node used for distributing load. You already have Workbench Anomaly Detection Primary Node running in other host.
- Press Enter for default value (primary node)
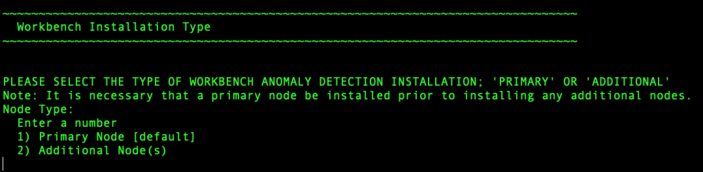
- There are 2 Installation Types:
- Continue with the next steps for both: Primary or Additional Node Installation.
- DEFAULT or CUSTOM installationInstall Workbench AD with Default or Custom settings:
- Default - the respective Workbench AD Default settings will be used.
- default settings being paths, ports, etc.
- Custom - or, if required, you can change the default settings by selecting a Custom install. In Custom mode, the following parameters are required:
- For Workbench Anomaly Detection:
- Binary files location
- Configuration files location
- Data files location
- Log files location
- Socket port
- Incoming data port from Logstash
- HTTP AD API port
- For Workbench Metricbeat:
- Binary files location
- Data files location
- Log files location
- HTTP port
- For Workbench Agent:
- Binary files location
- Log files location
- HTTP port

- For Workbench Anomaly Detection:
- Default - the respective Workbench AD Default settings will be used.
- Provide the Workbench Primary Zookeeper IP Address and Port.
- If Zookeeper is authenticated, provide username and password
- Simply press Enter for username/password if ZooKeeper authentication is disabled
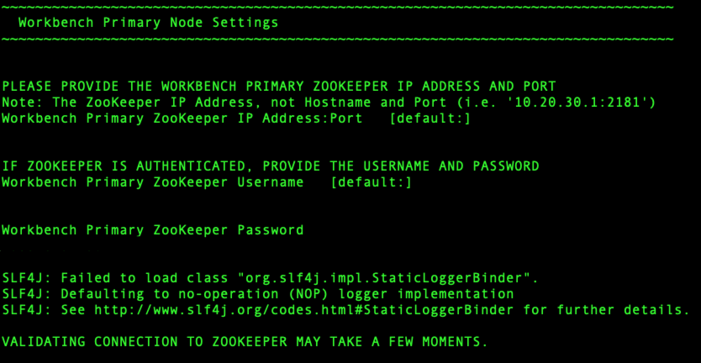
- Simply press Enter for username/password if ZooKeeper authentication is disabled
- If Zookeeper is authenticated, provide username and password
- Provide the Workbench Anomaly Detection installation folder location:

- AD Hostname:AD Hostname:
- This Hostname will be utilized by the Workbench solution components.
- Primary components to be installed: Information on which Workbench components are being installed on this host/node
- Anomaly Detection Node
- Workbench Metricbeat
- Workbench Agent

- Select / provide the Service Account details for the Workbench components:
- Workbench components will run using this service account.

- Workbench components will run using this service account.
- The Workbench Anomaly Detection installation will now progress
- The Workbench Anomaly Detection installation is complete


Post Installation Steps
- Validate (i.e. service --status-all | grep WB) if the AD Additional component Services are running:
- WB Anomaly Detection Node: WB_AnomalyDetection_9.x.xxx.xx
- WB Metricbeat: WB_Metricbeat_9.x.xxx.xx
- WB Agent: WB_Agent_9.x.xxx.xx
- Validate if the new AD host appears in Workbench/Configuration/Hosts as is presented in AD Configuration.
- Follow the steps in Post Installation Configuration if needed.
- If you are installing AD at first time, follow the guidelines given in Using AD to learn how to use the Workbench Anomaly Detection Insights features.
This page was last edited on December 24, 2021, at 18:03.
Comments or questions about this documentation? Contact us for support!