
Common Properties for Workflow Blocks
Contents
- 1 Common Properties for Workflow Blocks
- 1.1 Block Notes Property
- 1.2 Categories Property
- 1.3 CC Property
- 1.4 Condition Property
- 1.5 Destination Property
- 1.6 Detach Property
- 1.7 Detach Timeout Property
- 1.8 Do Not Thread Property
- 1.9 Email Server Property
- 1.10 Enable Status Property
- 1.11 Exceptions Property
- 1.12 Enable Status Property
- 1.13 Exclude Email Addresses Property
- 1.14 Field Codes Property
- 1.15 From Property
- 1.16 Include Original Message Into Reply Property
- 1.17 Interaction ID Property
- 1.18 Logging Details Property
- 1.19 Log Level Property
- 1.20 Language Property
- 1.21 Name Property
- 1.22 Orchestration Extensions Property
- 1.23 Show Advanced Properties
- 1.24 Orchestration Options
- 1.25 Output Queue Property
- 1.26 Output Result Property
- 1.27 Prompts Property
- 1.28 Standard Response Property
- 1.29 Subject Property
- 1.30 Tenant Property
- 1.31 To Property
- 1.32 Universal Contact Server Property
- 1.33 Update Interaction User Data Property
- 1.34 Update User Data Property
- 1.35 Uri Property
- 1.36 Use Subject From SRL Property
- 1.37 Variables Mapping Property
The following properties are common to multiple blocks. Their descriptions are placed here to minimize duplication of content:
Block Notes Property
You have the option of entering a comment (see example).

This property is the equivalent of the IRD Object Comments feature.
Categories Property
Use this property to select individual categories and sub-categories of the Root Category to be used in the classification process.
- Click under Value to display the ... button and open the Categories dialog box.
- Click Add to open the Select Items dialog box.
- From the Type dropdown menu, do one of the following:
- If you are connected to Configuration_Server, select Configuration Server. Select one or more categories for the Value.
- Select Literal and enter the categories in the Value field. Use commas to separate the categories.
- Select Variable and select the variable that contains the categories from the Value field.
CC Property
Use this property to specify the CC addresses on the e-mail transmitting the chat transcript. The CC property is not allowed in the Email Response block when the Response Type property is set to Notification.
- Click under Value to display the ... button and open the Select Cc Addresses dialog box.
- Click Add to open the Select Items dialog box.
- From the Type dropdown menu, do one of the following:
- If you are connected to Configuration_Server, select Configuration Server. Select a Configuration Server E-mail Accounts Business Attribute for the Value.
- Select Literal and enter the Cc address in the Value field.
- Select Variable and select the variable that contains the Cc address from the Value field.
- Select Originating Email and then select the value as CC or To-all. Originating Email is not applicable to the Email Forward (Forward type: Forward and Redirect), Send Email, and Chat transcript blocks.
- Select User Data as the Type and EmailAddress for a value. User Data is not applicable for the Send Email block.
- If applicable, repeat the above steps to add another e-mail address.
- Click OK to close the dialog box.
Condition Property
The Condition property indicates that the log will be active only if the given condition is true at runtime. To provide a condition setting for a log:
- Select the Condition row in the block's property table.
- Type the condition to evaluate against.
For example, assume in Entry block, there is a variable "MyVar==3". Assume also that you would like to log the session ID (GVPSessionID variable in Entry block) for all sessions where MyVar=3. In this case you must set the condition to "AppState.MyVar=3". If this condition is true, then GVPSessionID will be written to the log, otherwise it will be ignored.
Destination Property
Use this property to specify the routing destination.
- Click under Value to display the ... button and open the Destination dialog box.
- Select one of the following:
- Block Reference. For Value, specify any Target or Route Interaction block in the diagram where the Route property is set to False. When Destination is set to a Route Interaction block, the block-generated SCXML code automatically uses the following Route Interaction block properties: Queue For Existing Interaction and Queue For Outgoing Interaction.
- Literal. For Value, you can specify:
- An agent: <agent id>
- A place: <place id>
- A DN: <number>
- An e-mail address: <username>@<host> or _origin or _origin.all or _udata
- A customer number: <dn number>
- A target format addresses: <Target DN>
See the Orchestration Server Documentation Wiki for those literals that apply to multimedia interactions only.
- Variable. If the variable contains a string, see Literal above. If the value is a JSON object, Value can refer to:
- An agent: {agent: “<agent id>”, type:”A”}
- An agent group: {agent: “<name>”, type:”AG”}
- A place: {place: “<place id>”, type:”AP”}
- A place group: {place: “<name>”, type:”PG”}
- A DN: {dn: “<number>”, type:”Q or RP or DN”, switch:”<switch name>”}
- An interaction queue: {id: “<q name>”, type:”iq” }
- A workbin: {id: “<wb name>”, type:”wb”<owner>”}
- A customer number: {dn: “<number>”}
- A target format addresses: Resource Object from the queue.submit.done event (the Target Block Resource Selected property).
See the Orchestration Server wiki for those literals that apply to multimedia interactions only.
- Configuration Server to select the from Switch//DN if connected.
- Resource to select a resource using properties that will form a JSON object.
- Click OK to close the Destination dialog box.
Detach Property
Use for multi-site routing. Controls whether the Orchestration Platform should <detach> an interaction from the current session before sending the e-mail with the chat transcript. When this property is set to true, the interaction is detached from the current session. The Chat Transcript block will always <detach> the new interaction before continuing with the current interaction.
Detach Timeout Property
Use to specify how long to attempt to <detach> if an initial attempt fails with an invalidstate error. Specify the timeout in milliseconds. If set to 0, no further attempt to detach is made. After the timeout, if the <detach> is not successful, no further attempts will be made and the block will attempt to reclaim the interaction back into the current session using <attach>.
Do Not Thread Property
Select true to instruct NOT to thread under another interaction (which is specified under key ParentID in the User Data) in the contact’s history in the Universal Contact Server Database.
Email Server Property
Note: This property is not mandatory as the platform will choose an e-mail server if not provided. Select the Application name for the E-mail Server that URS should notify about the e-mail (via Interaction Server).
- Click under Value to display the ... button and open the Application Selection dialog box.
- The next step depends on whether you are connected to Configuration Server.
- If you are connected, select Configuration Server from the Type dropdown menu. Select the name of the E-mail Server Java object from the Value field.
- You can also select Literal and enter the name of the e-mail server in the Value field.
- You can also select Variable and select the variable from the Value field.
Enable Status Property
This property controls whether or not a block contributes code to the application. Diagrams visually indicate when a block is disabled. You may wish to use this property if there is a need to temporarily remove a block during debugging or, for other reasons during development, temporarily disable a block. This saves the effort of having to remove the block and then add it back later. You can also right-click a block and select Toggle Enable Status. The ORS Debugger skips over deactivated blocks.
Exceptions Property
Use this property to define which exceptions or events to handle.
- Click opposite Exceptions under Value.
- Click the ... button to bring up the Exceptions dialog box. The sample below shows the dialog with the interaction.deleted event selected.

Starting with 8.1.410.14, a resultof guard condition check is now made when processing eServices/child interactions. The Entry block interaction.deleted event handlers are updated with the following guard conditions:
- Current interaction deletion.
- The interaction.deleted event is from an interaction deletion and not from a detach operation.
_event.data.interactionid == system.InteractionID && (!_event.data.resultof || _event.data.resultof == 'deletion')
- Click Add to add new exceptions/conditions.
- For each exception, specify a unique name and an exception event. Also see handling eServices Switchovers.
- Name--Composer uses the name of the exception to label the outport.
- Event--Use to select the specific exception event.
- Condition-- Added in 8.1.440.18. You have the option of entering a guard condition for this exception, which you define in Expression Builder. The exception is selected only if the condition evaluates to true.
- Target--If true, an exception port is created and the user can connect it to the block this exception will transition to when it is executed. If false, the exception will not cause a change in the state configuration when it is executed. The executable content contained in the exception will still be executed, so the exception will function as a simple exception event handler.
- Body--(optional) Executable scxml code that will be executed when this event is received and any specified condition evaluates to true. This code is executed before any other blocks that are connected as this exception's event handlers.
- When done with the dialog box, click OK.
Notes:
- Exceptions for Busy treatment blocks should be handled in the Target block to which they are connected and not in the Busy treatment blocks themselves. Busy treatment exceptions are raised as the error.queue.submit exception and not as exceptions listed in individual treatment blocks.
- Each block has its own predefined set of events on the Exceptions property dialog box. Genesys recommends that you not remove any of the predefined events from the Supported list.
- Before generating code, each supported event must be handled by connecting its red node on the side of the block to the inport (input node) of another block.
- The events in the Entry block are global in scope.
- Events defined in other blocks are local to that block only. When an event is thrown, if a handler for that event is declared in the current block, that local event handler is called.
- If there is no local event handler for the event, but there is a global event handler declared in the Entry block, then the global event handler from the Entry block is called.
Enable Status Property
This property controls whether or not a block contributes code to the application. You may wish to use this property if there is a need to temporarily remove a block during debugging or, for other reasons during development, temporarily disable a block. This saves the effort of having to remove the block and then add it back later. You can also right-click a block and select Toggle Enabled Status.
Exclude Email Addresses Property
When sending a response, you may not want the email to copy in all the addresses (To, From) in the original email. Use this property to exclude specific email addresses that need to be removed from the “To” and “Cc” fields. Exclude Email Address is not allowed in the Email Response block when the Response type property is set to Notification and the Email Forward block with the Forward type property set to Forward.
- Click under Value to display the ... button and open the Exclude Addresses dialog box.
- Click Add to open the Select Items dialog box.
- From the Type dropdown menu, do one of the following:
- Select Literal and enter the address to exclude in the Value field.
- If you are connected to Configuration Server, select Configuration Server. Select a Configuration Server E-mail Accounts Business Attribute for the Value.
- Select Variable and select the variable that contains the address to exclude from the Value field.
- If applicable, repeat the above steps to add another e-mail address.
- Click OK to close the dialog box.
Field Codes Property
When using a standard response to render message text, use this property to assign values to Field Code variables that have been defined in Knowledge Manager (as described in the eServices 8.1 User's Guide) and used in that standard response. Universal Contact Server requires values for Field Codes when using standard responses that include Field Codes.
- Click under Value to display the ... button and open the Field Codes dialog box.
- Click Add. A second dialog box opens for specifying Field Codes and values.
- Type the name of the Field Code.
- Select Literal or Variable.
- If you select Literal, enter the value for the Field Code.
- If you select Variable, select the variable the contains the Field Code Value.
From Property
Use this property to specify the address to appear in the "From" field of the outbound e-mail. The From property is not allowed in the Email Forward block when the Response Type property is set to Forward or Redirect.
- Click under Value to display the ... button and open the Select From E-mail Address dialog box.
- From the Type dropdown, you have the following options:
- If you are connected to Configuration Server, select Configuration Server from the dropdown menu. Select the from address from the Value field in the form of an Configuration Server E-mail Accounts Business Attribute.
- Select Literal from the dropdown menu and then enter the From address in the Value field.
- Select Originating Email and then select the value as To. Originating Email is not applicable in the Email Response block of Response type: Notification, Email Forward block of Forward type: Forward and Redirect
- Select Variable from the dropdown menu and then select the variable that contains the from address.
- Click OK to close the dialog box.
Include Original Message Into Reply Property
Select true or false to indicate if the text from the parent interaction copied into the forwarded e-mail.
Interaction ID Property
Set to a meaningful value or keep the default value, which is the system variable InteractionId.
Can be used for "interaction-less" processing for scenarios where the InteractionId variable is not automatically initialized, but instead must wait for an event. An example would be an SCXML application triggered by a Web Service that does not add an interaction.
Background: Previous to 8.1.1, Composer did not expose an Interaction ID property. Instead, when ORS started processing an interaction, a generated SCXML application automatically initialized the system variable, InteractionId. This variable was then used internally by Routing and certain eServices blocks when interacting with ORS.
With the introduction of support for Interaction-less processing, you can now define a specific event (IPD Event property) to initialize InteractionId, or not define an event at all.
For scenarios with an interaction (IPD Diagram/Event=interaction.present for example), you may keep the default value for the Interaction ID property. The default value is the system variable InteractionId, which is initialized automatically in this case.
For other scenarios (any scenario where the system variable InteractionId is not set), you may choose to:
- Not use blocks that require an Interaction ID
- And/or set the Interaction ID property to a meaningful value
- And/or assign a meaningful value to the InteractionId system variable
Logging Details Property
Logging details contains the expression that will be logged at runtime by the ORS platform. If logging details are specified, then logging is generated for the block; if no logging details are specified, no logging is generated.
To create logging details:
- Click the Logging Details row in the block's property table.
- Click the ... button to open the Logging Details dialog box.
- In the Logging Details dialog box, click Add to open Expression Builder.
- Create an expression to be used for logging details, such as an expression based on the variables whose content you wish to log.
Log Level Property
To assign a value to the Log Level property:
- Select the Log Level row in the block's property table.
- In the Value field, select one of the following from the drop-down list:
- Project Default. The block uses the project's default log level, which can be configured through the project properties.
- Info. This is an Informational level to log application-specific data.
- Debug. Debug level is used for application debugging.
- Error. Error level is used to log error details.
- Warn. Warning level is used to flag any application warnings.
- Alarm. Alarm level is used to send the message as an alarm to the Genesys Management Framework.
Language Property
To set the active language:
- Select the Language row in the block's property table.
- Click under Value to display a down arrow.
- Select one of the following languages:
- English (US)
- Spanish
- Mandarin
- Cantonese
- Vietnamese
- French
- French (Canada)
- German
- Italian
- Japanese
- Korean
- Russian
Name Property
The Name property is present in all blocks in Composer. The Name property is the first property for all blocks. Use the Value field in the Name property row of the block's property table to name the block.
- Block names should conform to ECMAScript and SCXML identifier naming conventions. There is no limit to the maximum number of characters.
- Names may consist only of numbers, letters, or initial underscores (_).
- Names should only begin with a letter or underscore.
- Except for the Entry and Exit blocks, you should give all blocks a descriptive name. For example, if an Input block asks the caller to input an account number, then the name of the block could be Input_Account_Number.
- The name of the block is used as the “Name” of the <form> tag that gets generated for that block.
To provide a name for a block:
- Select the Name row in the block's property table.
- In the Value field, type a block name that conforms to the restrictions above.
Orchestration Extensions Property
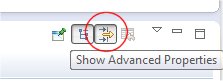
Starting with 8.1.4, Composer blocks used to build routing applications (with the exception of the Disconnect and EndParallel blocks) add a new ORS Extensions property. Use this property to add custom attributes into any/all states and sub-states for any block they are configured in. Add the ORS Extensions property to the Properties view for a selected block by clicking the Show Advanced Properties button.
Show Advanced Properties
When creating a new diagram in Composer perspective, this button appears on the right side of the Composer GUI, between the palette of blocks and the Properties view.

This property gives the ability to use any attribute Orchestration Server supports in addition to the SCXML standard. For information on these attributes, see the attributes prefixed with "_" in the SCXML Elements section of the Orchestration Server Developer's Guide. For example, you can specify additional attributes to be added into the SCXML <state> element, which Orchestration Server can then use to control persistence on a <state> level and for other functionality in the future.
Orchestration Options
Selecting Properties from the Project menu opens a dialog box showing the properties of the selected Project or of the Project that contains the selected resource. Select Orchestration Options to view other settings.
Output Queue Property
Select the output queue for the new interaction.
Only interaction queues that were created in the current Composer Project are shown for the Configuration Server values. The interaction queues are sorted per parent Interaction Process Diagram. To define the output queue:
- Click under Value to display the ... button and open the Select an Output Queue dialog box.
- Click the Type down arrow and do one of the following
- If you are connected to Configuration Server, select Configuration Server and then select an output queue as the Value. The Independent Objects > Same queue choice allows you to put the outbound interaction in the same interaction queue that initiated the current interaction.
- Select Literal and then enter the name of the output queue as the Value.
- Click OK.
Output Result Property
Use this property to specify a variable where the new interaction will be saved. The results will then be available in other blocks in the application for further processing.
The format of returned data is JSON. Any post processing work to be done on returned results can be done in the existing Assign block which provides access to ECMAScript functions. It already supports writing simple or complex expressions to extract values out of JSON strings and arrays.
Prompts Property
Use the Prompts property to specify the audio prompts that are played to the caller in a Play Message or User Input block. You can specify prerecorded prompts, text, and several standard data types.
To add, delete, or arrange prompts:
- Click the Prompts row in the block's property table.
- Click the ... button to open the Prompts dialog box.
- Click Add to enable Prompt Type, Interruptible, and Value fields.
- From the Type drop-down list, select a Type: Announcement, RecordedAnnouncement, FormattedDigits, or Text. See table below.
- Interruptible—Select true or false. Indicates whether the caller can interrupt the message. Instructs URS to send a message to T-Server indicating that the announcement is interruptible.
- Value*—Enter data for the selected Type.
Place the audio files in the Resources\Prompts\{APP_LANGUAGE} folder under the Java Composer Project. Audio files can be added to the project by copying and pasting from the Windows file system into the Java Voice Project in the Project Explorer.
Note: By default, Genesys supplies .vox files only for mulaw 8Khz. If you are using any other audio format for playback of audio files, replace the files with the corresponding audio files in the required audio format.
Standard Response Property
Use this property to select the text from your eServices Knowledgement Mangement Standard Response library. You can enter either a category code or a standard response identifier.
- Click under Value to display the ... button and open the Select a Standard Response dialog box, which organizes standard responses by caterories. Starting with 8.1.440.18, the dialog box for the eServices blocks that contain a Standard Response property shows a category/standard response tree as defined in eServices Knowledge Manager.
- From the Type dropdown menu, do one of the following:
- If you are connected to Configuration Server, select Configuration Server. Expand the category. Then select the Standard Response identifier or category code. An example with a category selected is shown below.

- Standard Response property dialog box also gives the option of using a literal or variable. If you select Variable, select a variable containing one of the following:

- A category code from a variable whose value is set to an existing category code in the form "'gdata:config\\CA.<id>'", where <id> is the category ID. Example: msgsrc=gdata:config\\CA.00005a5FS3GW005G
- A standard response identifier in the form "'gdata:config\\SR.<id>'", where <id> is the standard response identifier. Example: msgsrc=gdata:config\\SR.00005a5FS3GW005A
- If you select Literal, manually enter the category code or Standard Response identifier.
- Click OK to close the dialog box.
Subject Property
This property is enabled if the Use Subject From SRL property is set to false. Enter the subject to appear in the Subject field of the outbound interaction.
Tenant Property
This mandatory property is set by default to Variable(TenantID), whose value is assigned by Orchestration Server. To override this value, click the button to open the Tenant dialog box where you can select another variable to contain the TenantID or enter the value as a literal.
Note: UCS will fail executing the requested task if passed the Tenant_Name instead of the TenantID.
To Property
Use this property to specify the address to which the interaction is to be sent. See the Getting Using Email Addresses topic for information on getting the e-mail address of a customer using Context Services blocks and using it in the To property. Also see the Note below.
- Click under Value to display the ... button and open the Select To E-mail Address dialog box.
- From the Type dropdown menu, you have the following options:
- If you are connected to Configuration_Server, select Configuration Server. Select the to address from the Value field in the form of an Configuration Server E-mail Accounts Business Attribute. Select User Data as the Type and EmailAddress for a value.
- Select Literal and enter the To address in the Value field.
- Select Originating Email (only for the Email Response block with Response Type as Auto Response or Acknowledgement and only for the Email forward block with Forward type as Reply to Customer) and then select the Value as From or To - all.
- Select Variable from the dropdown menu and then select the variable that contains the To address.
- Click OK to close the dialog box.
Universal Contact Server Property
Specify the Universal Contact Server to use.
- Click under Value to display the ... button and open the Application Selection dialog box.
- The next step depends on whether you are connected to Configuration Server.
- If you are connected, select Configuration Server from the Type dropdown menu. Select the name of the Universal Contact Server object from the Value field. If not connected:
- Select Literal and enter the name of the Universal Contact Server in the Value field.
- Or select Variable and select the variable from the Value field.
Update Interaction User Data Property
Select true to have the UCS returned values be attached to the interaction User Data in the form of key-value pairs; otherwise select false.
When set to true, the following user data key-values are added to this interaction's user data:
- ContactCreated: true or false.
- NumberOfContactsFound: Number of contacts identified with the given User Data.
- ContactIdList: A string or an array of strings with the list of matching contact IDs. Note: if the Return Unique property is set to true, ContactIdList is not returned if multiple contacts are identified.
Update User Data Property
Select true to have the contact attribute values returned by the Universal Contact Server be part of the User Data of the response.
Select false to have the contact attribute values returned by the Universal Contact Server be part of the parameters of the response.
Universal Contact Server returns contact attribute values only when a unique contact is found/created. Also note the following:
- If a unique contact is identified or created and this property is false, the contact attribute values will also be returned in the parameter part of the ESP response and will be added in the interaction's User Data as well.
- When this property is set to true AND if a unique contact is identified or created, Universal Contact Server returns the contact attribute values in the User Data part of its response. The User Data part of the response is automatically added to the interaction's User Data.
- If this property is set to false AND a unique contact is identified/created, the contact attribute values are passed back to the Orchestration platform in the parameter part of the response. In that case, you might choose to add them to the interaction's User Data by setting the Update Interaction User Data property.
- Regardless of the value of the Update User Data property, Universal Contact Server ALWAYS returns the contact ID in the User Data part of its response to Orchestration Server when a unique contact is identified/created.
Uri Property
The Uri property specifies the Location of the Method or File depending on the value of the Type property.
To set a URL destination for the Uri property (Type property is set to URL):
- Select the Uri row in the block's property table.
- In the Value field, type a valid URL, or select a variable from the drop-down list.
To set a Project destination for the Uri property (Type property is set to ProjectFile):
- Click the Uri row in the block's property table.
- Click the
 button to open the Uri dialog box.
 - Select a workflow in the list.
- Click OK to close the dialog box.
Use Subject From SRL Property
Select true or false to indicate whether to get the e-mail Subject from the Standard Response Library.
Variables Mapping Property
Use this property to map individual contact attribute values to variables.
Note:
- Contact attribute values are returned only when a unique contact is identified.
- Only primary contact attribute values are returned.
To use variables mapping, open the Variables Mapping dialog box.