Encrypting and Provisioning Certificates
Contents
Before you configure encryption certificates for voice and screen recordings, you must generate the following keys and certificates:
- A certificate for the Certificate Authority (CA) in .pem format.
- A recording certificate (also known as public key) in .pem X.509 RSA format.
- A recording private key in .pem format.
It is your responsibility to store your private keys and certificates, including the expired ones. You must also back up your keystore, keystore password, certificates and private keys in a secure location offsite to protect against site level disasters. When Genesys Interaction Recording encryption is enabled, loss of the keystore and private key would result in loss of recording files.
While renewing the certificates, keep your old certificates under Administration - Recording Certificates and provision the new certificates using the instructions provided in this section. This will ensure the playback of recordings encrypted with the older certificates without any issues.Generating the Certificates and Keys
This certificate must meet the following requirements:
- 2048 bit RSA (or higher; please align encryption strength requirements with your IT Security)
- x509 certificate
- PEM format
- The certificate must be signed by a trusted third-party CA, self signed or signed by your own private CA
- If using a third-party CA, the certificate signing request provided to the third-party CA must contain the Subject Name, Serial Number, Subject DN, and Issuer DN. You might be contacted by the third-party CA who might ask for additional information
- The certificate validity period of the certificate determines when the next certificate needs to be generated for renewal
The following OpenSSL command to generate certificate signing request and private key is an example:
openssl req -nodes -newkey rsa:2048 -keyout private_key.pem -out cert.req -days <validity period>
The system prompts for DN fields to be filled in. You must fill in all of them. See the table below for the details.
| DN Field | Explanation | Example |
|---|---|---|
| Common Name | Name of your Recording Solution | Interaction Recording |
| Organization | The exact legal name of your organization. Do not abbreviate your organization name. | Monster & Sons, Inc. |
| Organization Unit | Section of the organization. | Robot Repairs |
| City or Locality | The city where your organization is legally located. | Pleasant Hill |
| State or Province | Full state or province where your organization is legally located. | California |
| Country | The two-letter ISO abbreviation for your country. | US |
The files will have the following:
- private_key.pem— the private key that is used to decrypt the recordings. It must be kept safe and should not be shared.
- cert.req— the certificate signing request for the third-party CA that signs the request and provides the public key certificate to be used to encrypt the recordings.
Chained Certificates
Genesys recommends that the recording certificate that you want to use for Genesys Interaction Recording encryption be signed by a single trusted third-party CA.
To set up a chained certificate:
- Upload the certificate using Genesys Administrator Extension.
- Obtain the CA file and place it in the MCP's local directory—for example, /genesys/mcp/certificates/<tenant name>/<ca-file>.
Note that the CA file given here should be the bundle of all the intermediate CA's and the root CA in specific order—for example, cat crt_inter3.pem crt_inter2.pem crt_inter1.pem root_ca.pem > ca.pem.
When you create a bundle from separate certificates, take note that these certificates might sometimes have additional information that should not be in the final bundle file. If this is the case, the above command (cat) will not work, and the information should be copied using an editor that opens the file using the Unix end of line. The information that should be taken starts from:
-------BEGIN CERTIFICATE----------
and finished with the line:
-------END CERTIFICATE---------------- - Configure the CA file path in IVR profile. In the gvp.service-parameters section, set the recordingclient.gvp.config.mpc.mediamgr.CA_file parameter to fixed,/genesys/mcp/certificates/<tenant name>/<ca-file>
For Call Recordings
A Recording Certificate binds a public encryption key to a particular recorded message identity.
- When configuring encryption, backup of the private key is your responsibility. If the private key becomes lost or corrupt, any recording encrypted using that key will become unusable.
- If screen recording is also used in the deployment, it is required that a screen recording certificate is also provisioned. Otherwise, the Recording Muxer Script will not be able to mux the call recording and screen recording together, if the call recording is encrypted but the screen recording is not encrypted.
The following steps describe how to configure encryption for voice recordings:
Prerequisites
- A certificate for the Certificate Authority (CA) in .pem format—for example, ca_cert.pem.
- A recording certificate (also known as public key) in .pem format—for example, 02_gir_cert.pem.
- A recording private key in .pem format—for example, 02_gir_priv_key.pem.
- On the machine where the Recording Crypto Server is installed, place the Certificate Authority (ca_cert.pem) in the <Recording Crypto Server Install Directory>\RCS directory.
- Edit the rcs.properties file:
- Change the value of the cacertstorepath parameter to ca_cert.pem.
- Set the value of the cacertstorepassword parameter to the valid password.
- Restart the Recording Crypto Server.
- Using Recording Plug-in for GAX, edit all your Media Control Platforms (MCP):
- On the Options tab of each MCP application object, in the [mpc] section, set the mediamgr.CA_file parameter to the location of the Certificate Authority file (for example, c:\keystore\ca_cert.pem).
- Restart all the MCP instances.
For an example of a certificate, see Sample Certificate and Key File Generation. You are now ready to upload and deploy your certificates to complete the encryption process.
To upload a new certificate:
- Log in to Genesys Administrator Extension, and navigate to Administration > Certificates.

- On the Recording Certificates panel, click Upload.
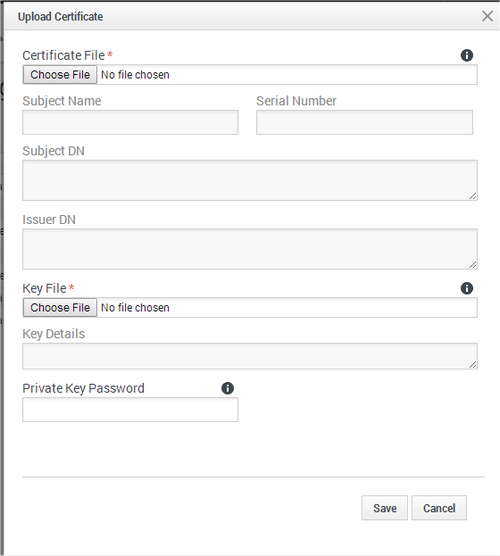
- On the Upload Certificate panel, in the Certificate File section, click Choose File.
- Select the appropriate file. This file must contain an X.509 RSA certificate in PEM format. The Subject Name, Serial Number, Subject DN, and Issuer DN fields automatically populate.
- In the Key File section, click Choose File.
- Select the appropriate file. The file must contain an RSA private key in PEM format. The encoding can be in either OpenSSL RSA private key or PKCS8 format. The Key Details field automatically populates.
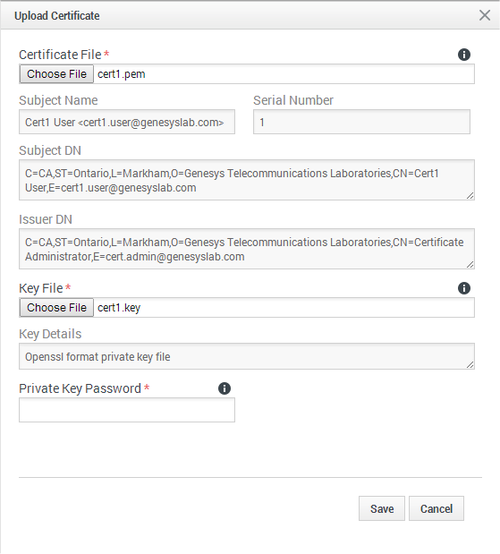
- If the private key file is encrypted, enter the Private Key Password.
- Click Save.
- If you Upload and/or delete recording certificates in one Genesys Administrator Extension session, these changes are not reflected in another Genesys Administrator Extension session. You must log out and log in again to the second Genesys Administrator Extension session.
- If Recording Crypto Server (RCS) is restarted when a Genesys Administrator Extension user is logged in, the next Genesys Administrator Extension operation involving RCS fails because the RCS session saved by the Recording Plug-in for GAX does not exist. RCS will return a 401 "RCS is not available" error. The user must log out, and log in again when receiving the 401 "RCS is not available" error.
To deploy a new certificate:
- Log in to Genesys Administrator Extension, and navigate to Configuration > Configuration Manager > Voice Platform Profiles.
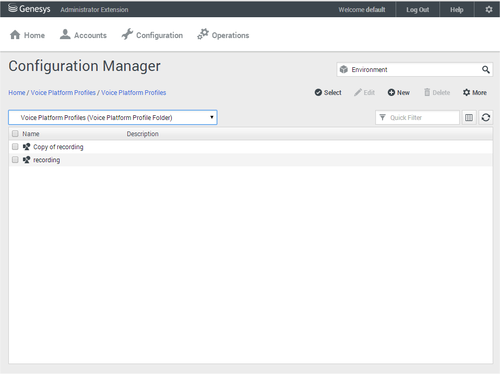
- From the Voice Platform Profiles screen, click the profile that you want to add the certificate to.
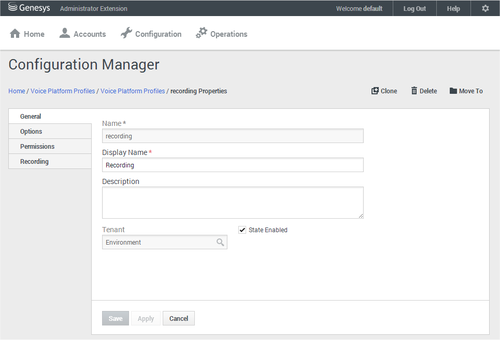
- Select the Recording tab.

- Click Add.
- From the Select Certificate screen, select the certificate you want to add to the IVR Profile, and click Add.
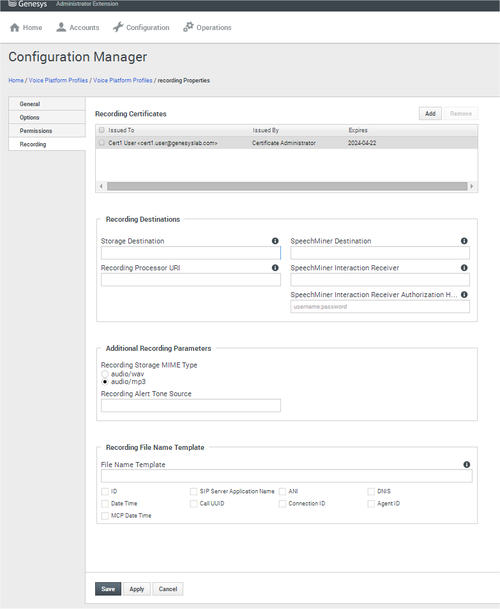
- Click Save.
For Screen Recordings
Assigning Certificates
To assign a new certificate:
- Using Genesys Administrator Extension, in the header, go to Administration > Screen Recording Certificates.
- On the Screen Recording Certificates panel, click Add.
- From the Select Certificate window, perform one of the following actions:
- Select the check box next to the appropriate certificate, and click Add.
- Click Cancel to discard any changes.
- Perform one of the following actions:
- Click the Save button to accept the changes.
- Click the Cancel button to discard the changes.
Setting up the Decryption Proxy
- Configure the Recording Crypto Server (RCS) locations that Interaction Recording Web Services (or Web Services if you're using version 8.5.210.02 or earlier) uses for encrypted screen recordings:
- For a single location:
- Using a text editor, create the create_single_location file using the following command:
{ "name":"decrypt-uri-prefix", "location": "/", "value": "<rcs uri>/rcs" }ImportantReplace <rcs uri> with the appropriate value. - Execute the following command:
curl -u ops:ops -X POST -d @create_single_location http://<Web Services Server>:8080/api/v2/ops
/contact-centers/<contact center ID (in hex format)>/settings/screen-recording
 --header "Content-Type: application/json"; echo
- Using a text editor, create the create_single_location file using the following command:
- For multiple locations:
- Using a text editor, create the create_first_location file using the following command:
{ "name":"decrypt-uri-prefix", "location": "<node_location>", "value": "<rcs uri>/rcs" } - Execute the following command:
curl -u ops:ops -X POST -d @create_first_location http://<Web Services Server>:8080/api/v2/ops
/contact-centers/<contact center ID (in hex format)>/settings/screen-recording
--header "Content-Type: application/json"; echo
ImportantReplace <node_location> with the appropriate value. The values for the <node_location> are similar to the nodePath settings in the Interaction Recording Web Services (Web Services) application.yaml file (if you are using Web Services and Application version 8.5.201.09 or earlier, refer to the nodePath setting in the server-settings.yaml file instead), but allow a hierarchical representation. For example, an Interaction Recording Web Services (Web Services) node uses a decrypt-uri-prefix setting with a location of "/US" if the nodePath set to "/US/AK" or "/US/HI". - Repeat steps a and b for each location required.
- Using a text editor, create the create_first_location file using the following command:
- For a single location:
For more information on the properties of these group settings, see Interaction Recording Web Services Group Settings.
