Contents
Capture Point Business Value Report
This page describes how you (as a business user) can use the (CX Insights for iWD folder) Capture Point Business Value Report to understand the distribution of tasks by process and point of entry (capture point) into the iWD system. You can use this information to assess whether the time to complete tasks correlates with the desired business value and time to complete for a busy enterprise, which can help you to better tune priority schema and priority levels for processes, capture points and departments.
Understanding the Capture Point Business Value Report
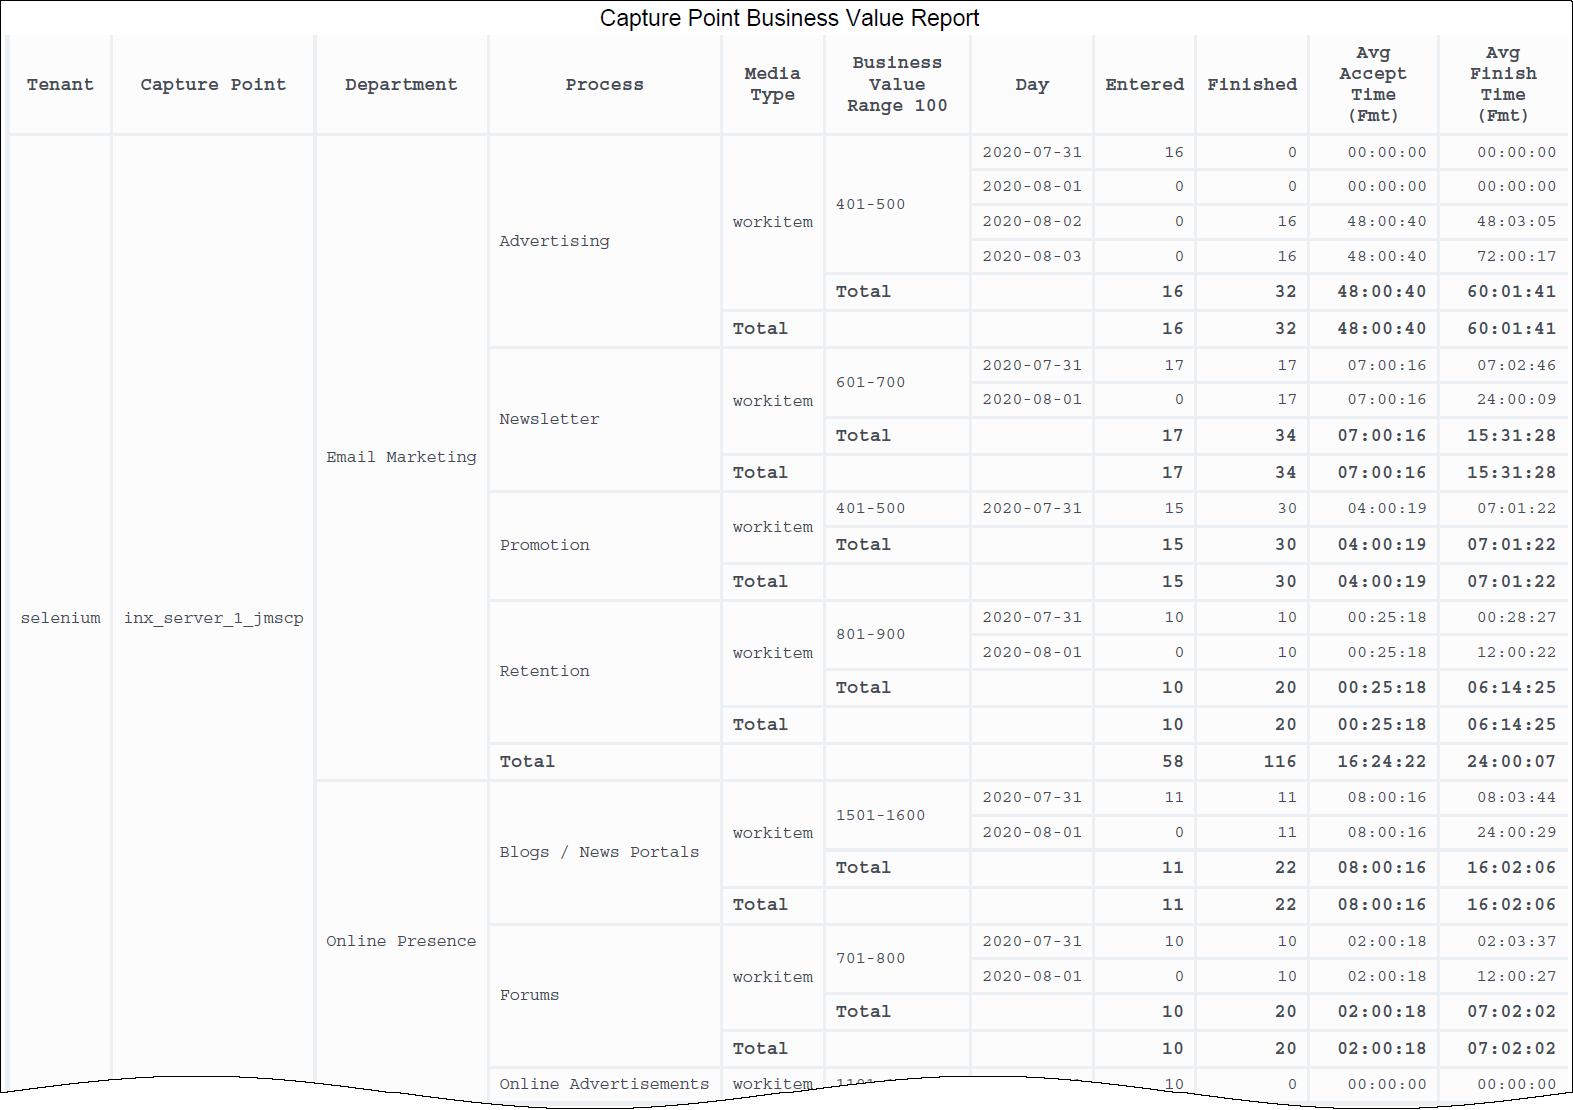
For each record, the report displays the business value range into which the tasks fall as well as the average time that it took to complete the tasks. For each capture point, the report plots the total number of finished tasks against their assigned business value range.
Although this report is defined using the Business Value Range attribute, you can drill along this attribute to display larger ranges in which business value of the task capture falls.
To get a better idea of what this report looks like, view sample output from the report:
SampleCapturePointBusinessValueReport.pdf
The following tables explain the prompts you can select when you generate the report, and the metrics and attributes that are represented in the report:
Prompts in the Capture Point Business Value Report
| Prompt | Description |
|---|---|
| Pre-set Date Filter | Choose from the convenient list of predefined rolling time ranges, spanning one day or more, over which to run the report. |
| Start Time | Choose the first day and time from which to gather report data. |
| End Time | Choose the last day and time from which to gather report data. |
| Department | Optionally, select a department on which to focus the report. |
| Process | Optionally, select a business process on which to focus the report. |
| Capture Point | Optionally, select a Capture Point on which to focus the report. |
| Tenant | Optionally, select a tenant on which to focus the report. |
| Media Type | Optionally, select one or more media types for which to gather data into the report. |
Attributes in the Capture Point Business Value Report
| Attribute | Description | Data Mart Table.Column |
|---|---|---|
| Tenant | Enables data within the reporting interval to be organized by tenant. | TENANT.TENANT_NAME |
| Department | Enables data to be organized by the name of the department for which iWD prioritizes and routes tasks. | DEPARTMENT.DEPARTMENT_NAME |
| Capture Point | Enables data to be organized by the name of the capture point that acquired tasks from the source system. | CAPTURE_POINT.CAPTURE_POINT_NAME |
| Process | Enables data to be organized by the name of the business process, which is a core attribute of tasks and work items that define strategies for how to route them. | PROCESS.PROCESS_NAME |
| Media Type | Enables data to be organized by media type. | MEDIA_TYPE.MEDIA_TYPE_NAME |
| Business Value Range 100 | Enables data to be organized by the range in which the business value of the task capture falls.
Ranges are character values that have a granularity of 100—for example: 1–100, 101–200, 201–300. |
BUSINESS_VALUE.BUSINESS_VALUE_RANGE_100 |
| Day | Enables data within the reporting interval to be organized by a particular day within a month and year. Day values are presented in YYYY-MM-DD format. | DATE_TIME.LABEL_YYYY_MM_DD |
Metrics in the Capture Point Business Value Report
| Metric | Description | Source or Calculation |
|---|---|---|
| Entered | The total number of new tasks that entered the iWD system through this capture point during the reporting interval. | IWD_AGG_TASK_CAPT_[Y,Q,M,W,D,H,15].NEW_TASK_COUNT |
| Finished | The total number of tasks that entered the iWD system through this capture point and were completed during the reporting interval. | IWD_AGG_TASK_CAPT_[Y,Q,M,W,D,H,15].CMPL_TASK_COUNT |
| Avg Finish Time (Fmt) | The average amount of time that elapsed before tasks that entered the iWD system through this capture point were completed. This measure includes the time that tasks were backlogged as well as work time. | Calculated based on the value of the Finish Time and Finished metrics, where:
|
| Avg Accept Time (Fmt) | For completed tasks, the average amount of time that elapsed before tasks that entered the iWD system through this capture point were assigned to a resource for the first time. This metric reflects how long, on average, tasks were backlogged. | Calculated based on the value of the Accept Time and Finished metrics, where:
|
Customizing the report
Some dashboards contain attributes representing different granularity of an attribute, such as Priority Range, or Business Value. You can change the granularity of the data shown in the report by replacing this attribute with another; this procedure uses Business Value Range in the Capture Point Business Value Report as an example.
Procedure: Changing the granularity of the report data
Purpose: Change the granularity range of an attribute. In this example, we change the Capture Point Business Value Report, which by default is configured to use the "Business Value Range 100" attribute.
Steps
- Log in with an account having Administrator privileges.
- Open and run the report. It's best to modify a copy of the report, rather than the original:
- Click Report Home > Save As.
- In the Save As editor:
- In the Save in list, choose one of the following paths:
- Shared Reports > Custom — to make the modified report accessible to other users.
- My Reports — to make the modified report accessible only to you.
- Enter a Name for the report, and optionally modify the Description.
- Click OK.
- In the Save in list, choose one of the following paths:
- In the Report Saved editor, click Run newly saved report, and answer the prompts to generate the report.
- You can now modify the report:
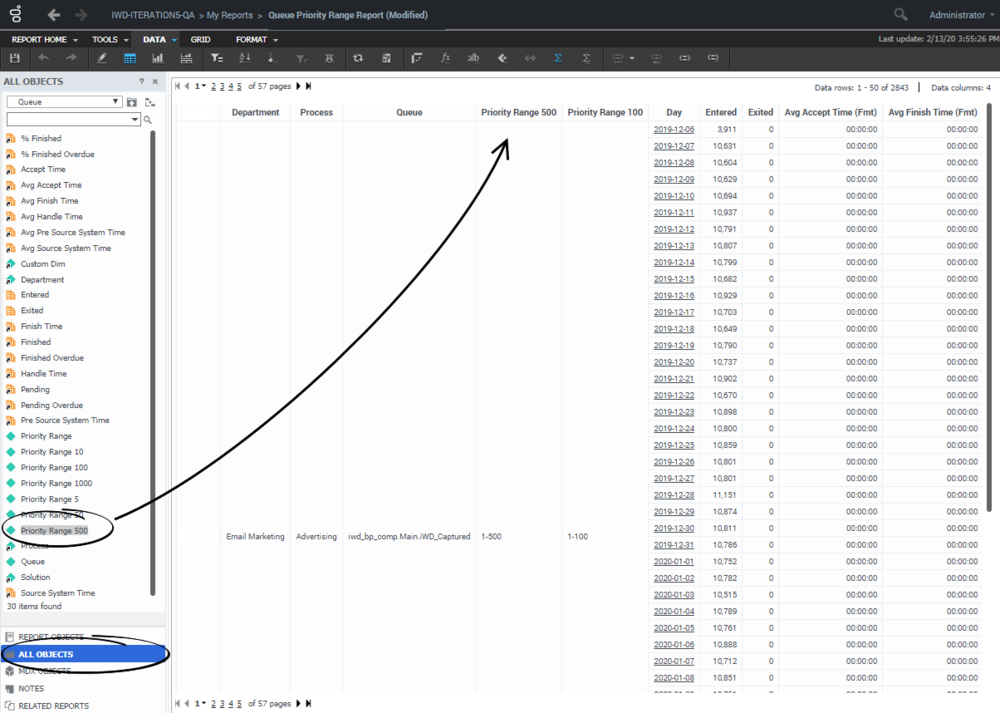
- From the Report Objects menu, click All Objects.
- In the All Objects hierarchy, drag the new attribute (for example Business Value Range 1000) into the report,releasing the left mouse button when over the appropriate location in the report.
- Drag the unwanted attribute (for example Business Value Range 100) out of the report grid.
- From the Report Objects menu, click All Objects.
- Click Report Home > Save. Rerun the report to verify the results.


