Contents
Configuration of the LFMT Database
For each LFMT Indexer/Collector pair, a separate LFMT database is required. New Comment
This section describes how to initialize a LFMT Database.
The configuration of a Database Access Point (DAP) for a LFMT Database is also detailed.
- The LFMT Database (Oracle, MS-SQL or Postgres) is NOT the same as the GAX Database - its a different/separate database solely for LFMT Collector/Indexer pairs
- The GAX database is still required for GAX functionality
- A new Database must be created for LFMT functionality - a new/separate database for each LFMT Collector/Indexer pair (i.e. LFMT_Chicago_1)
- LFMT supports TLS database connections as of LFMT package version 8.5.104.10 (LFMT Collector 8.5.104.04+, LFMT Indexer 8.5.104.02+, LFMT Client 8.5.104.02+)
Initializing the LFMT Database
- Navigate to the <LFMT Collector Install Directory>\utilities\dbscripts directory.
- The table below lists the RDBMS database types and their corresponding LFMT initialization script names contained in the dbscripts directory.
- Determine/locate the LFMT Database initialization script that corresponds to your RDBMS and LFMT deployment type (new install or upgrade).
DBMS Script Notes Microsoft SQL lfmdb_8.5.101.XX_mssql.sql Use this for a new install of LFMT 8.5.10x.xx Oracle lfmdb_8.5.101.XX_ora.sql Use this for a new install of LFMT 8.5.10x.xx PostgreSQL lfmdb_8.5.101.XX_postgres.sql Use this for a new install of LFMT 8.5.10x.xx Microsoft SQL lfmdb_8.5.000.xx_to_8.5.101.xx _mssql.sql Use this when upgrading from LFMT 8.5.000.xx to LFMT 8.5.101.xx Oracle lfmdb_8.5.000.xx_to_8.5.101.xx _ora.sql Use this when upgrading from LFMT 8.5.000.xx to LFMT 8.5.101.xx PostgreSQL lfmdb_8.5.000.xx_to_8.5.101.xx _postgres.sql Use this when upgrading from LFMT 8.5.000.xx to LFMT 8.5.101.xx Microsoft SQL lfmdb_8.5.100.xx_to_8.5.101.xx _mssql.sql Use this when upgrading from LFMT 8.5.100.xx to LFMT 8.5.101.xx Oracle lfmdb_8.5.100.xx_to_8.5.101.xx _ora.sql Use this when upgrading from LFMT 8.5.100.xx to LFMT 8.5.101.xx PostgreSQL lfmdb_8.5.100.xx_to_8.5.101.xx _postgres.sql Use this when upgrading from LFMT 8.5.100.xx to LFMT 8.5.101.xx - Via your respective RDBMS UI, load and execute the initialization script that corresponds to your RDBMS and LFMT deployment type (new install or upgrade).
- The result of the above is a new RDBMS LFMT database (i.e. LFMT_Chicago_1) that a LFMT Collector/Indexer pair can connect to
- When deploying multiple LFMT Collector/Indexer pairs a new RDBMS database is required for each and every LFMT Collector/Indexer pair
Provisioning a Database Access Point for the LFMT Database
- Log into GAX, and navigate to Configuration Manager.
- From the Environment section, select Application Templates.
- In the Application Templates section, enter a name for the DAP Template in the Name text field.
- Choose Database Access Point as the template type from the Type dropdown.
- Enter 8.5 for the DAP version in the Version text field.
- Click the Save button to save the new application template.
- Once the Application Template has been created, navigate to Configuration Manager.
- From the Environment section, select Applications.
- In the Applications section, select New.
- In the New Properties pane, select the General tab. Complete the following:
- In the General tab, enter a name (i.e. DAP_LFMT_Chicago_1) for the LFMT DAP in the Name field.
- Click on the Template field and navigate to the Application Template created above.
- Click on the Host field and navigate to the host where LFMT Database resides.
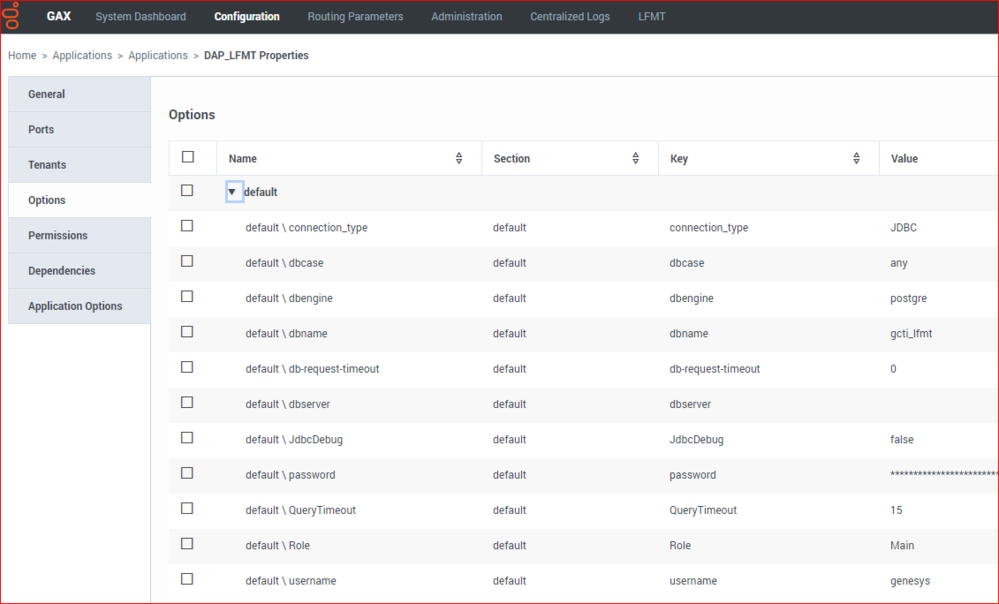
- Choose JDBC as the connection type from the Connection Type dropdown.
- Choose Any as the case conversion type from the Case Conversion dropdown.
- Choose Main as the role from the Role dropdown.
- Choose False as the role from the Debug dropdown.
- Enter 15 for the DB timeout in the JDBC Query Timeout text field.
- Choose your DBMS type (i.e. postgres) from the DBMS Type dropdown.
- Enter the LFMT Database Name (i.e. LFMT_Chicago_1) in the Database Name text field.
- Enter the LFMT Database Username in the Username text field.
- Enter the LFMT Database Password in the User Password text field.
- Select the Ports tab. Complete the following:
- Set the value of the default communication port to the listening port of your DBMS. Default ports are listed below:
- For PostgreSQL the default listening port is 5432.
- For Oracle the default listening port is 1521.
- For MSSQL the default listening port is 1433.
- As of LFMT package version 8.5.104.10, TLS can be enabled for the connection to the LFMT database. To enable TLS, set the listening mode for the defined port to "secure".
- Set the value of the default communication port to the listening port of your DBMS. Default ports are listed below:
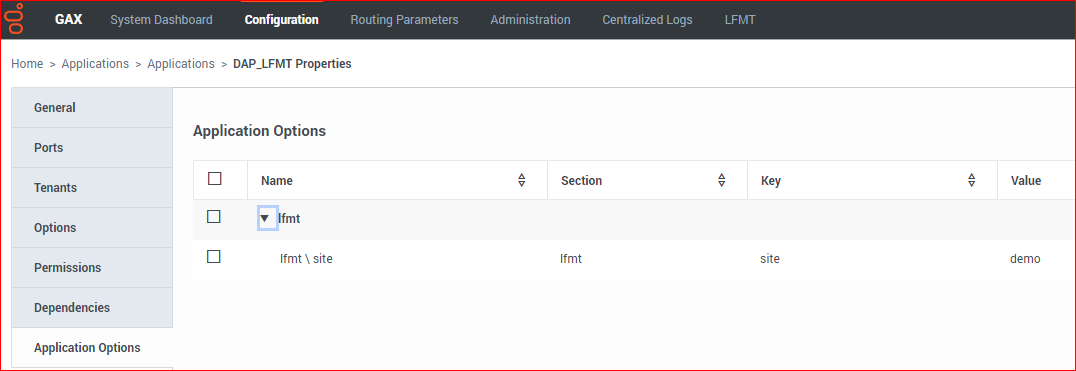
- Select the Application Options tab. Review and configure the LFMT DAP options.
- Create the section lfmt.
- Create the option site.
- Set the value of the site option (i.e. Chicago_1) to a unique identifier for the LFMT Database.
Configuring Connections to the LFMT DAP/Database
The LFMT Database stores information accessed by the LFMT Client (GAX), the LFMT Indexer, and the LFMT Collector, therefore each LFMT application requires a connection the respective LFMT DAP.
This section describes how to configure connections to the LFMT database.
Configuring GAX for use with the LFMT Database
- Log into GAX, and navigate to Configuration Manager.
- From the Environment section, select Applications.
- In the Applications section, select the GAX Application configured for use with the LFMT Client.
- In the Application Properties pane, select the Connections tab.
- In the Connections tab, add a connection to the LFMT DAP (i.e. DAP_LFMT_Chicago_1) to which GAX will connect.
- Click the Save button to save changes to the application.
- Restart GAX.
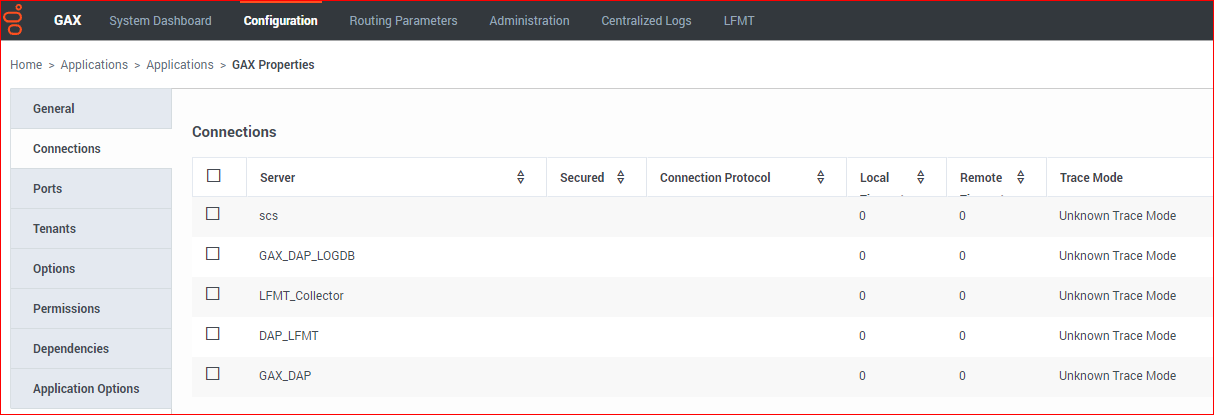
The example below shows the GAX application having a connection to the DAP_LFMT application:
Configuring LFMT Indexer for use with the LFMT Database
- Log into GAX, and navigate to Configuration Manager.
- From the Environment section, select Applications.
- In the Applications section, select the LFMT Indexer application that will access the LFMT Database.
- In the Application Properties pane, select the Connections tab.
- In the Connections tab, add a connection to the LFMT DAP to which LFMT Indexer will connect.
- Click the Save button to save changes to the application.
- Restart LFMT Indexer.
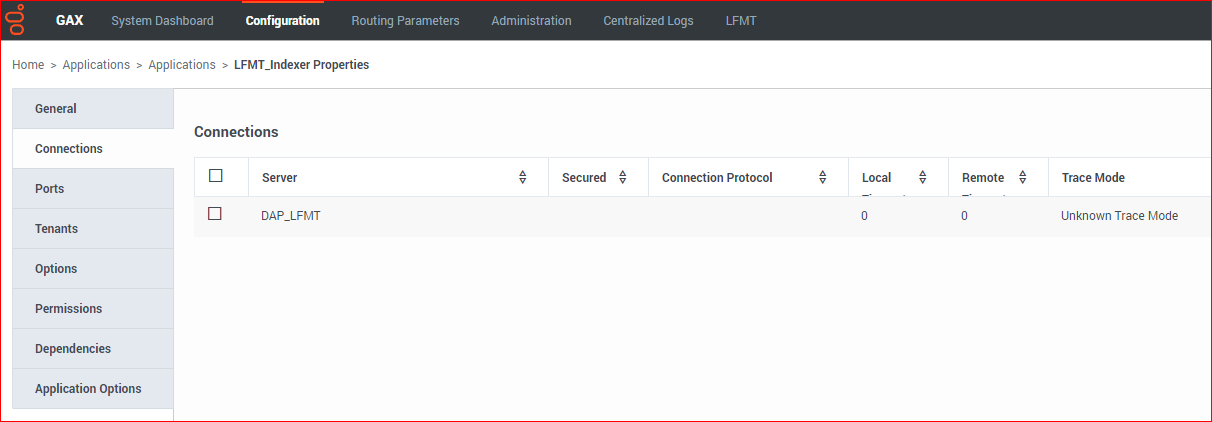
The example below shows the LFMT_Indexer application having a connection to the DAP_LFMT application:
Configuring LFMT Collector for use with the LFMT Database
- Log into GAX, and navigate to Configuration Manager.
- From the Environment section, select Applications.
- In the Applications section, select the LFMT Collector that will access the LFMT Database.
- In the Application Properties pane, select the Connections tab.
- In the Connections tab, add a connection to the LFMT DAP to which LFMT Collector will connect.
- Click the Save button to save changes to the application.
- Restart LFMT Collector.
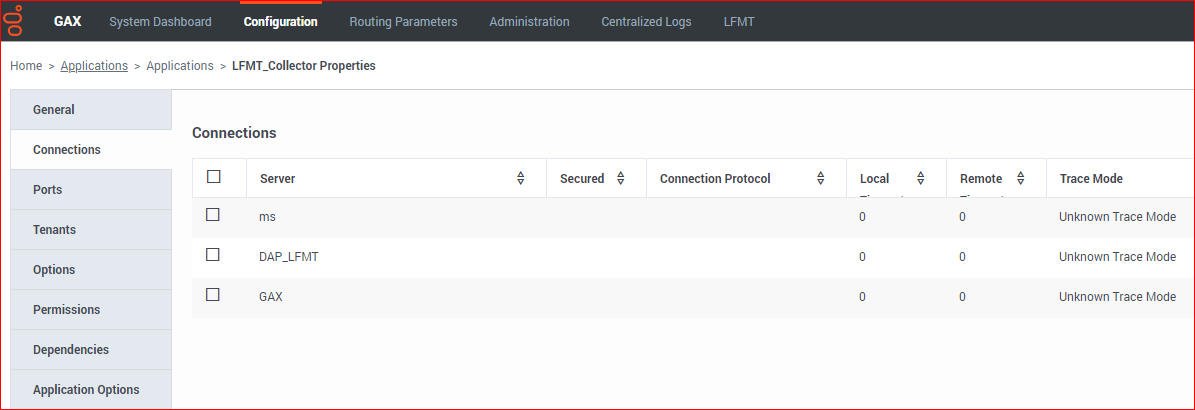
The example below shows the LFMT_Collector application having a connection to the DAP_LFMT application:
