Installing The Deployment Package
Contents
This section explains how to begin installation on the supported operating system by using the Procedure: Installing Interaction Workspace Deployment Package on the Windows operating system.
- Some releases of Workspace include Workspace language packs (localized User Interface and Help). These procedures include information about how to install language packs either as part of the Workspace deployment or after you have deployed Workspace.
- Genesys recommends that you always install the release of Workspace for which the language pack was developed rather than installing a language pack on a previously deployed release of Workspace. For example, you should not install an 8.5.1 language pack on top of an 8.5.0 release of Workspace; doing so might result in some UI text being displayed in English or some UI elements being incorrectly labelled.
- If you are not deploying from the Workspace International CD/DVD, you must manually add Language Packs to your deployment package.
Procedure: Installing Interaction Workspace Deployment Package on the Windows operating system
Purpose: To install the deployment files for Interaction Workspace on the Windows web server.
|
|
Prerequisites
- Have Administrative rights to the web server
- Framework .NET 2.0 installed
Start
- On your desktop, open the Interaction Workspace CD/DVD or the Interaction Workspace IP and double-click the Setup.exe file.
You might be asked to reboot your system to delete or rename certain system files before the Installation Wizard runs. - On the Welcome panel, do one of the following:
- Click Next to begin the installation procedure.
- Click Cancel to exit the Genesys Installation Wizard.
- Click About to open the Interaction Workspace ReadMe file in your default browser.
If you clicked Next, the Select Options panel is displayed.
- Choose Prepare a ClickOnce package, and click Next.
- Click Back to return to the Welcome panel.
- Click Cancel to exit the Genesys Installation Wizard.
For more information about installation options, see Table - Interaction Workspace Install Mode Deployment Packages).
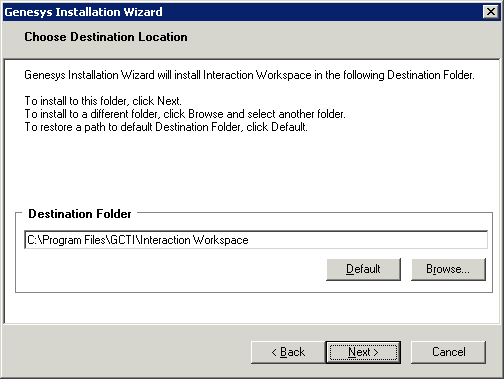
If you clicked Next, the Choose Destination Location panel is displayed (see Figure - Choose Destination Location panel of the Genesys Installation Wizard).
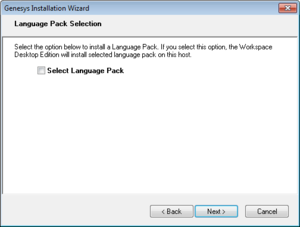
Select Select Language Pack to display the list of available language packs.
To select a language for installation, select it in the left hand box then click Add. The language is moved to the right hand box. To de-select a language for installation, select it and click Remove. The language is moved back to the left hand box and will not be installed. After you have added to the right hand box the languages that you want to install, do one of the following:
- Click Next to continue the installation procedure.
- Click Back to return to the Select Options panel.
- Click Cancel to exit the Genesys Installation Wizard.
- Type a location in the Destination Folder text box.
- Click Default to reset the location to the default location.
- Click Browse to navigate to a destination folder.
- Click Next.
- Click Back to return to the Select Options panel.
- Click Cancel to exit the Genesys Installation Wizard.
If you clicked Next, the Ready to Install panel is displayed.
- Click Install to install Interaction Workspace on your web server.
- Click Back to return to the Choose Destination Location panel.
- Click Cancel to exit the Genesys Installation Wizard.
If you clicked Next, Interaction Workspace is installed in the location that you specified. When installation is complete, the Installation Complete panel is displayed.
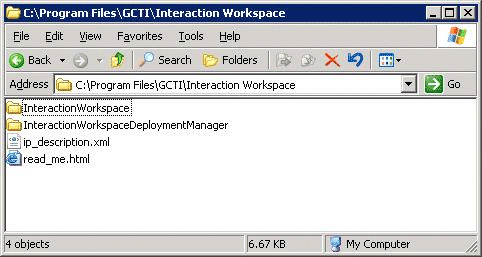
Figure 13 - Contents of the Interaction Workspace install disc or image copied onto the web-server host shows the files that are installed by the Prepare a ClickOnce package option (for more information about installation options, see Table - Interaction Workspace Install Mode Deployment Packages).
- The InteractionWorkspace folder contains the Interaction Workspace application files.
- The InteractionWorkspaceDeploymentManager folder contains the application files required for deployment, including the Deployment Manager application: InteractionWorkspaceDesktop.exe. This folder contains the following subfolder:
- WebPublication"Contains the publish.htm and setup.exe (the bootstrap for client-side prerequisites). For more information, see Procedure: Deploying the Interaction Workspace downloadable package (ClickOnce) on your web server.
End Next Steps


