Adding and Removing Language Packs
Use the following procedures to manually add and remove Workspace Language Packs after you have deployed Workspace.
Contents
Adding a Language Pack to Workspace after Deployment
Language packs (localized content for Workspace) are not always released at the same time as the English version of Workspace, and new language packs are added as demanded by Genesys' customers.
Language packs are available as part of the Genesys International DVD/IP. If you are installing a new release of Workspace from an International DVD/IP, use the standard ClickOnce, Developer, and Non-ClickOnce procedures in the other tabs of this topic.
Use the following procedure to add a language pack to your existing Workspace deployment.
Procedure
Installing a Workspace Language Pack on an existing Workspace deployment or ClickOnce package
Purpose: To install a Workspace language pack on your existing Workspace deployment on a client desktop or on an existing ClickOnce package.
Prerequisites
Workspace must already be installed using one of the following deployment types:
Start
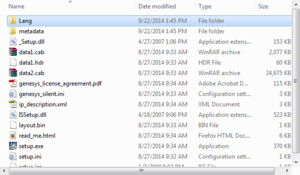
- If you are deploying from the Workspace Desktop Edition DVD, open the Lang folder (refer to the Lang (Language) folder in the Workspace Install Package figure). If you are installing from a language specific IP, go to Step 3.
- The Lang folder contains folders named with three-letter language codes. These folders contain the language specific language pack installers (refer to the Three letter language-code folders in the Lang folder figure). Open the folder that contains the language installer that you want to use.
- Double-click the setup.exe file to launch the language pack installer.
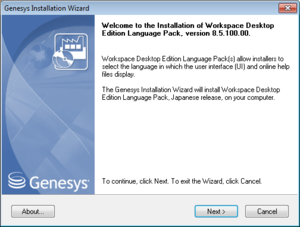
The Genesys Installation Wizard launches and the Welcome panel is displayed.
- On the Welcome panel, do one of the following:
- Click Next to begin the installation procedure.
- Click Cancel to exit the Genesys Installation Wizard.
- Click About to open the Workspace Desktop Edition ReadMe file in your default browser.
- On the Select Installed Application panel, do one of the following:
- Select the application to which you want to add a language pack and click Next to begin the installation procedure.
- Click Cancel to exit the Genesys Installation Wizard.
- Click Back to return to the splash screen.
- In the Ready to Install panel, do one of the following:
- Click Install to install the language pack.
- Click Cancel to exit the Genesys Installation Wizard.
- Click Back to return to the Select Installed Application panel.
- Click Finish to close the Installation Complete panel and complete the installation.
- Depending on whether you are updating an existing installation or adding a language pack to a ClickOnce package, do one of the following:
- If you are adding a language to an existing non-ClickOnce installation, launch Workspace and select the new language from the Login view Language drop-down menu.
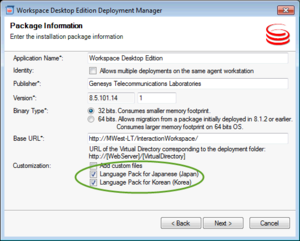
- If you are adding a language pack to a ClickOnce installation, launch Workspace Desktop Edition Deployment Manager (InteractionWorkspaceDeploymentManager.exe). In the Package Information panel, select the installed language packs that you want to add to your ClickOnce package, then complete the deployment.
End
Removing a Language Pack From Workspace after Deployment
For non-ClickOnce deployments, use Add/Remove Programs to select which Language Packs you want to remove from your workstation.
For ClickOnce deployments, run Workspace Deployment Manager and de-select language packs in the Package Information panel and push new ClickOnce package to your web server.


