Configuration of TLS Connections
TLS Connections to Configuration Server
LFMT Indexer and LFMT Collector both support secure connections to Configuration Server's Auto-Detect port. This section describes how to configure these secure connections. It is assumed that the person configuring the secure connection has already become familiar with the Genesys Security Deployment Guide and configured the Configuration Server Auto-Detect port.
Important
When creating certificates using OpenSSL as described in the Genesys Security Deployment Guide ensure the default Secure Hash Algorithm is at minimum SHA-2. This can be done by editing the .\ca_conf\ca.conf file created by the create_ca.sh script so default_md = sha256 prior to creating certificates.Important
If LFMT Indexer and LFMT Collector are to be deployed on a Linux host, ensure the private key is in PKCS #8 format. For more information on converting keys to PKCS #8 for use with Java based Genesys PSDK applications, refer to the Genesys Security Deployment Guide. Installing Certificates and Certificate Authorities on the LFMT Server Host
This section describes how to install the certificates and certificate authorities used for secure connections on the LFMT Server Host.
On Linux
- If not already completed, install the Genesys Security on UNIX package and configure the system environment variable LD_LIBRARY_PATH as per the Genesys Security Deployment Guide.
- Copy the certificate, the certificate key, and the certificate authority file to a location on the LFMT Server Host.
- Ensure the certificate, the certificate key, and the certificate authority file are readable by the user that starts LFMT Indexer and LFMT Collector.
On Windows
- Copy the certificate, the certificate key, and the certificate authority file to a location on the LFMT Server Host.
- Ensure the certificate, the certificate key, and the certificate authority file are readable by the user that starts LFMT Indexer and LFMT Collector.
- From the Windows Start menu, select Run, and then execute the mmc command to start the Microsoft Management Console (MMC).
- The Microsoft Management Console should be opened under the user who starts LFMT Indexer and LFMT Collector. If this is the Local System account, you will need to open the console as the Local System user. This can be done using the PSTools psexec application with the following command:
psexec.exe –i –s mmc.exe
- PSTools can be downloaded from http://technet.microsoft.com/en-US/sysinternals.
Provisioning LFMT Indexer/Collector for Secure Connections
This section describes how to provision LFMT Indexer/Collector for secure connections to the Auto-Detect port of Configuration Server. Use this procedure for both simple and mutual TLS connections.
- Log into GAX, and navigate to Configuration Manager.
- From the Environment section, select Applications.
- In the Applications section, locate and open the LFMT Indexer/Collector application.
- In the General tab, specify the Auto-Detect port of the primary and backup Configuration Server for the port and backupport arguments in the Command Line Arguments respectively.
- In the Connections tab, select Add. Add a connection to the primary Configuration Server being sure to select the Auto-Detect port in the Port ID drop-down.
- In the Connections tab, select Add. Add a connection to the backup Configuration Server being sure to select the Auto-Detect port in the Port ID drop-down.
- In the General tab, specify the Certificate, Certificate Key, and the Trusted CA installed on the LFMT Server Host.
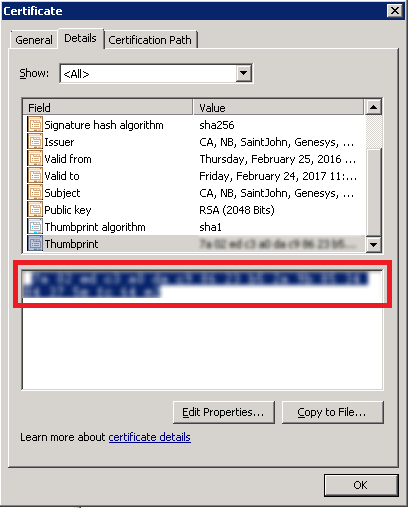
- Certificate: For Windows this will be the thumbprint of the certificate shown in the Properties of the certificate in MMC Certificates snap-in. For Linux, this will be the complete path to the certificate file. Ex. /home/genesys/certs/collector_host.pem
- Certificate Key: For Windows this will be the thumbprint of the certificate shown in the Properties of the certificate in MMC Certificates snap-in (this normally the same value as used in the Certificate field). For Linux, this will be the complete path to the certificate key file. Ex. /home/genesys/certs/collector_host_java_priv_key.pem
- Trusted CA: For Windows this will be the thumbprint of the Trusted Root Certificate Authority shown in the Properties of the certificate authority in MMC Certificates snap-in. For Linux, this will be the complete path to the certificate authority file. Ex. /home/genesys/certs/ca_cert.pem
- Click Save to commit the changes.
Tip
As an alternative to configuring the Certificate, Certificate Key, and the Trusted CA for the LFMT Indexer and Collector at the application level, certificates and certificate authorities can be assigned on the LFMT Server Host Object in GAX. This page was last edited on November 29, 2019, at 14:41.
Comments or questions about this documentation? Contact us for support!

