Managing DID Groups with GAX
All procedures begin in the DID Groups main page. To get there:
- Log into Genesys Administrator Extension (GAX) as a tenant user.
- Select DID Groups from Configuration > Voice Platform Tile menu.
At the end of each procedure, click Apply to save changes.
You can sort the list view of DID Groups by using the arrowhead symbol in the DID Groups list view header in the top right corner.
Creating a New DID Group
- Click New.
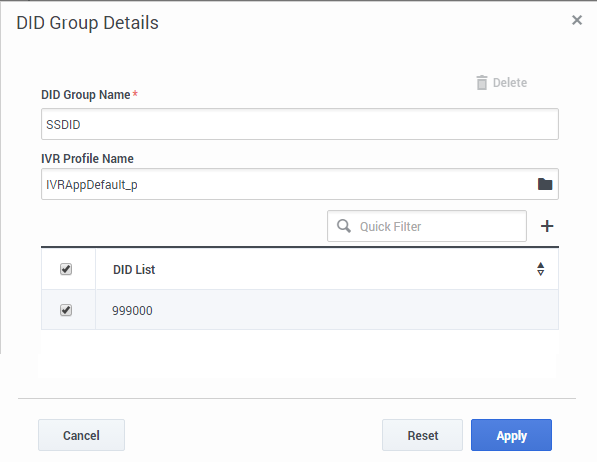
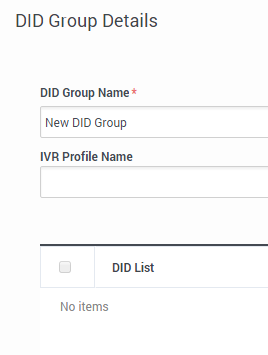
- Open the DID Group Details dialog. Specify the following details to create a new DID Group:
- DID Group Name - Mandatory to specify a unique name of the DID Group to be created.
- IVR Profile Name - Optional to specify an existing IVR Profile Name for the DID Group.
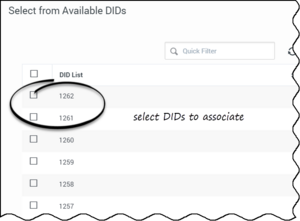
- Use the '+' icon to add a single DID from the available list. Optionally you can use the quick filter to filter the DIDs in the list to include or exclude by selecting and clearing the box to associate with the newly created DID Group.
- You can also associate multiple or bulk DIDs to a DID Group. For more details on adding a single or multiple DIDs to a group, refer to Adding DIDs to a DID group. Refer to Add DIDs to add either a single or bulk DIDs in GAX.
- Click Apply to save the DID Group.
Modifying an Existing DID Group
- Double click the DID Group to edit.
- Make the necessary changes to the DID Group.
- Click Apply to save the changes.
Adding DIDs
- In GAX, navigate to Environment > Tenants > Option.
- In the gvp-dids section, add the required DIDs.
- You can add a single DID or a range (for example, 1000-1025), by clicking the Add button.
- Or, add multiple or bulk DIDs by using the More > Import feature by importing the bulk DIDs from a .CSV file.
- Note: The CSV file is formatted to contain the columns: Section, Key, and Value. You can also define a DID range in the Key column in the CSV file.
Adding DIDs to a DID group
After adding DIDs in GAX, you can associate them to DID Groups.
- In GAX, navigate to Configuration > Voice Platform Tile > DID Groups.
- In the DID Groups page, double click the DID Group record to display the DID Group Details page.
- If you want to associate a single DID to the group,
- If you want to associate multiple or bulk DIDs to a DID Group,
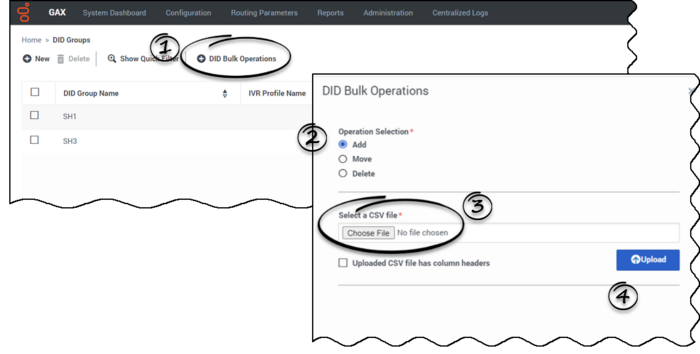
- Click the DID Bulk Operations feature from the DID Groups page.
- In the DID Bulk Operations dialog, select the type of operation you want to perform on the DIDs. You can select one of the following:
- Add - to associate the DIDs to the DID Group.
- Move - to move the given DIDs from one DID Group to another.
- Delete - to delete the DIDs association from the DID Group.
- Select a CSV file - select the .CSV file that contains the bulk DID details to be associated with the DID Group.
- Note: The .CSV file is formatted to contain the columns: DID, DID Group, Tenant, and IVR Profile Name.
- Click Upload.
Important
You can associate a DID range (for example, 1000-1025) to a DID Group by defining the range value in the CSV file. However, the DID range is not displayed in the Select from Available DIDs dialog for direct selection. This page was last edited on July 10, 2024, at 08:07.
Comments or questions about this documentation? Contact us for support!


