Procedure: Filling out the HTML Part Tab
Prerequisites
For the HTML version of a standard response, you must first create the standard response as a standalone HTML file, using whatever authoring tool or text editor you prefer.
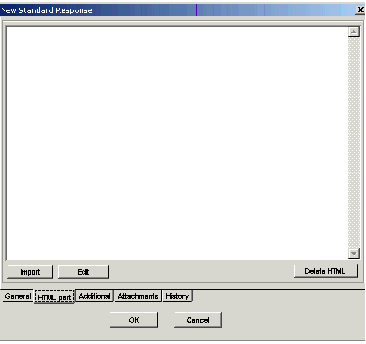
- Start on the HTML part tab, as shown in "HTML Part Tab."
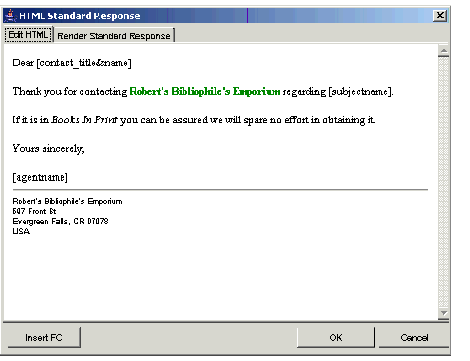
2. On the HTML part tab, click Import and browse to the HTML file that you want to import, then click OK. The HTML Standard Response dialog box appears, as shown in "HTML Standard Response."
Important
In the HTML version of a standard response, links to resources that are used in the content, such as image files, must use absolute URLs; embedded graphics or relative links are not supported. Also, these resources must be available on the web through an HTTP server at the time that the standard response containing this HTML is sent to the customer.This dialog box opens with its Edit HTML tab. On this tab you can do the following:
- Insert, delete, copy, and paste text. Pasted text retains its attributes. Inserted text takes on the attributes of its insertion point.
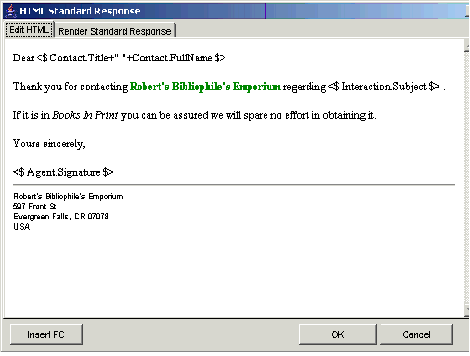
- Insert field codes. Note that the imported file in "HTML Standard Response" includes bracketed expressions like [subjectname] to indicate where field codes should be inserted. Using the Insert FC button to insert field codes produces the result shown in "HTML Standard Response with Field Codes Inserted."
Important
Generally, plain text part and HTML part should have the same semantic content from the call center point of view. These parts should contain the same field codes and differ, perhaps, only in the content that requires HTML representation, such as pictures or rich text capabilities. If both parts are present, it will depend on the email clients how such MIME (email) content is displayed. For example, if Microsoft Outlook has AutoPreview turned on, the preview may show the plain text version whereas the full display shows the HTML version. For this reason you should be careful that the plain text and HTML versions have identical content.Go to the Render Standard Responses tab to see the standard response with the field codes rendered in the same way as when you click Check Field Codes on the General tab, as described in Inserting field codes into a standard response.
Next Steps
-
Go on to the Additional tab.
This page was last edited on January 30, 2020, at 23:06.
Comments or questions about this documentation? Contact us for support!


