
Install the Plug-in for Interaction Workspace
| Purpose: List the Installation tasks for the Genesys Web Engagement Plug-in for Interaction Workspace. |
Install the Genesys Web Engagement Plug-in for Interaction Workspace on Windows
Prerequisites
- Interaction Workspace, version 8.1.301.10 and later, is installed.
- Installation must be driven from the host where you intend to install the plug-in.
Start
- On your desktop, open the Genesys Web Engagement CD/DVD or the Genesys Web Engagement IP, navigate to the web_engagement_iws_plug-in\windows folder, and double-click the Setup.exe file.
- On the Welcome panel, do one of the following:
- Click Next to begin the installation procedure.
- Click Cancel to exit the Genesys Installation Wizard.
- Click About to open the Genesys Web Engagement ReadMe file in your default browser.If you clicked Next, a list of installed application is displayed.
- Select the Interaction Workspace IP and click Next.
- On the Ready to install panel, click the Install button to install the plug-in.
- Complete the installation. As a result, the following files were copied to the Interaction Workspace installation directory:
- InteractionWorkspace\Languages\Genesyslab.Desktop.Modules.WebEngagement.en-US.xml,
- InteractionWorkspace\Genesyslab.Desktop.Modules.WebEngagement.dll
- InteractionWorkspace\Genesyslab.Desktop.Modules.WebEngagement.module-config
- InteractionWorkspace\Newtonsoft.Json.Net35.dll
End
Next Steps
![]() Import the Interaction Workspace Plug-in template
Import the Interaction Workspace Plug-in template
Import the Interaction Workspace Plug-in template
![]() Purpose: Import the template which enables you to create the configuration of the Web Engagement servers in the Configuration Server.
Purpose: Import the template which enables you to create the configuration of the Web Engagement servers in the Configuration Server.
Start
- Open Genesys Administrator and navigate to PROVISIONING > Environment > Application Templates.
- In the Create menu of the Tasks panel, click on the Upload Template link.
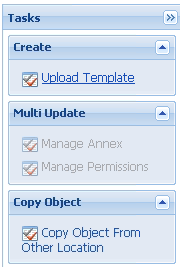 Upload Template link in the Tasks panel
 - Click the Add button of the Click 'Add' and choose application template (APD) file to import dialog box.
- Browse the Web_Engagement_iWS_Plug-in_811.apd file available in the templates directory of your installation CD. The Configuration tab for the new template opens.
- Click the Import Metadata button.
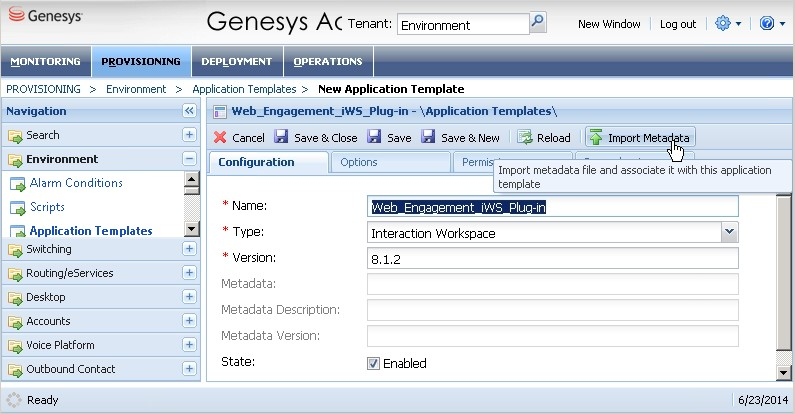 Click the Import Metadata button.
 - Select Web_Engagement_iWS_Plug-in_811.xml metadata file and click Open. The metadata fields in the Configuration tab are now filled.
- Click Save & Close.


End
Next Steps
![]() Add a connection to the Backend Server
Add a connection to the Backend Server
Add a connection to the Backend Server
![]() Purpose: Add a connection to the Backend Server to Interaction Workspace.
Purpose: Add a connection to the Backend Server to Interaction Workspace.
Start
- In Genesys Administrator, navigate to Provisioning > Environment > Applications, select the Interaction Workspace application and click the Edit... button.
- Configure the connection:
- In the Connections section, click the Add button. The Browse Applications dialog opens.
- Select the Web Engagement Backend Server application and click OK. The Backend Server is added to the list of Connections.
End
Next Steps
![]() Configure Authentication (optional)
Configure Authentication (optional)
Configure Authentication (optional)
![]() Purpose: To configure the security options to support authentication for the REST API.
Purpose: To configure the security options to support authentication for the REST API.
Prerequisites
- Your Web Engagement Backend Server supports authentication. See Authentication for details.
Start
- In Genesys Administrator, navigate to Provisioning > Environment > Applications, select the Interaction Workspace application and click the Edit... button.
Note: Before configuring the authentication options, be sure to read about each option to help determine the correct values for your deployment: - Click the options tab and then click New.
- In the New Option window, configure the following:
- Set Section to gwe:security
- Set Name to auth-scheme
- Set Value to your authentication scheme. For example, Basic.
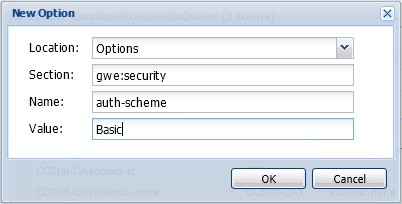
- Click OK
- Complete steps a-d to configure the remaining security options:
Your configuration options for Interaction Workspace should now have a new section for the Genesys Web Engagement security options:Section Name Value gwe:security user-id Your user ID. gwe:security password Your user password.
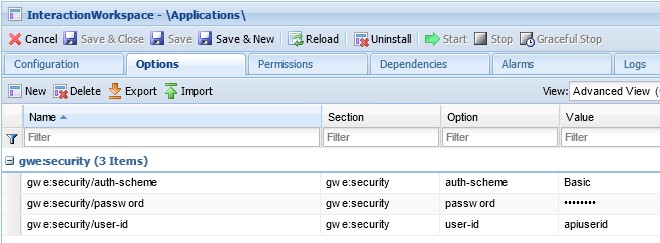 New security options for Genesys Web Engagement.
 - Click Save & Close.


End
Next Steps
![]() Configure Role-Based Access Control for Web Engagement
Configure Role-Based Access Control for Web Engagement
Configure Role-Based Access Control for Web Engagement
![]() Purpose: To accomplish some higher-level business or configuration goal.
Purpose: To accomplish some higher-level business or configuration goal.
Prerequisites
Start
- Open Genesys Administrator and navigate to PROVISIONING > Accounts > Roles
- Edit or create a Role responsible for managing Web Engagement in Interaction Workspace; for instance, create the Agent can Monitor Web Engagement role by clicking the New button.
- Select the Role Privileges tab.
- In the Add/Remove Products top panel, enable Interaction Workspace and expand the Interaction Workspace Web Engagement Privileges section.
- Set the Allowed value for the Agent - Can Monitor Web Activity option .
 Select Allowed
 - In the Members section of the Configuration tab, add users or groups who should get this role.
- Click Save and close.

End
Next Steps
![]() Back to Task Table
Back to Task Table
This page was last edited on July 17, 2020, at 15:48.
Comments or questions about this documentation? Contact us for support!