
Callback Block
Contents
You can use the Callback block in the Assisted Service phase of your Default type application for inbound calls. This block allows the caller to request a callback when the next agent is available (Immediate callback), or to schedule a callback for a more convenient time (Scheduled callback).
Required Variables
The table below lists required user variables for the callback feature. You must create these variables before using the Callback block.
| Variable | Default Value | Description |
|---|---|---|
| offerImmediate | true | Stores whether Immediate callback is offered. Set the default value to false if you do not want to offer this callback type, or if you want to determine this value at runtime. |
| offerScheduled | true | Stores whether Scheduled callback is offered. Set the default value to false if you do not want to offer this callback type, or if you want to determine this value at runtime. |
| offerHold | true | Stores whether callers can decline the callback and remain on hold. Set the default value to false if you do not want to offer this callback type, or if you want to determine this value at runtime. |
| vq | Example: 'Callback_VQ' | Specifies the Virtual Queue name to use for callback. |
| skill_expr | Example: 'Billing>0' | Specifies a skill expression to use when routing callbacks. |
Call Routing tab
Specify the variables and rules to use when offering callback.
In the drop-down menus for Immediate, Scheduled, and Hold, select the variables that you created in the Required Variables section. See the figure below for an example.
If you are offering Immediate callback, you can also set the following options:
- Estimated Wait Time is greater than or equal to - Specify the minimum value for Estimated Wait Time, in minutes, before Immediate callback is offered. Set this value to 0 to always offer Immediate callback.
- Position in Queue is greater than or equal to - Specify the minimum queue position before Immediate callback is offered. Set this value to 0 to always offer Immediate callback.
In the Skill Expression Based Routing section, select the variables that you created in the Required Variables section. See the figure below for an example.

Offer Callback tab
In the drop-down menu, select Template - Offer Callback to use the pre-packaged template for callback.
The inbound callback feature is provided by a series of shared modules. The Callback block hands off the call to one main shared module that guides callers through the callback process. This shared module might rely on one or more supporting shared modules to extend its functionality (such as to collect a phone number or negotiate a time for Scheduled callback). When the callback process is complete, the main shared module returns the call to your application.
For ease of use, you can use shared module templates that provide pre-packaged callback functionality. The templates are read-only and cannot be edited or deleted. If you want to modify these templates, go to the Shared Modules list and click Clone beside a template to create a copy for editing.
Connect Customer tab
In the drop-down menu, select Template - Calling Back to use the pre-packaged template for callback.
The outbound callback feature is provided by a shared module.
For ease of use, you can use a shared module template that provides pre-packaged callback functionality. The template is read-only and cannot be edited or deleted. If you want to modify this template, go to the Shared Modules list and click Clone beside the template to create a copy for editing.
Advanced tab
Greetings
Enable the check box beside Customer Greeting and/or Agent Greeting to play an audio file to that person while the call is being connected.
For customers, you might use this feature to play a legal disclaimer, or to announce that the call might be recorded (if you use call recording in your contact center). For agents, you might use a variable to announce the customer name or other relevant information.
After you enable Customer Greeting and/or Agent Greeting, you can select an audio file to play by clicking the icon in the Announcement field. This is useful for customer greetings that play a static disclaimer audio file.
Optionally, enable the Var? check box to use a variable to dynamically select the audio file. This is useful for agent greetings that use a variable to provide call-specific information, such as the customer name.
Result tab
In the drop-down, select a variable to store the outcome of the callback interaction. This step is optional.
Scheduled Callbacks
This section describes how to create a Callback type application to provide Scheduled callbacks. After you create your application, you must configure Genesys Mobile Services to use this application for outbound callback. Refer to the Callback User's Guide for more information.
In Designer, go to the Applications page and click Add Application. In the pop-up window, enter an application name and select Callback in the drop-down menu. Click Create and Open.
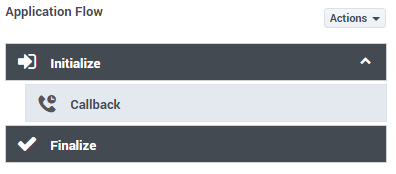
The Callback application type only has two phases - Initialize and Finalize. Drag a Callback block from the Palette and drop it in the Initialize phase.

Learn more about the tabs that are available for this block:
Confirm Customer tab
In the drop-down menu, select Template - Calling Back to use the pre-packaged template for callback.
The outbound callback feature is provided by a shared module.
For ease of use, you can use a shared module template that provides pre-packaged callback functionality. The template is read-only and cannot be edited or deleted. If you want to modify this template, go to the Shared Modules list and click Clone beside the template to create a copy for editing.
Result tab
In the drop-down, select a variable to store the outcome of the callback interaction. This step is optional.
User-Originated Callbacks
This section describes how to create a Callback application that provides user-originated callbacks. This allows a customer who is using a mobile device to request a callback and receive a push notification when an agent is available. The customer can then connect to the agent.
After you create your application, you must configure Genesys Mobile Services to use this application for outbound callback. Refer to the Callback User's Guide for more information.
In Designer, go to the Applications page and click Add Application. In the pop-up window, enter an application name and select Callback in the drop-down menu. Click Create and Open.
You can only use this type of Callback application with the Initialize phase. Drag a Callback block from the Palette and drop it in the Initialize phase.
Learn more about the tabs that are available for this block:
Confirm Customer tab
Select Customer dials in. In a user-originated callback scenario, the customer initiates the call after receiving a push notification that an agent is available.
Advanced tab
Use the Advanced tab to configure options for Greetings and Reporting.
Configure a greeting message for the agent, customer, or both. The message plays just before the call between the agent and customer is connected and can be a variable or an announcement from the audio collection.
You can also choose to enable reporting on the reconnected call waiting for an agent by placing the call in virtual queue. Select a variable or existing virtual queue from the drop-down menu or append the callback virtual queue name with a suffix (for example, you can add _out to the name of the reconnecting virtual queue).
Result tab
(Optional) In the drop-down, select a variable to store the outcome of the callback interaction.
Valid values for user-originated callback:
- CALLBACK-ABANDONED_IN_QUEUE
- CALLBACK-ROUTED_TO_AGENT
- CALLBACK-PUSH_FAILED
Known Issues
- You cannot use callback if you also use priority increments for routing in the Route Call block. Callback requires all calls to keep their priority from the time they enter the queue. Calls can have different priorities that are set at the beginning of the call, but their priorities cannot be modified once they enter the queue.