Upgrade Genesys Knowledge Center Server
It is recommended that you upgrade your system to Genesys Knowledge Center Server 9.0.006.16. It is not recommended to select the Fresh or Maintenance options (if available). Also, to be on the safe side, it is highly recommended that you create and save a copy of your existing launcher.ini file when working with Windows or your existing setenv.sh file when working with Linux.
Although it is not recommended, if you do choose to select a Fresh (new) installation you must update the Windows launcher.ini file or the Linux setenv.sh file with the following content so that it points to the previous configuration server:
- Dwcc.appName=<previous_app_name>
- Dwcc.primaryConfServer=<previous configuration server path>
Upgrade Genesys Knowledge Center Server in a Windows environment
Upgrade Genesys Knowledge Center Server in a Linux environment
Upgrade Genesys Knowledge Center Server in a Windows environment
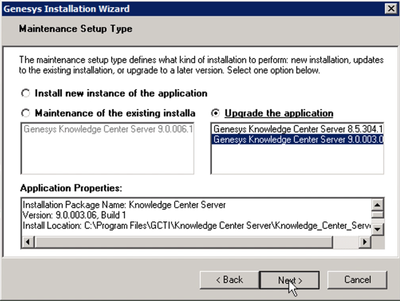
- In your upgrade package, locate and double-click the setup.exe file. The Maintenance Setup Type screen appears.
- In the Maintenance Setup Type window, select Upgrade the application and from the list provided select the component you want to upgrade to.
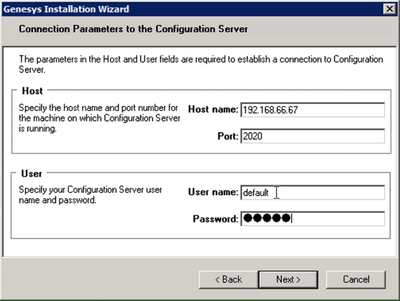
- Click Next. The Connection Parameters to the Configuration Server screen appears.
- In the Host and User fields enter your host name, port and configuration server credentials.
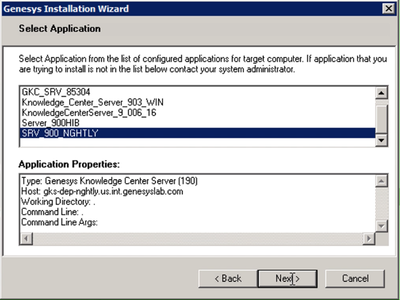
- Click Next. The Select Application screen appears.
- In the list provided, select the Genesys Knowledge Center Server application. Select the Genesys Knowledge Center Server that is currently running.
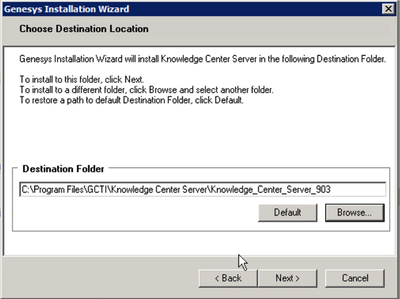
- Click Next. The Choose Destination Location screen appears.
- In the Destination Folder enter the path to the location of your previous Genesys Knowledge Center Server.
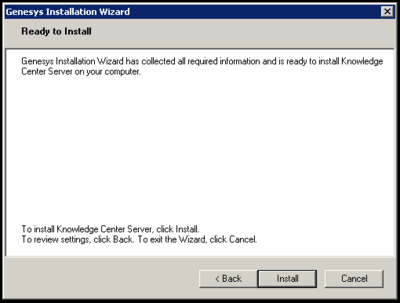
- Click Next. The Ready to Install screen appears.
- Click Install. The Genesys Installation Wizard indicates it is performing the requested operation. When through, the Installation Complete screen appears.
- Click Finish to complete your installation.
- Start the Genesys Knowledge Center Server.
Upgrade Genesys Knowledge Center Server in a Linux environment
Start
- Open a terminal in the Genesys Knowledge Center Server CD/DVD or the Genesys Knowledge Center Server installation package and run the install.sh file. The Genesys installation starts.
- Enter the hostname of the host on which you are going to install.
- Enter the connection information required to log in to the Configuration Server:
- Hostname—For instance, demosrv.genesyslab.com
- Listening port—For instance, 2020
- User name—For instance, demo
- Password
- If you have a backup Configuration Server, enter the Host name and Port.
- If the connection settings are successful, a list of keys and Genesys Knowledge Center Server applications is displayed.
- Enter the key for the Genesys Knowledge Center Server application that you created previously on Configuration Server.
- Enter the full path to your installation directory and confirm that it is correct.
If the installation is successful, the console displays the following message: Installation of Genesys Knowledge Center Server, version 8.5.x has completed successfully.
End

