
Contents
- 1 Voice Interaction
- 1.1 Overview: The Voice Interaction Window
- 1.2 VoIP-/SIP-enabled Agents
- 1.3 The Call status area of the Voice Interaction view
- 1.4 Call Actions
- 1.5 Call Timers
- 1.6 Contact Information and History
- 1.7 Force Closing a Case (Stuck Call)
- 1.8 Troubleshooting Remote and Virtual Desktop Environments
- 1.9 Communicating with Another Agent
- 1.10 Communicating with Another Agent While Handling an Active Interaction
- 1.11 Voice Consultation
- 1.12 Transferring a Voice Interaction
- 1.13 Starting a Voice Conference
- 1.14 Voice Recording
- 1.15 Video Interaction
- 1.16 Related Resources
Voice Interaction
[Modified: 8.5.111.21, 8.5.117.18, 8.5.118.10]
The Voice Interaction window enables you to view all of the information that is necessary to handle a voice interaction with a contact or an internal target.

The Voice Interaction Window enables you to handle a voice interaction with an internal target. You can communicate with other agents or internal targets by using the Team Communicator toolbar in the Main Window view, or from the Voice Interaction view while you are handling an active call with a Contact.
Click the links below to learn more about handling calls, setting up consultations, recording your calls, and more:
- Voice Interaction: Enables you to view the information that is necessary to handle a voice interaction with a contact or internal agent.
- Internal Voice Interaction: Enables you to start a voice interaction with an internal target.
- Voice Consult: Enables you to consult with another agent about the current voice interaction. Voice consultations that are started from an active interaction enable your internal target to view case data, contact information, and history. The target agent can choose not to accept your consultation request. You can also transfer or conference your call to an Active Consultation.
- Voice Recording:Enables you to record the current voice interaction with a contact or an internal target (for VoIP-/SIP-enabled agents only).
- Video Interaction: Enables you to send and receive a video stream as part of a voice call.
Overview: The Voice Interaction Window
The Voice Interaction window enables you to handle many call-related tasks, including:
- Starting a consultation and transferring or conferencing the call to an internal target or with a contact.
Note: If you want to initiate an internal voice interaction to speak to another agent without transferring or conferencing the external call, use the Team Communicator. - Viewing and managing contact history.
- Viewing and managing contact information. Your account might be configured to let you assign an interaction with an unknown contact to a known contact in the contact database by using the Manual Contact Assignment feature [Modified: 8.5.117.18].
- Solving stuck calls.
- Recording calls (VoIP/SIP only).
- Adjusting microphone and speaker volume (for Workspace SIP Endpoint or Genesys Softphone).
- Reading a standard response.
- Blending the interaction with other media (such as email, voice, and SMS) by using the Party Action menu.

The contents that are displayed to you in this view depend on your role and on the case information that is available about the contact.
This view is composed of many atomic views that together provide all of the features that you need to handle a voice interaction. You can use this view to:
- View the status of the call.
- End the call, hold the call, and send DTMF.
VoIP-/SIP-enabled Agents
![]()
The VoIP/SIP call actions enable you to:
- Record the call.
- Mute the microphone.
- Unmute the microphone.
- Mute the speaker (for Workspace SIP Endpoint or Genesys Softphone).
- Unmute the speaker (for Workspace SIP Endpoint or Genesys Softphone).
- Adjust the microphone volume (for Workspace SIP Endpoint or Genesys Softphone).
- Adjust the speaker volume (for Workspace SIP Endpoint or Genesys Softphone).
- Accept a video stream as part of a voice call.
- Set a disposition code.
- Select Mark Done for the current interaction.
- Use the Note to attach a note to the call history.
- View Case Data (attached data) for the current call.
- View the history of the current call.
- View contact information and history.Your account might be configured to let you assign an interaction with an unknown contact to a known contact in the contact database by using the Manual Contact Assignment feature [Modified: 8.5.117.18].
- Hide or display the controls and information about the current interaction by clicking the collapse/expand Interaction View button:
- Collapse:

- Expand:

- Collapse:
- Start a voice consultation with an internal target or contact and transfer or conference the call.
- Start an Instant Messaging (IM) consultation that passes contextual information to the IM internal target. After you initiate an IM consultation session, you can transition the IM session to a voice consultation. Note: Your administrator might have added custom views to enhance your use of the Voice Interaction view.
The Call status area of the Voice Interaction view
- Connected: You are actively talking to the contact or internal target.
- Ended: The call has been ended by either you or the contact.
- On Hold: The call is in a state where the contact is unable to hear you, and you are not able to hear the contact when they are on hold.
- Establishing: You are trying to connect to an internal target or queue for a voice consultation.
- Establishing on hold: The call is put on hold before the internal target answers, so that the internal target will be on hold when the call is answered.
Call Actions
- End Call: Click End Call (
 ) to disconnect the call.
 - Hold Call: Click Hold (
 ) to place the active call on hold. If a call is on hold, you cannot hear the contact and the contact cannot hear you.
 - Resume Call: Click Resume Call (
 ) to reconnect to a call that is on hold. You will be able to hear the contact, and the contact will be able to hear you.
 - Instant Call Transfer: Click Instant Call Transfer (
 ) to redirect the current voice interaction to a contact, an internal target, or an Agent or Agent Group voicemail (
 ) ([Added: 8.5.118.10]) that you select by using the Team Communicator.
 - Instant Call Conference: Click Instant Call Conference (
 ) to start a voice conference instantly with the current voice interaction and a contact or internal target that you select by using the Team Communicator.
 - Send DTMF: You can attach numerical data to a call by entering dual-tone multi-frequency (DTMF) digits into the call case history. Click the keypad button (
 ) to open the DTMF keypad, then type numbers into the number field or click the keypad numbers to enter numbers.
 - Mute the Microphone: (For VoIP-/SIP-enabled agents working with Workspace SIP Endpoint or Genesys Softphone) The party to whom you are connected cannot hear you when the microphone in your headset or on your workstation is muted. There are two ways to access the Mute the Microphone button. Either click Mute microphone (
 ) on the Volume Properties control, or click to open the Volume Properties control menu, and then click Mute the microphone next to the Microphone Volume control. When your microphone is muted, a small red circle with a slash is displayed next to the microphone icon.
 {
{ - Mute the Speaker: (For VoIP-/SIP-enabled agents working with Workspace SIP Endpoint or Genesys Softphone) To access the Mute the Speaker button, click to open the Volume Properties control menu, and click then Mute the speaker next to the Speaker Volume control. When your speaker is muted, a small red circle with a slash is displayed next to the speaker icon.

- Adjust Microphone Volume: (For VoIP-/SIP-enabled agents working with Workspace SIP Endpoint or Genesys Softphone) To access the Microphone volume control, click to open the Volume Properties control menu, and then move the Volume control slider left to decrease the volume and right to increase the volume.
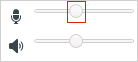
- Adjust Speaker Volume: (For VoIP-/SIP-enabled agents working with Workspace SIP Endpoint or Genesys Softphone) To access the Speaker Volume control, click to open the Volume Properties control menu, and then move the Volume control slider left to decrease the volume and right to increase the volume.

- Start Consultation: Start a consultation with an internal target or a contact (
 ). The target can choose not to accept the request. The target can end the consultation. You can end the consultation or you can transfer or conference your current interaction to or with the consultation target.
Choose an Instant Message consultation or a Voice consultation.
- Start/Stop Video: Add/Remove a video stream to your current voice call.

- Schedule Callback: Click Schedule Callback (
 ) to open the New Callback dialog box. Refer to the Genesys Callback article. [Added: 8.5.111.21]
 - Mark Done: Complete a call and close the Voice Interaction window by clicking Mark Done (
 ). Your environment might be configured to require you to specify a disposition code before you can click Mark Done. Your environment might also be configured to automatically change your status from After Call Work to Ready, Not Ready, or some other value, when you click Mark Done, or you might have to manually set your status to Ready, or some other value, after you complete your after call work.


Call Timers
[Modified: 8.5.111.21] The Interaction Bar contains call controls to enable you to complete call actions such as putting the call on hold and retrieving the call. It also contains a timer that tells you how long you have been handling the call.
When you place a call on hold, a new timer might be displayed that tells you how long the call has been on hold, and a progress bar might also be displayed. The progress bar changes from green to yellow to red as time goes by. If the progress bar changes to red, the call has been on hold too long and you should click Resume (![]() ) to update the contact and let them know that they are still on the call. If you hover your mouse pointer over the hold timer, the call duration and hold time are displayed in a tool tip (if this feature is enabled for you).
) to update the contact and let them know that they are still on the call. If you hover your mouse pointer over the hold timer, the call duration and hold time are displayed in a tool tip (if this feature is enabled for you).
After a call but before you click Done, a timer displays showing you how long it takes for you to complete your After Call Work. If you hover your mouse pointer over the After Call timer, the call duration and After Call Work time are displayed in a tool tip (if this feature is enabled for you).
Contact Information and History
The Contact Information view enables you to view and edit contact information. If the current contact is already in the Contact database, their information is displayed in this view. Use the fields to add or modify contact information. For more information about the Information view, refer to the Contact Directory article.
The Contact History view enables you to view information about past interactions with the current contact if the contact is already in the Contact database. Use the search tools to find specific interactions. For more information about the Contact History view, refer to the Contact History article.
If there are in progress or recent interactions for the current contact, the number of interactions is displayed in the connection status area of the interaction.Force Closing a Case (Stuck Call)
Troubleshooting Remote and Virtual Desktop Environments
You might work in an environment that uses Virtual Desktop Infrastructure (VDI) to run Workspace. This means that when you start Workspace, it is displayed on your screen, but it is not actually running on your workstation, it is running on a remote machine.
If the you are unable to make or receive calls and the Workspace SIP Endpoint icon (![]() ) is grey instead of red, you might have to restart the Workspace Standalone SIP Endpoint application.
) is grey instead of red, you might have to restart the Workspace Standalone SIP Endpoint application.
Communicating with Another Agent
In the Internal Target Action menu, select Call <target name>, where <target name> might be an agent, a skill, an agent group, or queue. If the internal target accepts your invitation, the status in the Voice Interaction Window changes to Connected. You can now talk to the internal target.
You have access to the same controls and functionality when you are talking to an internal target as when you are talking to a contact. You can do the following:
- Check the call status.
- Perform call actions, such as ending the call, putting the call on hold, sending DTMF, or transferring/conferencing the call. For VoIP-/SIP-enabled agents, the following additional call actions are available: record the call, mute and unmute the call, and adjust the microphone and speaker volumes. Refer to Voice Interactions for a list of additional actions and limitations.
- View the call history.
- Set a disposition code.
Communicating with Another Agent While Handling an Active Interaction
While you are on an active call, use the Team Communicator toolbar in the Main Window to launch a new voice interaction.
You can also initiate an IM session with an internal target from the active call. IM sessions that are started from an active call enable the internal target to view case data and contact information and history. You can transition an internal IM session to a voice-consultation call.
If you start a new voice interaction, the original active call is put on hold, and you are connected to the internal target. To resume the original call, click the Resume Call button on the original voice interaction window.
While the original call is on hold, you can connect to the internal-target call. The standard call actions are available.Voice Consultation
The Voice Consult functionality enables you to consult with an internal target or a contact about the current Voice interaction.
During the consultation, you can transfer to the target or start a conference with the target. The target can choose not to accept your consultation, transfer, or conference request, and can choose to end the consultation. Voice consultations that are started from an active interaction enable the internal target to view case data, contact information, and history.
The following video demonstrates how to start a call consultation.
Starting a Voice Consultation
The Voice Interaction view enables you to start a consultation with an internal target or a contact about your current voice call.
Click the Start a Consultation button (![]() ).
).
Use the Team Communicator to find an internal target or a contact.
In the Action menu, click:
-
Start Voice Consultation—Start a voice consultation with an internal target or a contact.
After the consultation request is initiated, the contact or internal target is put on hold, and the consultation request call is presented to the consultation target. The Call Status indicators that are next to the name of the party show whether the contact or internal is on hold, and indicates when the consultation request changes from Establishing to Connected.
The following video demonstrates consultation calls in detail.
-
Start Voice Consultation (Transfer): Initiate a voice interaction to talk to the transfer target prior to transferring the call to the internal target or another contact.
-
Start Voice Consultation (Conference): Initiate a voice interaction to talk to the consultation target prior to conferencing the call to the internal target or another contact.
Or,
Notes:
- You can also choose to start an Instant Message Consultation from the Action menu. Click Start Instant Message Consultation to display the Instant Message view in the current interaction window. Send a message to send an invitation to the consultation target.
- Depending on how your system is configured, when you end the call with the consultation target you might automatically be reconnected with the contact who was on hold or you might have to manually reconnect the call by clicking Resume (). The manual reconnect feature enables you to make another consultation call without being reconnected and having to put the contact on hold again. [Added: 8.5.103.10]
Transferring a Voice Interaction
To talk to the transfer target prior to transferring the call to the internal target or another contact, click the consultation button in the toolbar, and from the Team Communicator Action menu select the following option:
Start Voice Consultation (or, Start Voice Consultation (Transfer), depending on the type of environment you have).
After your target accepts the consultation, you are connected and you and the transfer target can speak to each other. The contact remains on hold.
The video demonstrates how to instantly transfer a consultation call.
Completing the Transfer
To complete the transfer, click the Instant Transfer button (![]() ) from the main voice interaction, select the consultation target from the Team Communicator, and click Instant Call Transfer. The contact or internal target is connected to the transfer target, and the voice-call status changes to Ended in the Voice Interaction view.
) from the main voice interaction, select the consultation target from the Team Communicator, and click Instant Call Transfer. The contact or internal target is connected to the transfer target, and the voice-call status changes to Ended in the Voice Interaction view.
You can perform any of the following functions by using the Voice Consult toolbar:
- Alternate (toggle) between the contact or internal target and the transfer target by clicking Resume Call (). The other party is put on hold until you toggle back or complete the transfer.
- End the call to the consultation target and resume the call with the Contact or internal target ().
- Send dual tone multi frequency (DTMF) to the transfer target by using the DTMF keypad ().
- For VoIP-/SIP-enabled agents, the following additional call actions are available: record the call, mute and unmute the call, and adjust the microphone and speaker volumes. Refer to Voice Interactions for a list of additional actions and limitations.
Once the transfer is completed, close the Voice Interaction window by clicking Mark Done (![]() ). You might be configured to specify a disposition code before you can click Mark Done.
). You might be configured to specify a disposition code before you can click Mark Done.
Note: You choose to change the transfer to a conference by clicking the Instant Conference button (![]() ), selecting the consultation target from the Team Communicator, and clicking Instant Voice Conference.
), selecting the consultation target from the Team Communicator, and clicking Instant Voice Conference.
Starting a Voice Conference
To talk to the conference target prior to conferencing the call to the internal target or another contact, click the Consultation button in the toolbar, and from the Team Communicator Action menu select the following option:
Start Voice Consultation (or Start Voice Consultation (Conference), depending on the type of configuration that you have).
- After the consultation request is initiated, the contact or internal target is put on hold, and the call is presented to the consultation target. Look at the Call Status indicators next to the name of the party to determine whether the contact or internal is on hold and to determine when the consultation request changes from Establishing to Connected.
Completing the Conference
After your target accepts the consultation, to complete the Conference, click the Instant Conference button (![]() ), select the consultation target from the Team Communicator, and click Instant Call Conference. The contact or internal target is connected to the transfer target to conference the call to the target. The contact or internal target is connected to the conference target.
), select the consultation target from the Team Communicator, and click Instant Call Conference. The contact or internal target is connected to the transfer target to conference the call to the target. The contact or internal target is connected to the conference target.
The following video demonstrates how to make an instant call conference while handling a call.
You can perform any of the following functions by using the Voice Consult toolbar:
- Alternate (toggle) between the contact or internal target and the conference target by clicking Resume Call (). The other party is put on hold until you toggle back or complete the conference.
- End the call to the conference target and resume the call with the Contact or internal target ().
- Send dual tone multi frequency (DTMF) to the conference target by using the DTMF keypad ().
- For VoIP-/SIP-enabled agents, the following additional call actions are available: record the call, mute and unmute the call, and adjust the microphone and speaker volumes. Refer to Voice Interactions for a list of additional actions and limitations.
The following video demonstrates the Action menus that can be used during a conference call.
Note: You can choose to change the conference to a transfer by clicking the Instant Transfer button (![]() ), selecting the consultation target from the Team Communicator, and clicking Instant Voice Transfer. Refer to thetransfer article for more information.
), selecting the consultation target from the Team Communicator, and clicking Instant Voice Transfer. Refer to thetransfer article for more information.
After the conference is established, you can perform the following actions:
- Suspend and reinstate listening.
- Remove a party from the conference.
- Use the Note to attach a note to the call history.
- Complete the call by clicking End Call ().
- Close the Voice Interaction window by clicking Mark Done (). You might be configured to specify a disposition code before you can click Mark Done.
- For VoIP-/SIP-enabled agents, the following additional call actions are available: record the call, mute and unmute the call, and adjust the microphone and speaker volumes. Refer to Voice Interactions for a list of additional actions and limitations.
Suspend and Reinstate Listening
[Modified: 8.5.109.16] You might be configured to suspend and reinstate listening by parties in a conference. Click the Party Action menu on the Voice Interaction view and select Suspend From Conference to suspend that party from the conference. The party cannot hear what the other parties say, nor talk in the conference until he or she is reinstated to the conference.
When a party is suspended from a conference, the word Suspended is displayed next to his or her name in the Party Action menu and the Call Conference button (![]() ) changes to the Call Conference Suspended icon (
) changes to the Call Conference Suspended icon (![]() ).
).
To reinstate the suspended part to the conference, click the Party Action menu on the Voice Interaction view and select Reinstate To Conference to allow the party to hear what the other parties are saying and talk to both parties.
Removing a Party from the Conference
You might be configured to remove a party from a conference. Click the Party Action menu on the Voice Interaction view and select Delete From Conference to remove that party from the conference. You can still talk to the party who was not removed from the conference.Voice Recording
If your account is configured for emergency recording, you can start and stop recording by using a single toggle button.
If your account is configured for controlled recording, you can start a recording, pause a recording, resume a recording, and end a recording.
In addition, your account might also be configured for automatic or system-guided recording. If this is the case, you receive a notification when a recording is in progress.
Call recording enables you to perform the following functions from the Voice Interaction window and the Main Window Interaction Bar:
- Record the call': Click Record the Call (
 ) to record a call.
 - Stop recording the call: Click Stop Recording the Call (
 ) to stop recording a call that you are currently recording.
 - Pause recording the call: Click Pause Recording the Call (
 ) to pause recording a call that you are currently recording.
 - Resume recording the call: Click Resume Recording the Call (
 ) to stop recording a call that you are currently recording.
When you are recording a call, the call icon in the connected-parties area changes to red.
![]()
When you pause a call recording, the red call icon changes back to blue.
If you place your mouse pointer over the call icon, a Tooltip is displayed to indicate both that the call is being recorded and the current length of time of the recording.
A call-recording icon (Video Interaction
The Video Interaction window enables you to view both video streams simultaneously, or only the inbound video stream.
- Start Video: Click Start Video
 to connect to the video stream during a voice call that also has a video component. This button is displayed in the Interaction Bar only if the call has a video component.
 - Stop Video: Click Stop Video
 to close the Video Interaction window. This does not end the call, it only stops the video stream from being displayed and stops sending your video stream to the contact.
In the Interaction Bar, use the button Start/Stop Video enable to display or hide the video window.
The following buttons enable you to control the video stream:
- Start Video stream/Stop Video Stream: Click
 /
/ to start or stop the video stream component of a video-enabled voice call. Use this feature to put the video "on hold". This has no effect on the voice call. The video stream sends a message to your contact that says "On Hold". If you put the voice call on hold, the video call is also put on hold.
 - Hold call/Resume call: Click to put the call on hold and resume the call. The call status changes to On Hold, and then back to Connected when you resume the call. When you put the call on hold, the video stream is also put on hold. You and the contact can no longer see each other's video streams. A "Video on Hold" message is displayed to the contact.
- Click
 /
/ to show or hide in the Video Interaction window the thumbnail view of your video stream.
 - Toggle Video: Click
 to switch between the view of the Video Interaction window between the inbound video stream and the video stream from your webcam.
You can resize the Video Interaction window by clicking and dragging the edges of the window. Workspace remembers the size and position of the last Video Interaction window that you used.
When you end the voice call, the video stream also ends and the Video Interaction window is closed.Related Resources
The Workspace Desktop Edition User's Guide (English only) provides detailed lessons for using all the features of Workspace. You might find the following lessons useful:
- Handle A Voice Call
- Blend Different Media Into A Single Conversation
- Main Window Basics
- Workspace Windows and Views
- Basic Use-Case Summary