Using the Interaction Bar
[Modified: 8.5.116.10]
In this lesson, you will learn how to use the Interaction Bar in the Main Window to manage one or more interactions.
This lesson contains the following section:
Managing Interactions
The Interaction Bar enables you to use a simplified control set to handle one or more interactions without having to make the interaction window active. It also enables you to restore, or bring to the front, any active interaction window.
The Interaction Bar is displayed at the bottom of the Main Window whenever you have one or more active interactions. Each interaction is represented by a control bar. If you are engaged with a contact in more than one simultaneous interaction, such as simultaneous Chat and Voice interactions, both interactions are represented by the same control bar. You can use the control bar to perform basic actions that are specific to the interaction type, such as ending a call.
Working on Multiple Interactions at the Same Time
[Added: 8.5.116.10]
You might be allowed to work on more than one interaction at the same time. Your administrator might set up your system so that new interactions interrupt the current interaction that you are working on, or your administrator might set up Workspace so that when you accept a new interaction while you are working on another interaction, the new interaction opens in the background and your current interaction keeps the focus.
This behavior might be set up differently for each of your media channels. For example, a newly accepted email interaction might appear in the background and newly accepted voice interactions might receive the focus.
- Newly created outbound/outgoing interactions always receive the focus.
- When interactions are accepted, but are displayed in the background, your reporting/focus time calculations might not begin until you select the interaction window and give it the focus.
Lesson: Managing multiple interactions by using the Interaction Bar
Purpose:
- To manage interaction windows and interaction functionality from the Main Window.
Prerequisites
- You are logged in to Workspace (see Lesson: Logging in to Workspace).
- You are handling one or more interactions.
- You are using the Main Window view.
Start
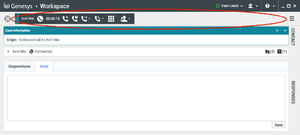
- Active interactions are displayed in the Interaction Bar at the bottom of the Main Window (see the Main Window displaying the Interaction Bar at the bottom figure). Interactions are "docked" in the Interaction Bar. The interactions appear as boxes that are identified by a name, number, or other contact information, as well as an icon that represents the interaction type (for example: voice, chat, or email).
Click the control bar for an interaction to give it the focus. All other open interactions are collapsed to the Interaction Bar.
If you place your mouse pointer over an interaction in the Interaction Bar, two things occur:- A tooltip is displayed that summarizes the content or the attached data for the interaction. The tooltip also includes a summary of all the interactions that are involved in this thread, as well as any consultation interactions that are related to the interaction.
- The media icon in the interaction is a button that activates when you place your mouse pointer near it. If you click the media icon, Workspace switches to that interaction without opening the interaction view.
Entries in the Interaction Bar flash (or blink) when specific events occur that might require your immediate attention. Chat, SMS Session, and IM interactions flash when a new message is received.
TipYour system might be configured so that all interaction control bars are automatically collapsed in the Interaction Bar. This might be done to enable you to see a third party application or other content in the Main Window before or during the handling of an interaction. To display an interaction view for a collapsed interaction, click the control bar. Added: 8.5.106.19
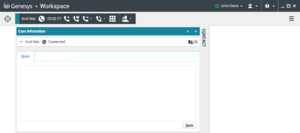
- If you click another interaction box, it becomes active and changes color, and controls are displayed (see the Main Window, displaying an active email interaction in the Interaction Bar figure).
- To control the interaction from the Interaction Bar, click the interaction box, and then use the controls. Different controls are available for different interaction types (see the Interaction Bar interaction boxes by type table). Refer to the interaction-specific chapters of the Workspace User's Guide and the Workspace 8.5 Help for information about the functionality of each control.
- Each interaction can be displayed in any of the following three modes:
- Collapsed to the Interaction Bar
- Pinned
- Floating
ImportantYour administrator has the option to specify which modes are available for each channel. For example, if you are an email-only agent, you might be enabled to use only the pinned mode; if you are a voice-only agent, you might be enabled to use only the floating mode.Click the small colored bar on the left of the interaction control to toggle between pinned mode and floating mode. Each interaction can be set to pinned or floating mode independently.
- Pinned mode — the interaction view is displayed in the Main View below the Interaction Bar, and all other views, such as My Channels, are hidden. Contact view and Response view are accessible.
- Floating mode — the interaction view is displayed as a small view that is attached to the bottom of the Interaction Bar. If other interactions are currently open in pinned mode or if one the workspace views, such as My Channels is currently displayed, they will appear dimmed behind the floating interaction view.
| Interaction Type | Interface |
|---|---|
| Chat | |
| Instant Message | |
| SMS | |
| Voice |
End


