Contents
Install or Upgrade process
If the previous version of the software was installed/upgraded via the automated installer then follow the procedure Upgrading from a previous automated install/upgrade. Alternatively, if either Performance DNA or Training Manager was installed/upgraded manually, follow the procedure Upgrading from a manual installation/upgrade to prepare the application server for an automated install/upgrade.
Upgrading from a manual installation/upgrade
Follow the steps below to prepare the server for installation/upgrade:
- Ensure that all prerequisites are present and at minimum supported version (unless specified).
- Backup up all databases (Performance DNA, Training Manager, DNA, ReportingDB/Skills ManagementReports), leave the existing databases on the database server, they will be automatically upgraded via the installer/upgrader.
- Back up all web server application files, including: sites, web services, storage folders: QMedia, crystal reports, custom company logos in Portal (if applicable), log files
- Remove all sites, services, virtual directories and related application pools from IIS and remove the original directories from the web server.
Once these steps have been performed, continue with the steps in the following section.
Upgrading from a previous automated install/upgrade
Copy the release package to the web server and run the Skills ManagementSetup_v9.0.0.0.msi executable. On execution, the installer will check that the required version of .NET Framework is installed.
Click OK then Finish to exit the installer before upgrading to the required version of .Net Framework and re-running Skills ManagementSetup_v9.0.0.0.msi.
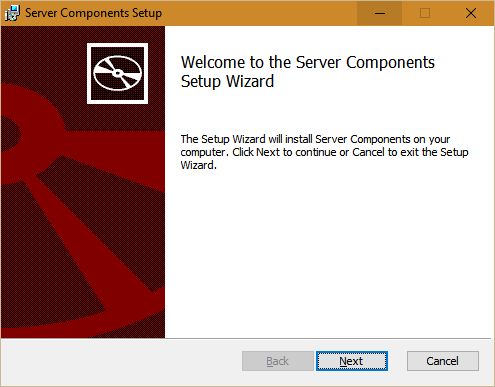
Click Next on the first screen.
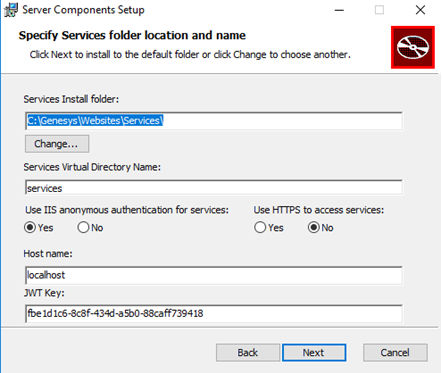
The next screen allows you to modify the location of the web services, the virtual directory name for the web services and the hostname of the web server. There is also an option to enable IIS anonymous authentication for services (default). Unchecking this option will result in windows authentication being used for the services.
If you select the Use HTTPS to access services option, then all the applications and services will be configured in IIS to use HTTPS rather than HTTP. Note that in this event, you should ensure that your webserver has a valid HTTPS binding, and that the host name you enter is valid for the certificate configured for the site in IIS.
The GUID for the field JWT Key is unique for each installation and is used to authenticate communication between front-end and back-end services and service-to-service communications. After installation is complete, a new GUID will be added to the web.config files and used to log in to PDNA, API, and the underlying service applications.
Update the settings as required, then click Next.
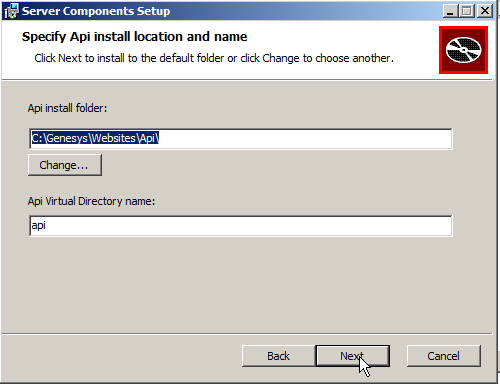
The next screen allows you to specify the physical location and virtual directory name of the Skills Management API. The values on this screen can be left at their default values. Click Next once you have specified these values.
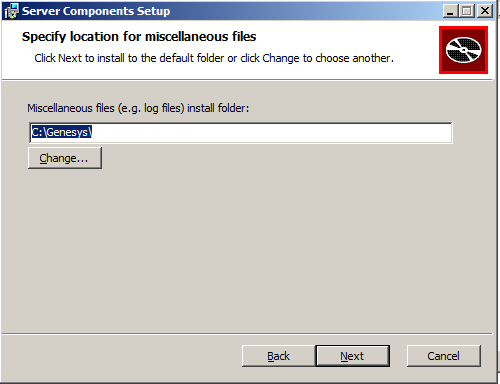
The next screen allows the updating of the path for the miscellaneous files folder. Update the path if required, then click Next.
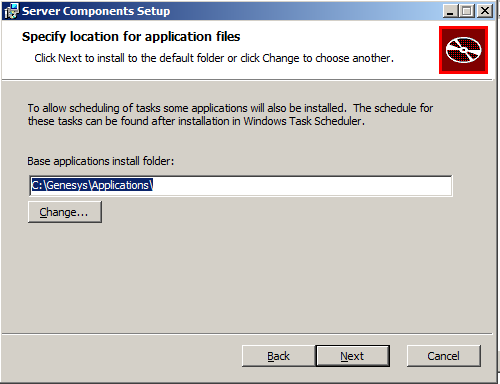
The next screen allows the updating of the path for the Applications folder. Edit the details if required, then click Next.
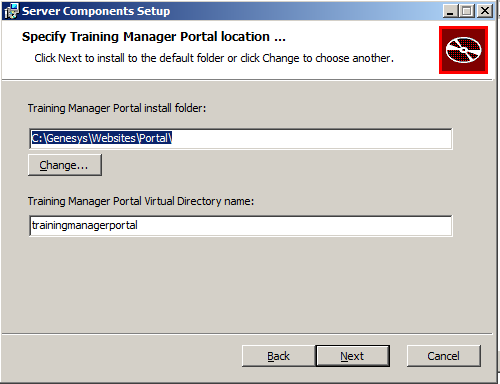
The next screen allows the updating of the path to the Training Manager Portal folder on the web server and the name of the Training Manager Portal IIS virtual directory. Edit the details if required, then click Next.
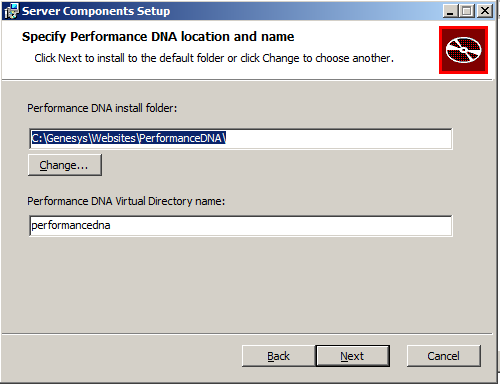
The next screen allows the updating of the path and IIS virtual directory for the Performance DNA site. Update the details if required, then click Next.
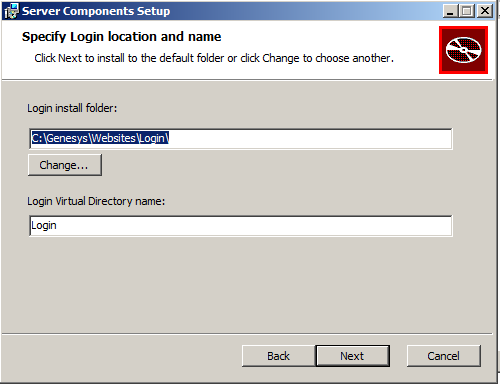
The next screen allows the updating of the path and IIS virtual directory of the Login site. Update the details if required, then click Next.
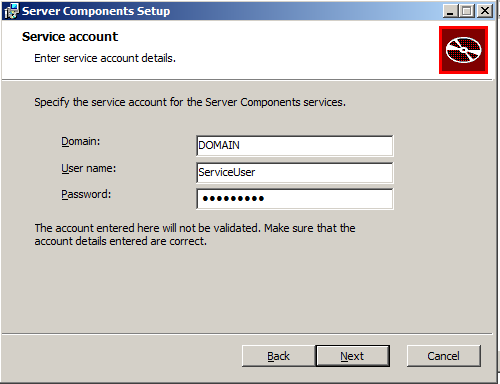
The next screen requires the provision of a service account which is used to install the services. This account should exist on the machine and have local administrator privileges. As mentioned in the prerequisites, the account must have “log on as a service” permissions.
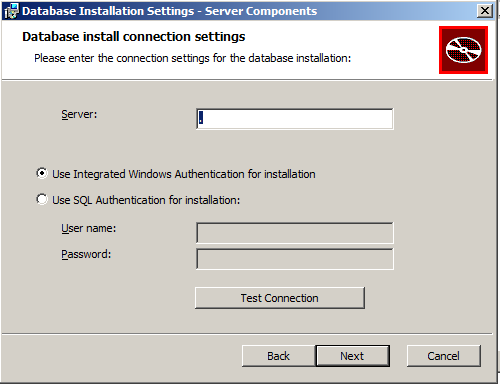
The next screen allows for changes to be made to the database settings. Edit the changes if required, then click Test Connection to validate the connection settings and SQL Server release.
If the SQL Server release is not supported a Database version warning will be given.
If a warning is given, click OK and cancel the install process before completing the required SQL server upgrade. Following the SQL Server upgrade re-run the Skills ManagementSetup_v9.0.0.0.msi
If the SQL Server release is supported and the details provided are valid you will receive the following confirmation:
Click OK to continue with the installation.
Following a successful connection test click Next.
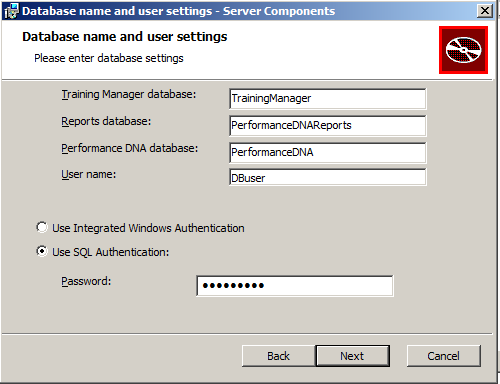
The following screen allows for changes to be made to the database names and the database account used to login to the databases. If you are installing the software for the first time, the values in these fields should be left at their defaults. If you are upgrading the product, ensure that the databases specified match the names of your existing databases and that you enter the existing database user’s details in the user name and password fields correctly.
Update these fields as required, then click Next to move to the SKM state management screen.
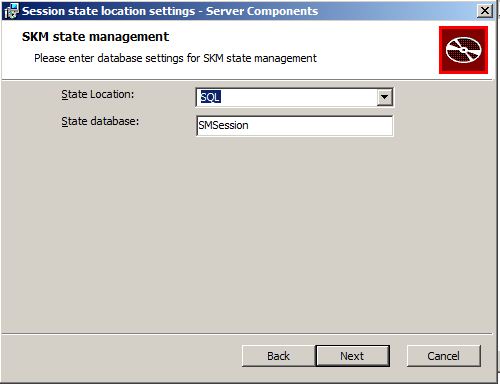
On this screen, you can select the type of State location that must be used:
- SQL - Select this option for multi-server environments or any environment that uses a load balancer.
- Memory - Select this option for smaller single server environments.
When selecting SQL as the state location update the State database with the name of the database that will be used/created for the session states.
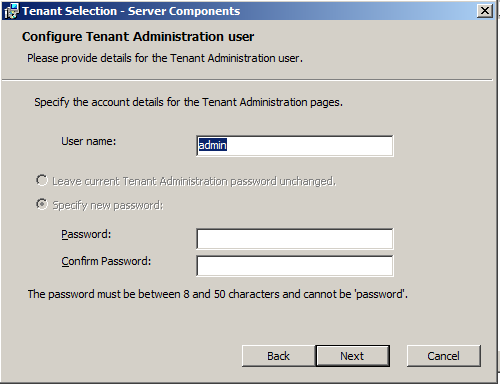
Update these fields as required, then click Next to move to the Configure Tenant Administration user screen.
This screen is used to specify the username and password for the tenant administration area. If you have already specified a password other than ‘password’ for the tenant administration area, you can leave this form with default values, or modify the username and/or password.
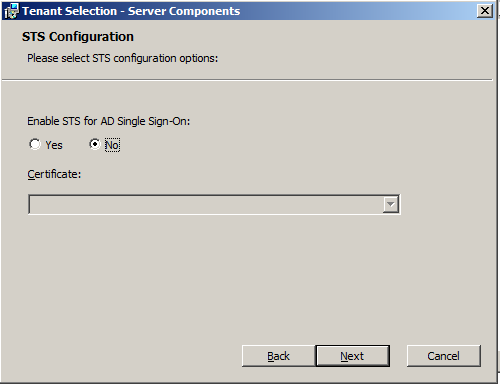
Update these fields as required, then click Next to move to the STS Configuration screen.
If you wish to use Active Directory authentication via the STS service for authenticating users, click the Yes option in this screen and specify the certificate that you wish to use and the Site administration domain group that will have administrator access to the suite.
If you are upgrading a Skills Management instance that was previously using the STS service, tick Yes in this screen and specify the certificate and Site Administration Domain Group that you wish to use.
If you are installing a new Skills Management instance and wish to use the STS service, tick Yes in this screen, specify the certificate you want to use, specify the site administration domain group and click next. Proceed with the installation. Once it has completed, run the STSConfiguration application from the Release/STSConfig folder and follow the steps specified in the Genesys Skills Management Installation and Configuration Guide for Active Directory SSO document to complete the STS Service configuration.
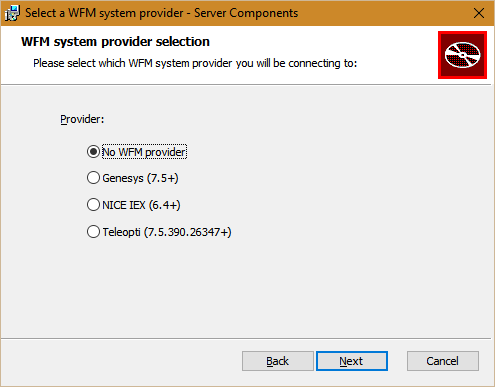
Update these fields as required, then click Next to move to the WFM system provider selection screen.
Select a WFM system provider if required, then click Next.
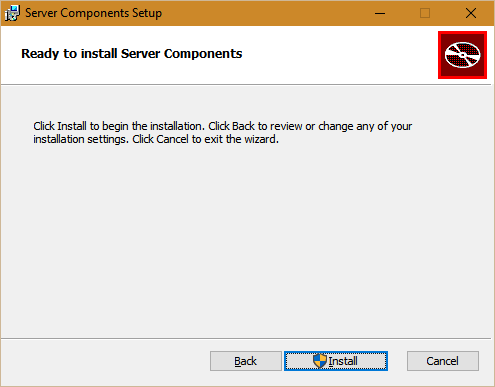
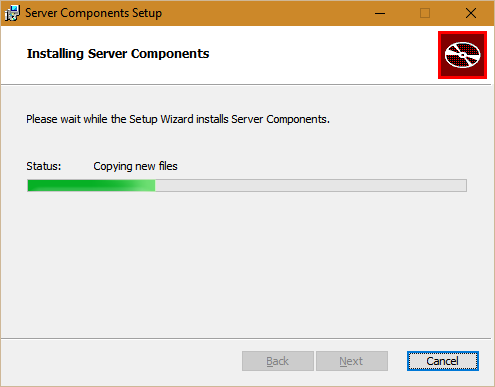
Click Install on the next screen to begin the install/upgrade process.
The final screen will confirm that the install/upgrade of the sites and services was completed. In version 9.0 this message will also contain the path to the PortalUsers.csv file which is required to complete the upgrade. Click Finish to close the application. The SkillsManagerWS Diagnostics page will launch allowing you to set up a license for Training Manager.
If you have run the setup program to upgrade your application from a previous version that was either installed/upgraded manually, ensure you copy the content of the following folders to the new folders created by the automated setup program:
- QMedia
- CrystalReports/Reporting
- Logs
- Skills Portal custom company logo
If you require STS and/or the Notifications client, follow the steps in the Genesys Skills Management Installation and Configuration Guide for Active Directory SSO and Genesys Skills Management 9.0 Notifications Client Installation Guide documents.
For OrgData please read OrgData section.
Check service credentials
Verify the credentials you entered were correct by checking the Services Administrative Tool.
Locate the Skills Management Invoker Service in the list of services, and ensure it is running. If it is not, this may be because the service account was not given log on as a service rights.
If the service is not running and you are using a local computer account (rather than a domain account) you can double-click the service and correct the credentials in the Log On tab.
If you are using a domain account, ensure that it has the rights to log on as a service and refresh the local group policy by running gpupdate /force from an elevated command prompt.
Enabling Automatic Application Startup
If the server has IIS 7.5, then you must install the out-of-band module. If the server has IIS 8+, then you must initialize the application by following the instructions at https://www.iis.net/downloads/microsoft/application-initialization. Once either the application initialization (IIS 8+) or the out-of-band module (IIS 7.5) is installed, you must modify the applicationHost.config and application's web.config files by following the procedures described below.
Configuring IIS
To configure IIS
- Open IIS and expand the root node.
- Select Application Pools and right click any application pool that the application uses by selecting Advanced Settings.
- Set start mode to always running.
- You must configure at least one site in each application pool to preload. You can do this by,
- Search the required application under the Sites node.
- Right click the application and select Manage Application > Advanced Settings.
- Change Preload Enabled to True.
Configuring web.config file
For the application that is set to preload, you must specify the application initialization details in the corresponding web.config file.
- In IIS, right-click the Application that is set to preload and select Explore.
- Locate the web.config file and open it in a text editor.
- Locate the system.webServer section of the XML and add the following <applicationInitialization> section:
<system.webServer> <br>
<applicationInitialization >  <br>
<add initializationPage="xxxxxx"/> <br>
</applicationInitialization> <br>
</system.webServer>
Where, you should replace xxxxxx with one of the following values, depending on the type of service:
- WCF: /{servicename}.svc (or, if /default.aspx is available then an svc file is not required)
- REST: /HealthCheck {creating in another task}
- Web application: "/"


