
PureConnect Billing Configuration
Follow the procedures below to configure the PureConnect billing information from Skills Management.
- Configure the Tenant billing information from the Tenant Management page.
- Configure the PureConnect billing server details from the Global Settings page.
- Enable the PureConnect billing process from the Global Events page.
Important
You can also configure the PureConnect billing information through the relevant Tenant APIs. For more information on these APIs, see the Swagger API documentation help setup for your organization.Configuring Tenant Billing details
When you create a Tenant, you can configure the billing details for the Tenant using the Tenant Management page. This configuration automatically uploads the billing information of the tenant to an Amazon Web Services (AWS) S3 bucket when the PureConnect billing process runs.
To configure Tenant billing details,
- Login to Skills Management as a Landlord or Tenant Administrator.
- Navigate to System > Tenant Management.
- Click Edit for the Tenant that you want to specify the billing details.
- For new tenants, you can specify the billing details when you create the Tenant.
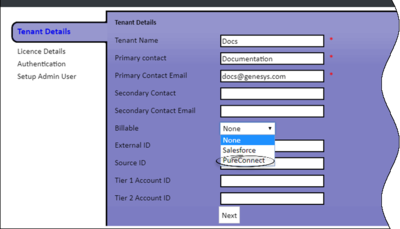
- On the Tenant Details tab, select PureConnect from the Billable drop down.
- Enter values for the following fields:
- Tier1 Account Id
- Tier2 AccountId
- Tier3 Account Id
- External Id
- Source Id
- Note: If you have an on premise installation, leave the above fields blank. If you are a cloud customer, enter the account details provided by the Genesys finance team.
- Click Next to save the billing information.

This page was last edited on October 3, 2019, at 10:12.
Comments or questions about this documentation? Contact us for support!