
Installing and configuring the adapter in Salesforce
Contents
Complete the procedures on this page to install and configure the Gplus Adapter for Salesforce in your Salesforce environment.
Installing the adapter in Salesforce
Prerequisites
- You have installed and configured Web Services.
- You have set up SSL for Jetty. For more information, see Configure SSL.
Start
- Open the following URL to install the latest Gplus Adapter for Salesforce package in Salesforce:
https://login.salesforce.com/packaging/installPackage.apexp?p0=04to0000000C3VD
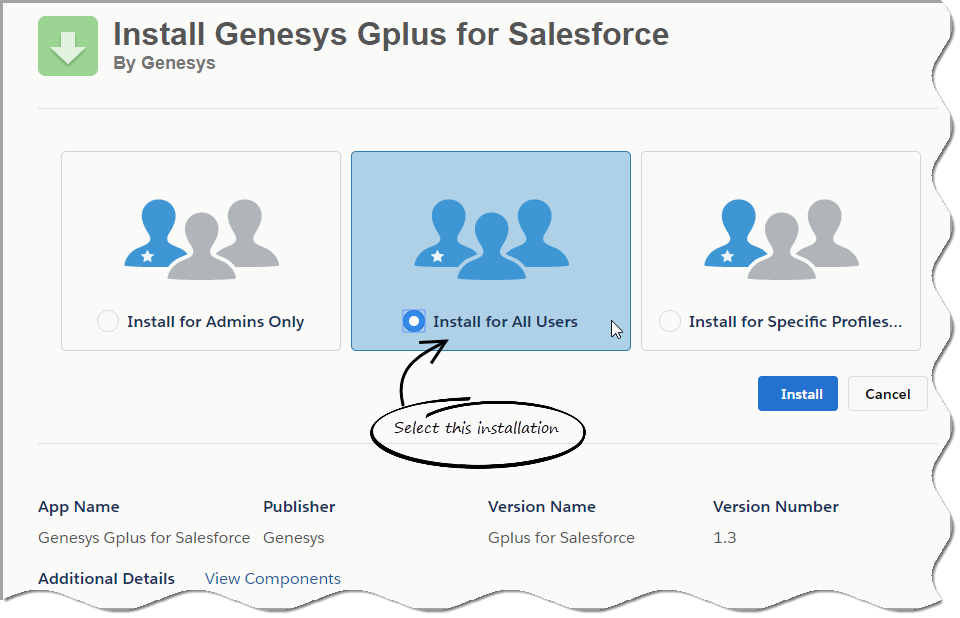
If you're not logged in, Salesforce prompts for your username and password. - Now you should see the Install Genesys Gplus Adapter for Salesforce page. Select an installation type. Generally, you should select Grant access to all users, but if you want to limit access to the adapter to specific profiles, then you can choose Install for Specific Profiles .... Click Install.
- When you see the "Installation Complete!" message, click Done.
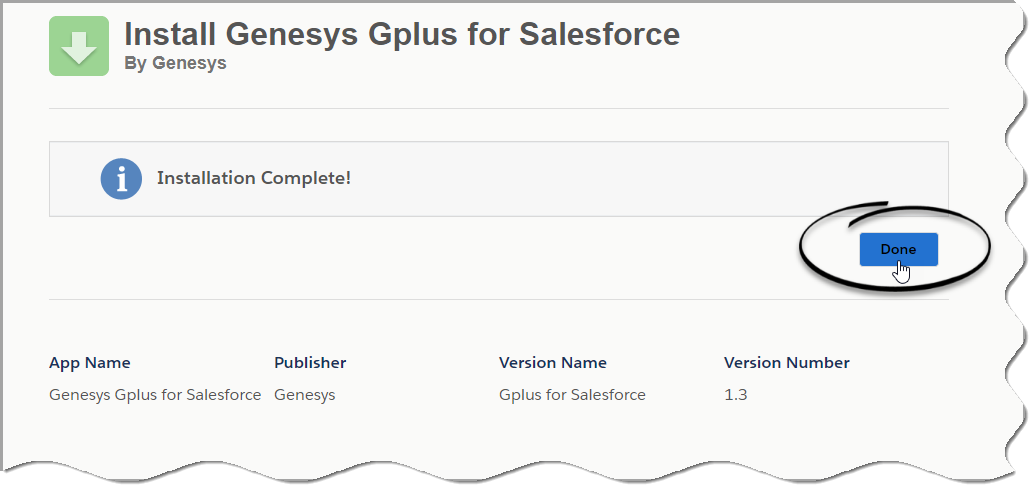
You should be redirected to the Installed Packages page, with "Genesys Gplus for Salesforce" included in the list.


End
Configuring the adapter in Salesforce
Complete this procedure to define your call center in Salesforce. The call center was created when you installed the Gplus Adapter for Salesforce package.
Start
- If you haven't already, login to Salesforce and go to Setup > Build > Customize > Call Center > Call Centers. Or, you can search for "Call Centers" in the Search All Setup field and select the "Call Centers" result. You should see the Introducing Salesforce CRM Call Center page. Note: You must have administrator privileges.
- You can select Don't show me this page again if you want to hide the page in the future, and click Continue.
- On the All Call Centers page, click Edit next to the Genesys Gplus for Salesforce entry.
- In the CTI Adapter URL field, replace GWS_HOST:GWS_PORT with the correct host and port for your installation of Web Services. For example: https://198.51.100.23:8090/ui/crm-adapter/index.html?crm=salesforce
If you're enabling single sign-on in the adapter, add the authType=saml parameter to the CTI Adapter URL. For example: https://198.51.100.23:8090/ui/crm-adapter/index.html?crm=salesforce&authType=saml
You should leave the other options at their default values so the adapter works correctly in Salesforce.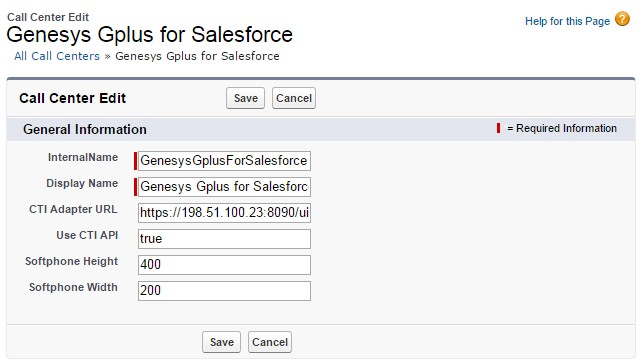
- Click Save.
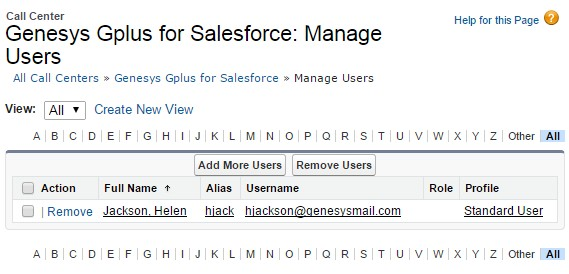
- Click Manage Call Center Users and then click Add users.

- On the Search for New Users page, you can enter search criteria to find users. Select the ones you want to be able to use the adapter and click Add to Call Center.
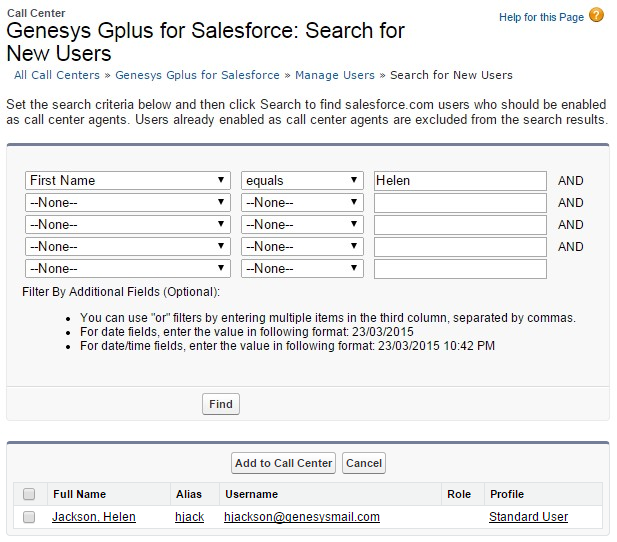
Your selected users are added to the list. You can remove a user on this page at any time.
- To access the adapter in Salesforce Classic, look for it in the left pane of your browser; in Salesforce Console, click the Phone button in the bottom right corner.
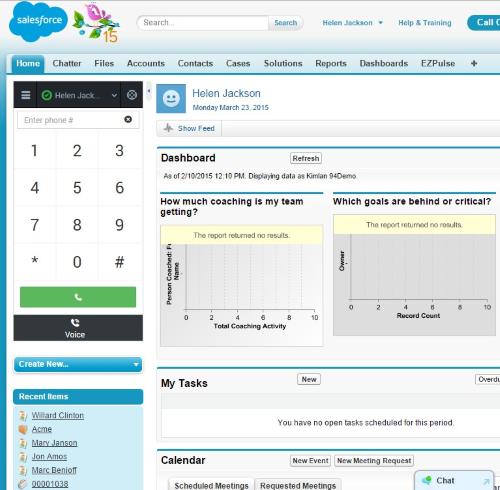 The adapter in Salesforce Classic.
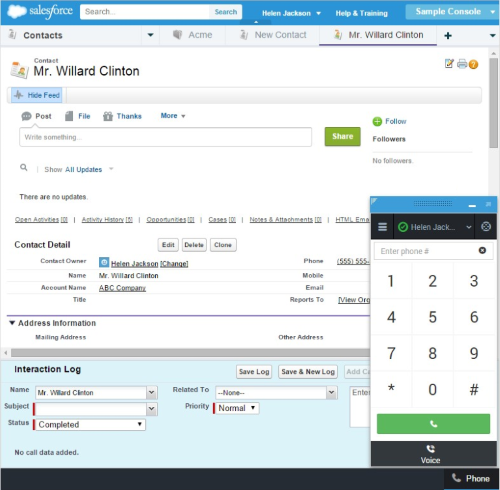 The adapter in Salesforce Console.


End
Configuring screen pops in Salesforce
When an agent receives an external call, the adapter can initiate a screen pop that causes Salesforce to show an appropriate record for the caller. To set up this functionality in Salesforce, login and go to Setup > Customize > Call Center > SoftPhone Layouts to create a SoftPhone Layout. Check out the Salesforce documentation for details about configuration.
In general, there are a couple of things to consider when you set up a SoftPhone Layout for the adapter:
- The Gplus Adapter for Salesforce ignores the SoftPhone Layout settings that control call-related fields. Instead, the adapter gets this information from Toast and case data you configure in the Genesys environment.
- Make sure you configure the Screen Pop Settings in the "CTI 2.0 or Higher Settings" section. These settings control whether the screen pop opens in a new window, tab, or Visualforce page.
See Screen pop for more information about configuring screen pops in your Genesys environment.