Personas
The Personas view lists information about the personas you have created in your environment.
A persona is a distinct personality you use for your Genesys Intelligent Automation applications. For example, you might create a distinct persona for each language your company serves. as such, you can use one persona for English-speaking customers and another persona for French-speaking customers.
In addition, each persona can use distinct pre-recorded prompts. This is helpful if you want to add distinct personas within a language group to appeal to various subsets of customers. You can have one persona that deals with general English-speaking calls, and another persona that caters to known callers from a particular age group, region, segment level, and more.
You can upload your own dynamic prompts to use with personas as a superior alternative to TTS (Text-to-Speech) prompts.
You can also create visual themes for each persona to use with WebIVR applications.
Personas tab
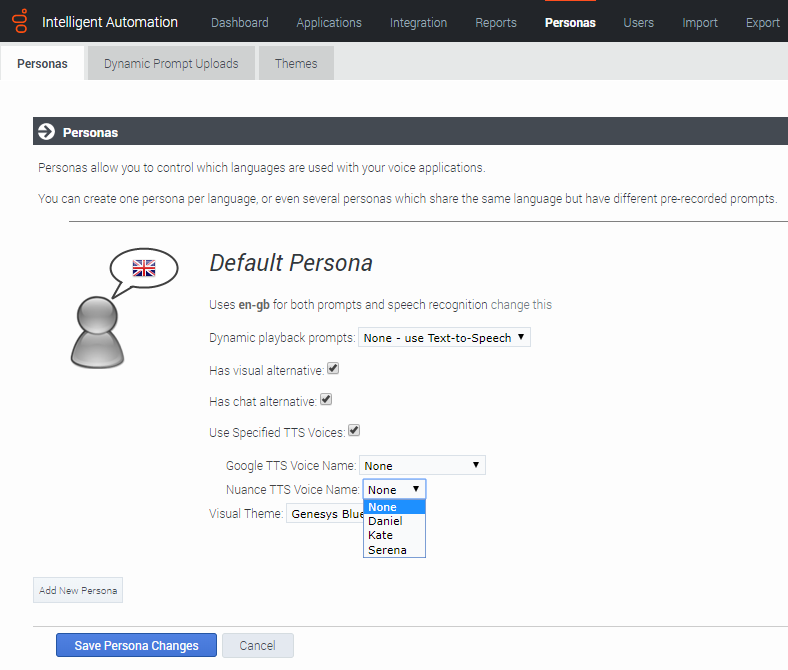
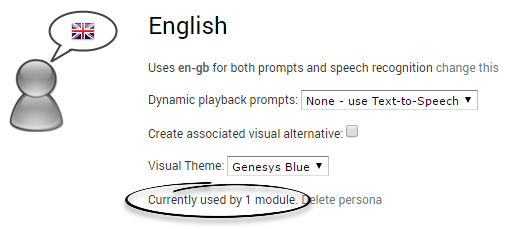
The Personas tab lists the personas you have created. Intelligent Automation comes pre-installed with a default persona, shown below:
This displays the following information about the persona:
- The name of the persona.
- The language used by the persona (in this case, British English). It also states this language is used for both prompts and speech recognition.
- This persona uses TTS (text-to-speech) for verbalizing information to the caller. However, if you have uploaded dynamic prompts, you can choose the prompt package here.
- Associated Chat and Visual alternatives
- Visual Theme
Creating a persona
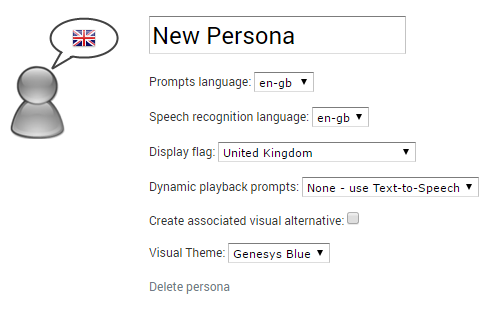
Click Add New Persona to create a persona for your company. The new persona appears in the list:
Configure the following:
- New Persona - The name of the persona. Choose a name that concisely describes the persona's function. In some cases, this might be as simple as a language (English or French). However, if you want to use more than one persona per language, use a name that describes its purpose (for example, English - Gold Segment).
- Prompts language - Select the language that this persona uses for TTS prompts.
- Speech recognition language - Select the language that this persona uses for speech recognition. This is often the same language you selected for Prompts language, but you can choose another language for speech recognition if needed (for example, if non-native speakers are frequently misunderstood by a particular language's speech-recognition engine and you want to use an alternative).
- Display flag - Select a flag to identify your persona. This icon is seen in the Callflow Editor for specific blocks, such as Message blocks, that allow you to select a persona.
- Dynamic playback prompts - Select whether to use Text-to-Speech or a dynamic prompt package that you previously uploaded.
- Create associated visual alternative - If enabled, Intelligent Automation creates a visual persona for use in WebIVR applications.
- Create associated chat alternative - If enabled, Intelligent Automation creates a chat persona for use in chat-based applications.
- Use Specified TTS Voices - If enabled, Intelligent Automation provides the option to select which TTS voice to use for a supported TTS engine (Nuance or Google). Allowed voices can be configured by an administrator. See Configuring TTS Voices.
- Visual Theme - If this persona is used in a WebIVR application, this drop-down menu allows you to select which theme to use.
Click Save Persona Changes.
Editing a persona
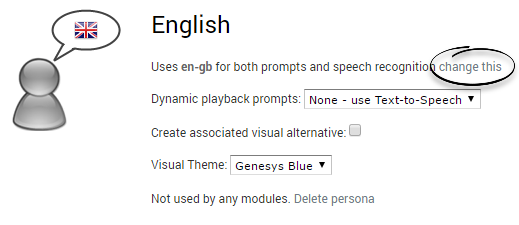
Click the change this link within a persona to change its details. You can configure any of the fields described in the Creating a new persona section.
Click Save Persona Changes.
Deleting a persona
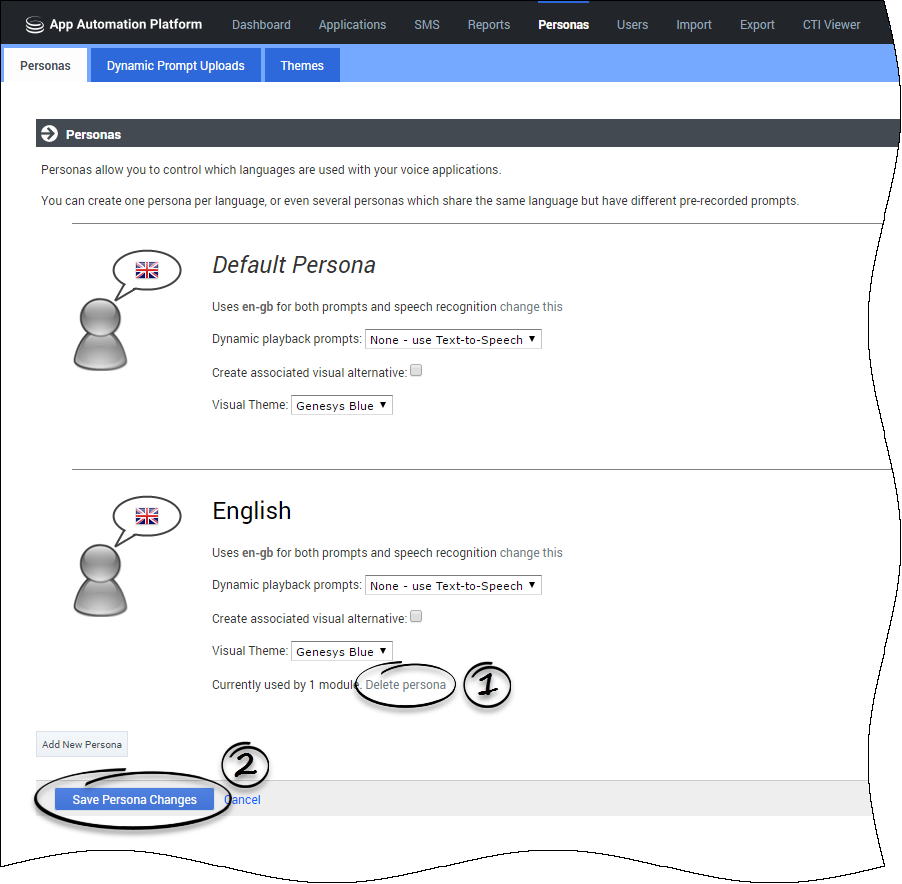
Click the Delete persona link within a persona to delete it, then click Save Persona Changes.
To the left of the Delete persona link, Intelligent Automation states how many applications or modules are currently using this persona. Ensure you understand the risk of deleting a persona that is being used in an application or module.
Configure Allowed TTS Voices
You can configure the TTS voices for both Nuance and Google on a per-language basis. In Administration > Default Server Settings, add a setting for each language and TTS engine you wish to support: Personas.<TTS Engine>.<Language>.TTSVoiceNames For example:
- Personas.Google.en-gb.TTSVoiceNames = en-GB-Standard-A,en-GB-Standard-B
- Personas.Nuance.en-gb.TTSVoiceNames = Daniel,Serena
Dynamic Prompt Uploads tab
The Dynamic Prompt Uploads tab lists the dynamic prompts you have uploaded to your environment.
Intelligent Automation uses dynamic prompts to give applications more natural-sounding language when speaking dynamic information back to customers. For example, when giving a calendar date to a customer, TTS (Text-to-Speech) might sound more uneven ("January One Two Zero One Seven" for January 1, 2017). The TTS voice might also not be in the tone or dialect that your callers expect. However, with dynamic prompts, you can use a native speaker to provide snippets of sounds that Intelligent Automation uses to concatenate more natural-sounding language for callers ("January First Twenty Seventeen" for January 1, 2017).
Before you can upload a new dynamic prompts package, you must prepare a ZIP file that contains recordings of the various sounds needed to produce a dynamic prompt. For example, you must have a speaker record sounds of the alphabet, numbers, times, dates, and more. Ensure that:
- The recording package includes all the listed files.
- The files are .wav file type.
- The file names must be an exact match to the filename provided by Intelligent Automation.
If you are unable to upload the package, set the Resources.AssumeRawAudioUploads option (under Administration > Default Server Setting) to True.
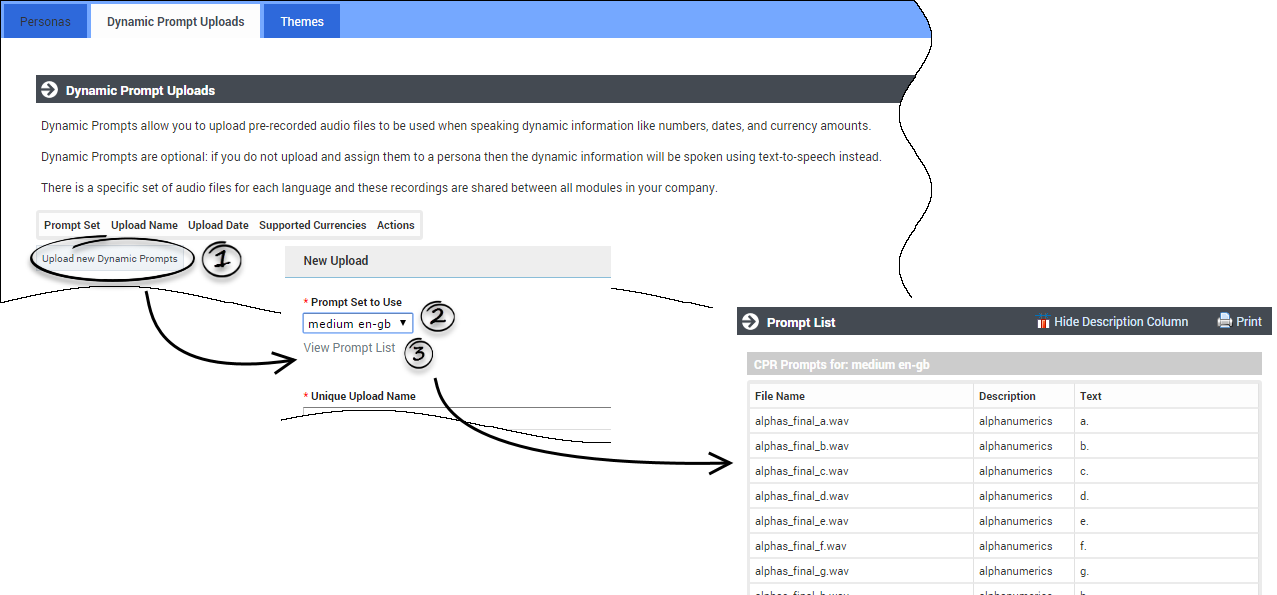
To view a list of the required sounds and filenames, click Upload new Dynamic Prompts. In the Prompt Set to Use menu, select a language (for example, medium en-gb for British English with a medium-sized subset of sounds), then click View Prompt List.
Uploading a new dynamic prompts package
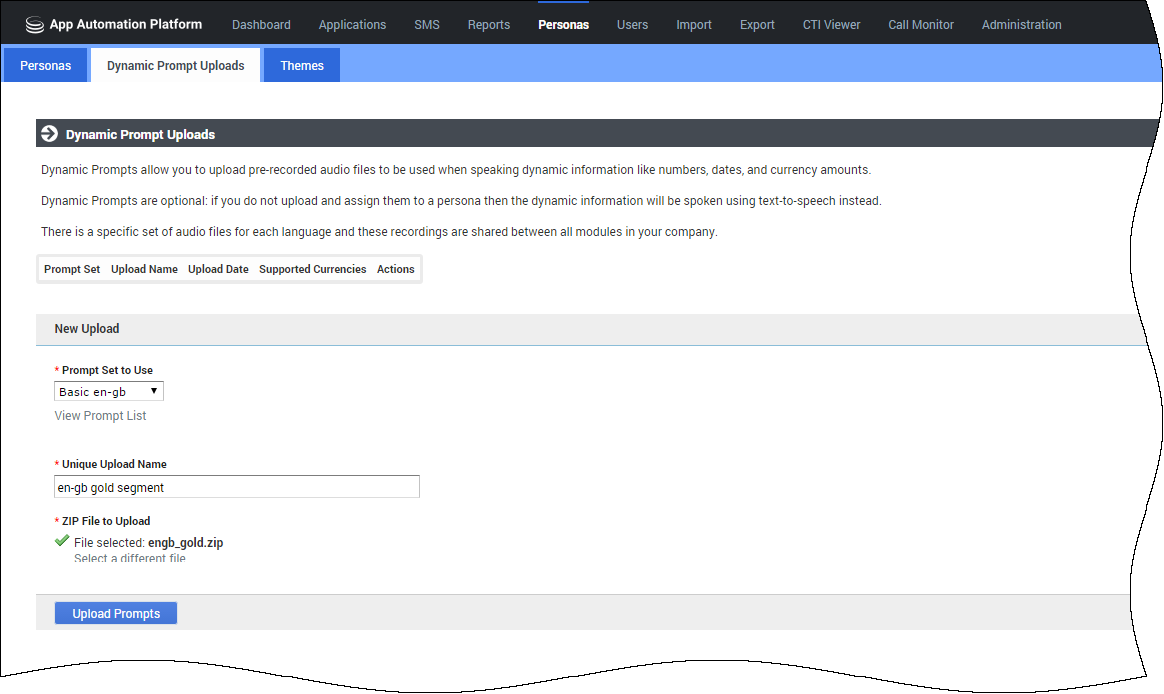
Once the package is ready, click Upload new Dynamic Prompts.
In the Prompt Set to Use menu, select a language.
In the Unique Upload Name field, provide a name for this dynamic prompts package. Choose a descriptive name that describes the purpose of the dynamic prompts.
Click Choose File to select the ZIP file on your computer, and then click Upload Prompts to upload the file.
Viewing information about your dynamic prompts
Once you have uploaded a package of dynamic prompts, the list updates to show information about the package. For example:
In the example above, you can view the following information:
- Prompt Set - The language set for these prompts.
- Upload Name - The name given in the Unique Upload Name field when the package was uploaded.
- Upload Date - The date the package was uploaded.
- Supported Currencies - The currencies this package supports. In this example, it supports this language's default currency. However, you might have a package that supports prompts for euros, pounds, dollars, and more. If so, these currencies are listed in this field.
Downloading a dynamic prompts package
In the Actions column, click download to download a ZIP file of the dynamic prompts package.
Deleting a dynamic prompts package
In the Actions column, click delete to delete the dynamic prompts package. Intelligent Automation displays a warning message that states any prompts using this package will revert to TTS (Text-to-Speech). If you understand the warning and agree to the deletion, click OK.
Themes tab
The Themes tab lists the themes available in your environment for WebIVR applications.
By default, your Intelligent Automation installation comes with the Genesys Blue theme. However, you can create your own theme to suit your business needs.
Creating a new theme
Click Create new Theme. The Edit Theme screen appears.
In the Name field, enter a unique name for your theme that describes its style and purpose. For example, you might call a theme Sales - Red, to indicate the theme is used by your company's sales department and the theme is based on the color red.
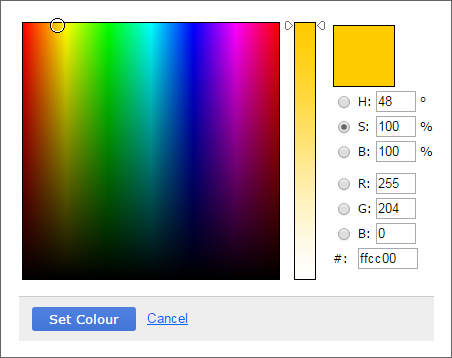
In the Colour Palettes section, specify which colors are available for use in this theme. You can click the X beside a color to remove it from the palette, making it unavailable for selection when configuring this theme. Or, you can add a color by clicking the + button. When you add a new color, Intelligent Automation displays a color-picker screen to allow you to customize the color. Click Set Colour when done to save the color to the theme's palette.
Below the color palette, you can define CSS-based settings for everything from the theme's header to the appearance of validation messages.
At the bottom of the settings list is a section called CSS Override. You can provide custom CSS in this field to further customize your theme. Any CSS specified in the CSS Override section supersedes CSS settings in the other sections. For example, if you set a particular border style in the Header section but then specified a different setting in the CSS Override section, the CSS Override setting is used.

