Contents
WebIVR Applications
You can use Genesys Intelligent Automation to create WebIVR versions of your voice applications. WebIVR applications are visual and web-based, allowing you to use the same routing logic as your voice application in a web or mobile setting.
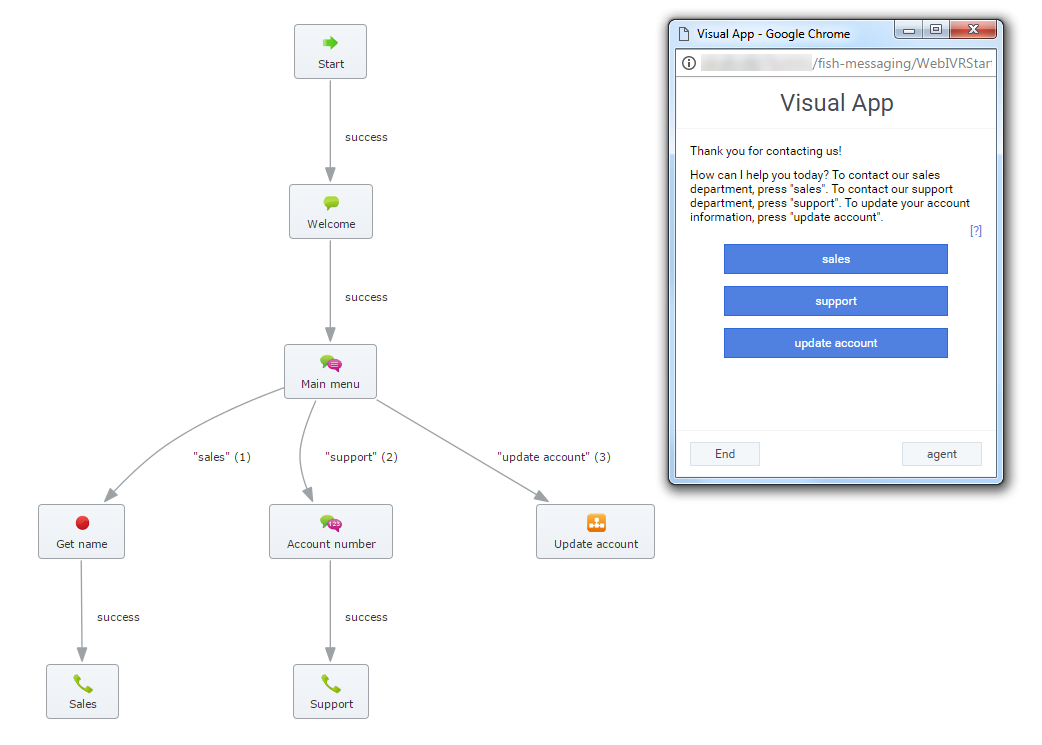
In the example above, a phone-based callflow was quickly adapted for use as a visual application by quickly updating prompt text using visual personas. Also notice how:
- IVR menu options became clickable buttons. When clicked, each button follows the path set in the Callflow Editor.
- If you created help text, it displays when the customer clicks ?.
- Global paths are respected. For example, the agent button is based on the agent global default path that is part of the standard application template.
Visual personas
WebIVR applications are based on visual personas that you enable in the Personas view. In the Persona tab, go to the persona you are using for your application and select the Has visual alternative check box. This allows you to use the same persona to serve both your voice application and your WebIVR application. You can customize the WebIVR persona to use prompts that are more relevant for visual interactions (for example, instead of saying "Thank you for calling," you can set your WebIVR application to say "Thank you for contacting us.")
Themes
You can set the appearance of a WebIVR application by choosing a theme for your visual persona in the Personas view.
Block behavior
All blocks in a WebIVR application function similarly to their role in a voice application. For example, a Message block plays a message in a voice application, whereas in a WebIVR application this block simply states a message on-screen (using the visual persona). The Phone block does not transfer the interaction directly to a phone number; it asks the customer to dial the transfer number (and on a mobile device, customers can usually click the displayed phone number to open the device's dialler).
You can insert hyperlinks into certain blocks, such as Message and Menu blocks, by using the following format in a prompt: [link:URL;Description]. For example: [link:https://www.genesys.com;Genesys].
Getting started
A good first step to prepare your WebIVR application is to go through each block in the Callflow Editor to check and define prompts and settings to ensure the visual persona is properly configured for a WebIVR application.
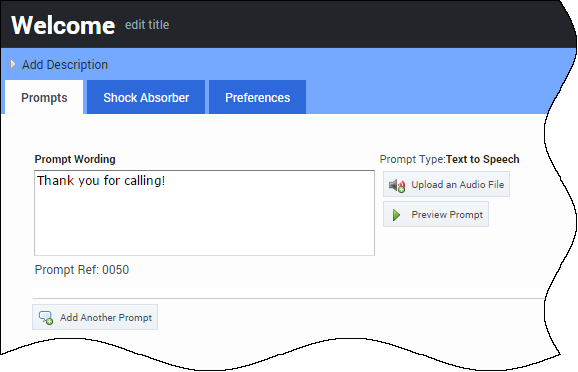
For example, the Welcome Message prompt below says, "Thank you for calling." However, this message does not make sense in a WebIVR application, as the customer has not dialled the voice application.
Go to the right of the Message screen and there is a persona selector. Select the visual persona.
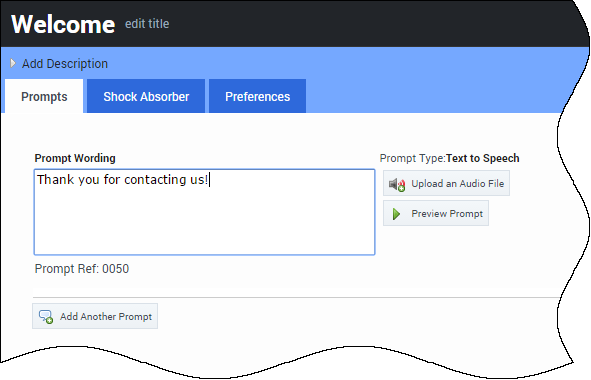
Now you can update the message to something more appropriate for a WebIVR application.
Viewing your WebIVR application
After you have prepared your application, you can click WebIVR in the top-right corner to try it out. The WebIVR application opens in a separate window, and you can click through the prompts and options as a customer would see them.
To open the WebIVR location:
- If your environment uses a Load Balancer, the Load Balancer and Messaging Server must be reporting as Online in the Administration > Servers tab.
- If your environment does not use a Load Balancer, Messaging Server must be reporting as Online in the Administration > Servers tab.
Deploying your WebIVR application
The WebIVR application is deployed to production in the same manner as your voice application.
To use the WebIVR application, you must provide a link that customers can use to access it. This link is based on one of the following formats, depending on whether you use a load balancer for your Messaging server:
- Load balancer before Messaging Server (LB): http://<LB_ADDRESS>:<LB_PORT>/fish-messaging/go/<application_token>
- Messaging Server Only (MS): http://<MS_ADDRESS>:<MS_PORT>/fish-messaging/go/<application_token>
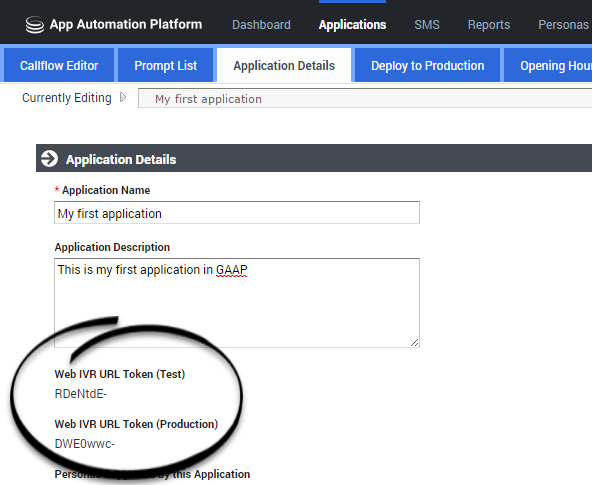
You can find the <application_token> value by clicking the Application Details tab in the Callflow Editor and noting the Web IVR URL Token value for test or production.
Passing Parameters in URLs
There are two ways to pass parameters through an URL. Genesys prefers using the secure method.
Passing parameters in a secure way
- Make a POST request to our Hash Servlet /fish-messaging/hash. The content of the POST should contain all parameters to be passed to the Web IVR as well as the company authentication key (can be found in the Company Details section in the GUI). The Authentication Key variable name should be AuthenticationKey.
- A hash will be generated and returned as a response to this request.
- Call the Web IVR URL with the parameters passed in on the query string e.g., /fish-messaging/go/43fa21-?hash=XXXXXXXXX&TestParam=TestValue&MyParam=MyValue etc.
- IA will take the parameters and generate a hash on them. It will then compare that hash with the authenticated hash generated previously to make sure they match. If they match, the parameters will be added to the IA context. If not, an error occurs.
Passing parameters in an unsecure way
- Set the WebIVR.Hash.PerformHashCheck default server setting to false.
- Add the parameters to the query string of the visual IVR URL e.g., /fish-messaging/go/43fa21-?TestParam=TestValue&MyParam=MyValue.
- They should be picked up by the visual IVR
When the variables are added, they are added both as IA and attached variables and also given new names:
- visual_parameter_variable_ParameterName
- visual_parameter_attached_data_ParameterName
You can also add a CLI/ANI or DNIS by adding parameters CLI or DNIS to the request.


