
Installing the Genesys Web Engagement Server
Starting with Genesys Web Engagement release 8.5.1, the GAX plug-in is replaced with the Web Engagement Management interface. This means that Web Engagement is no longer dependent on a specific GAX version, allowing you to upgrade Web Engagement independently from other GAX-related products.
After Genesys Web Engagement is ready to use, but before you use it, Genesys recommends that you verify the status of your Cassandra cluster and your Elasticsearch cluster.
About the Web Engagement Cluster
Genesys Web Engagement is built on the principles of N+1 architecture. This means that:
- The cluster combines 1 or more nodes. In other words, you must create and configure at least one node in order to use Web Engagement. And every time you add another node, you need to create and configure it using the same steps you used to create and configure the first one.
- All nodes are treated as equivalent to each other, so that almost all of the configuration is defined in the cluster application, while the nodes only contain the options required to connect to a particular host and their cluster.
- All server connections, such as Interaction Server and Stat Server, are defined for the cluster.
Note: Web Engagement supports a connection to the Interaction Server Proxy as an alternative to a direct connection to Interaction Server. - Connections to external clusters, such as a cluster of Chat Servers, must be configured in the cluster application, rather than adding connections to particular nodes. In other words, if you add nodes to the cluster, you don't have to reconfigure the existing nodes and cluster, whether you are migrating from one node to two nodes, or adding a thousand nodes to the system.
These features make it easy to maintain your cluster configuration and help you avoid faulty configuration scenarios.
Deploying Web Engagement
To deploy Web Engagement, follow these steps:
- Importing the Web Engagement Cluster Template
- Creating the Cluster Application
- Configuring the Cluster Application
- Configuring a Connection to a Cluster of Chat Servers (Optional)
- Importing the Web Engagement Client Template
- Creating a Client Application
- Configuring a Client Application
- Importing the Web Engagement Server Template
- Creating a Node Application
- Configuring a Node Application
- Adding Nodes to a Cluster
- Installing the Web Engagement Server
- Configuring alarms
Note: For more information on how to work with templates and application objects in Genesys Administrator, consult Generic Configuration Procedures.
Importing the Web Engagement Cluster Template
Note: For more information on how to work with templates in Genesys Administrator, consult Generic Configuration Procedures.
Start
- Open Genesys Administrator and navigate to Provisioning > Environment > Application Templates.
- In the Tasks panel, click Upload Template.
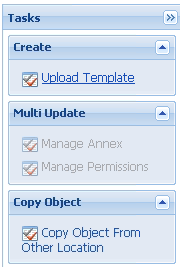 Upload Template link in the Tasks panel
 - In the Click 'Add' and choose application template (APD) file to import window, click Add.
- Browse to the GWE_Server_Cluster.apd file. The New Application Template panel opens.
- Click Save & Close.

End
Creating the Cluster Application
Note: For more information on how to work with application objects in Genesys Administrator, consult Generic Configuration Procedures.
Prerequisites
- You completed Importing the Web Engagement Cluster Template.
Start
- Open Genesys Administrator and navigate to Provisioning > Environment > Applications.
- In the Tasks panel, click Create New Application.
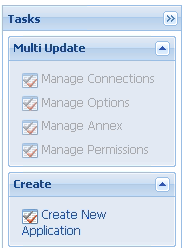 Create New Application link.
 - In the Select Application Template panel, click Browse for Template.
 Browse for Template.
 - Select the Web Engagement Cluster template that you imported in Importing the Web Engagement Cluster Template. Click OK.
- The template is added to the Select Application Template panel. Click Next.
- In the Select Metadata file panel, click Browse, then click Add, and then select the GWE_Server_Cluster.xml file. Click Open.
- The metadata file is added to the Select Metadata file panel. Click Next.
- In the Specify Application parameters tab:
- Enter a name for your application. For instance, GWE_Cluster.
- Make sure that State is enabled.
- Select the Host which will be used as an entry point into the Web Engagement Cluster. Typically, this is the Load Balancer host.
- Click Create.
- The Results panel opens.
- Enable Opens the Application details form after clicking 'Finish' and click Finish. The Web Engagement Cluster application form opens and you can start configuring the Web Engagement Cluster application.
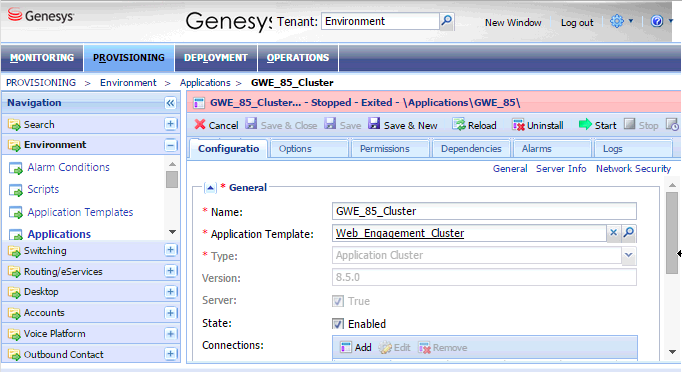 Web Engagement Cluster app opened in Genesys Administrator.


End
Configuring the Cluster Application
Note: For more information on how to work with application objects in Genesys Administrator, consult Generic Configuration Procedures.
Prerequisites
- You completed Creating the Cluster Application.
Start
- If your Cluster application form is not open in Genesys Administrator, navigate to Provisioning > Environment > Applications. Select the application defined for the Web Engagement Cluster and click Edit....
- In the Connections section of the Configuration tab, click Add. The Browse for applications panel opens. Select the Genesys application defined for Interaction Server, then click OK.
Note: Web Engagement supports a connection to the Interaction Server Proxy as an alternative to a direct connection to Interaction Server. The port ID is set to the default port.
 - Repeat the previous step for Stat Server. Optionally, you can also add a connection to Message Server (to apply the network logging option).
- If you are using legacy Web Engagement chat channel, configure a connection to the Chat Server or to a cluster of Chat Servers. If you are using a single Chat Server, you must set your port ID to webapi when specifying your connection to Chat Server. For information on how to connect a cluster of Chat Servers, see Configuring a Connection to a Cluster of Chat Servers (Optional).
- Expand the Server Info pane.
- In the Tenant section, click Add and select your tenant. For instance, Environment. Click OK.
- If your Host is not defined, click the lookup icon to browse to the hostname of your application.
- In the Listening Ports section, create the default port by clicking Add. The Port Info dialog opens. Note: You must specify the default port.
- Enter the Port. For instance, 9081.
- Choose http for the Connection Protocol.
- Click OK. The HTTP port with the default identifier appears in the list of Listening ports.
 Default HTTP port
- Create the port with the server/data/rules/deploy identifier by clicking Add.
- Enter server/data/rules/deploy for the ID.
- Enter a port value that is different from the one you chose for the default port. For instance, 9083.
- Select http for the Connection Protocol.
- Click OK. The HTTP port with server/data/rules/deploy ID appears in the list of Listening ports.
- Create the port with the ui identifier by clicking Add.
- Enter ui for the ID.
- Enter a port value that is different from the ports already assigned. For instance, 9082.
- Select http for the Connection Protocol.
- Click OK. The HTTP port with the ui ID appears in the list of Listening ports.
- Optionally, you can add a secure listening port for authenticated users, secured connections, and secure chat. Click Add.The Port Info dialog opens.
- Enter https for the ID field. This specific ID is required in GWE.
- Enter the Port. For instance, 9443.
- Enter https for the Connection Protocol.
- Choose Secured for the Listening Mode.
- Click OK.
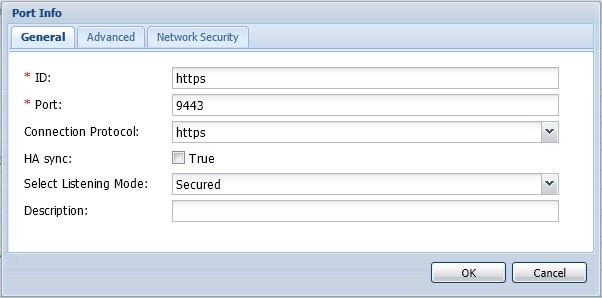 Secure listening port
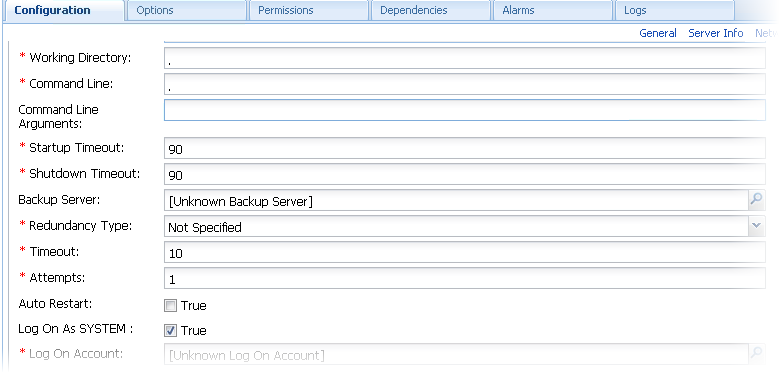
- Ensure the Working Directory and Command Line fields contain "." (period).
 Commands
 - Click Save.
- The Confirmation dialog for changing the application's port opens. Click Yes.
- Click Save & Close. If the Confirmation dialog opens, click Yes.


End
Configuring a Connection to a Cluster of Chat Servers (Optional)
Note: The Web Engagement "legacy" chat channel is deprecated as of version 8.5. Genesys recommends using the CX Widgets-based chat. Note: If you are using a legacy Web Engagement chat channel and running Web Engagement in a production environment, Genesys recommends connecting the Web Engagement Cluster to a cluster of Chat Servers rather than to a single instance of Chat Server.
Complete the steps below to configure a cluster of Chat servers for the Cluster.
Start
- In Genesys Administrator, create an application with a type of Application Cluster. This example uses an Application Cluster app called Chat Cluster.
- Navigate to Provisioning > Environment > Applications, select your Cluster application, and click Edit.
- In the Connections section, add a connection to Solution Control Server and an Application Cluster application that has connections to one or more Chat servers.
 The Cluster has a connection to the ChatCluster Application Cluster application.
 - Click Save & Close
- Open your Application Cluster application.
- In the Connections section, add connections to one or more Chat Servers, using a port ID of webapi for each connection.
 The ChatCluster application has connections to two Chat servers.
 - Click Save & Close.


End
Importing the Web Engagement Client Template
Prerequisites
- You completed Configuring the Cluster Application.
Start
- Open Genesys Administrator and navigate to Provisioning > Environment > Application Templates.
- In the Tasks panel, click Upload Template. Upload Template link in the Tasks panel
- In the Click 'Add' and choose application template (APD) file to import window, click Add.
- Browse to the GWE_Client.apd file, available in the templates directory of your installation CD. The New Application Template panel opens.
- Click Save & Close.
End
Creating a Client Application
To support the Web Engagement Management UI, you must create and configure Web Engagement Client application using the instructions in configuring a client application. The client application will be used to provide write-access to the Configuration Server.
Prerequisites
- You completed Importing the Web Engagement Client Template.
Start
- Open Genesys Administrator and navigate to Provisioning > Environment > Applications.
- In the Tasks panel, click Create New Application. Create New Application link.
- In the Select Application Template panel, click Browse for Template and select the Web Engagement Client template that you imported in Importing the Web Engagement Client Template. Click OK.
- The template is added to the Select Application Template panel. Click Next.
- In Specify Application parameters:
- Enter a name for your application. For instance, GWE_Client.
- Make sure that State is enabled.
- Select the Host on which the node will reside.
- Click Create.
- The Results panel opens. Click the Finish button. The Web Engagement Client application form opens.
- Click Save & Close. If the Confirmation dialog opens, click Yes.
- Enable Opens the Application details form after clicking 'Finish' and click Finish. The GWE_Client application form opens and you can start configuring the client application.
End
Configuring a Client Application
Prerequisites
- You completed Creating a Client Application.
Start
- If your client application form is not open in Genesys Administrator, navigate to Provisioning > Environment > Applications. Select the application defined for the client and click Edit....
- In the Connections section of the Configuration tab, click Add. The Browse for applications panel opens. Select the Web Engagement Cluster application you defined above, then click OK.
End
Importing the Web Engagement Server Template
Prerequisites
- You completed Configuring the Cluster Application.
Start
- Open Genesys Administrator and navigate to Provisioning > Environment > Application Templates.
- In the Tasks panel, click Upload Template. Upload Template link in the Tasks panel
- In the Click 'Add' and choose application template (APD) file to import window, click Add.
- Browse to the GWE_Server.apd file available in the templates directory of your installation CD. The New Application Template panel opens.
- Click Save & Close.
End
Creating a Node Application
You must create and configure every node that you add to the cluster, using the instructions in this section and the next one.
Prerequisites
- You completed Importing the Web Engagement Server Template.
Start
- Open Genesys Administrator and navigate to Provisioning > Environment > Applications.
- In the Tasks panel, click Create New Application. Create New Application link.
- In the Select Application Template panel, click Browse for Template and select the Web Engagement Server template that you imported in Importing the Web Engagement Server Template. Click OK.
- The template is added to the Select Application Template panel. Click Next.
- In the Select Metadata file panel, click Browse, then click Add, and select the GWE_Server.xml file. Click Open.
- The metadata file is added to the Select Metadata file panel. Click Next.
- In Specify Application parameters:
- Enter a name for your application. For instance, GWE_Node_1.
- Make sure that State is enabled.
- Select the Host on which the node will reside.
- Click Create.
- The Results panel opens. Click the Finish button. The Web Engagement Node application form opens and you can start configuring the Web Engagement Node application.
- Expand the Server Info pane.
- In the Listening Ports section, create the default port by clicking Add. The Port Info dialog opens.
- Enter the Port. For instance, 9081.
- Choose http for the Connection Protocol.
- Click OK. The HTTP port with the default identifier appears in the list of Listening ports.
- Create the port with the server/data/rules/deploy identifier by clicking Add.
- Enter server/data/rules/deploy for the ID.
- Enter a port value that is different than the one you chose for the default port. For instance, 9083.
- Select http for the Connection Protocol.
- Click OK. The HTTP port with server/data/rules/deploy ID appears in the list of Listening ports.
 Node listening ports
- Create the port with the ui identifier by clicking Add.
- Enter ui for the ID.
- Enter a port value that is different than the ports already assigned. For instance, 9082.
- Select http for the Connection Protocol.
- Click OK. The HTTP port with ui ID appears in the list of Listening ports.
- Click Save.
- A Confirmation dialog opens. Click Yes.
- Click Save & Close. If the Confirmation dialog opens, click Yes.
- Enable Opens the Application details form after clicking 'Finish' and click Finish. The GWE_Node_1 application form opens and you can start configuring the node application.
 Node app opened in Genesys Administrator.


End
Configuring a Node Application
Prerequisites
- You completed Creating a Node Application.
Start
- If your node application form is not open in Genesys Administrator, navigate to Provisioning > Environment > Applications. Select the application defined for the node and click Edit....
- In the Connections section of the Configuration tab, click Add. The Browse for applications panel opens. Select the Web Engagement Cluster application you defined above, then click OK.
 Node connection to Cluster
 - Expand the Server Info pane.
- In the Tenant section, click Add and select your tenant. For instance, Environment. Click OK.
- If your Host is not defined, click the lookup icon to browse to the hostname of your application.
- The Confirmation dialog for changing the application's port opens. Click Yes.
- (Optional) In the[log] section, the all option is set to stdout by default. Enter a filename if you wish to enable logging to a file. For example, you can enter stdout, C:\Logs\WebEngagement\GWE_Node1 to force the system to write logs in the console and in a file called GWE_Node1.log.

End
Adding Nodes to a Cluster
Prerequisites
You completed:
- Creating the Cluster Application.
- Configuring the Cluster Application
- Creating a Node Application
- Configuring a Node Application
Note: A single-node configuration works well in a lab environment, but in production, you need more than one node, in order to provide high availability. And every time you establish a new node, you must complete the following steps in order to create and configure it.
Genesys recommends that your cluster contain at least three Web Engagement nodes so that it can survive the loss of one node. To avoid "split brain" issues, keep an uneven number of nodes in the cluster. The cluster is considered as “ready-to-work” only after a majority of nodes have joined. A majority is N / 2 + 1, where N is the total number of nodes configured for the cluster.
Start
- Follow the instructions above for Creating a Node Application, but use a different name for the new node.
- Configure the new node application, as shown above, but point to a different server address.
End
Important: If you use more than one node, you need to set up Load Balancing in your environment.
Installing the Web Engagement Server
Install the Web Engagement Server on Windows or Linux.
Note: For more information on how to install apps that you have configured in Genesys Administrator, consult Generic Installation Procedures.
Prerequisites
Start- In your installation package, locate and double-click the setup.exe file. The Install Shield opens the welcome screen.
- Click Next. The Connection Parameters to the Configuration Server screen appears.
- Under Host, specify the host name and port number where Configuration Server is running. (This is the main "listening" port entered in the Server Info tab for Configuration Server.)
- Under User, enter the user name and password for logging on to Configuration Server.
- Click Next. The Select Application screen appears.
- Select the Web Engagement Server Application—that is, the Node app you created above—that you are installing. The Application Properties area shows the Type, Host, Working Directory, Command Line executable, and Command Line Arguments information previously entered in the Server Info and Start Info tabs of the selected Application object.
- Click Next. The Choose Destination Location screen appears.
- Under Destination Folder, keep the default value or browse for the desired installation location.
- Click Next. The Backup Configuration Server Parameters screen appears.
- If you have a backup Configuration Server, enter the Host name and Port.
- Click Next. The Ready to Install screen appears.
- Click Install. The Genesys Installation Wizard indicates it is performing the requested operation for Web Engagement Server. When through, the Installation Complete screen appears.
- Click Finish to complete your installation of the Web Engagement Server.
Prerequisites
Start- Open a terminal in the Genesys Web Engagement CD/DVD or the Genesys Web Engagement IP, and run the Install.sh file. The Genesys Installation starts.
- Enter the hostname of the host on which you are going to install.
- Enter the connection information to log in to Configuration Server:
- The hostname. For instance, demosrv.genesyslab.com.
- The listening port. For instance, 2020.
- The user name. For instance, demo.
- The password.
- If the connection settings are successful, a list of keys and Web Engagement applications is displayed.
- Enter the key for the Web Engagement Server application—that is, the Node app you created above—that you created previously in Configuration Server.
- Enter the location where Genesys Web Engagement is to be installed on your web server.
Note: This location must match the previous settings that you entered in Configuration Server. - If you have a backup Configuration Server, enter the Host name and Port.
- If the installation is successful, the console displays the following message:
Installation of Genesys Web Engagement Server, version 8.5.x has completed successfully.
Configuring alarms
Genesys recommends that you tune the following Web Engagement alarms:
- Incorrect load balancer routing
- Event Duration
- VisitProfile cache size
- Events cache size
- DroolsSession cache size
- Heap Memory Usage
- GC Latency
Next Steps
- Before using Genesys Web Engagement, you must either create and deploy your own Web Engagement application or deploy the provided sample application.
- At that point, you can Configure Genesys Rules System to work with GWE.