Contents
Viewing other schedules
The Other Schedules view displays a filterable, sortable, and searchable grid that lists other agents and their schedules. It has the following columns:
- Agent—Displays the name of the agent whose information appears in that row.
- Site—Displays the name of the agent's site.
- Team—Displays the name of the agent's team.
- Days of the week (one column for each)—Displays the agent's schedule information for that weekday. Click any work item in a specific agent's row to open the Schedule Details dialog box which contains all of the details about that particular work item.
Sorting the displayed data
Click the Agent, Site, or Team column header to sort ![]() the data in that column in ascending or descending order.
the data in that column in ascending or descending order.
You can also use the number keys on your keyboard.
Searching for agents
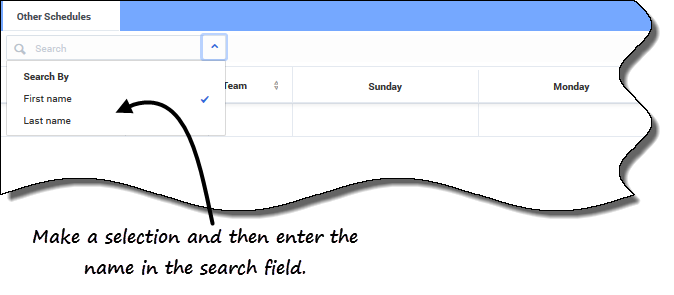
In the Search field, use the drop-down menu to search for agents.
- From the drop-down list, select First name or Last name and enter the agent's name in the search field.
Changing the view settings
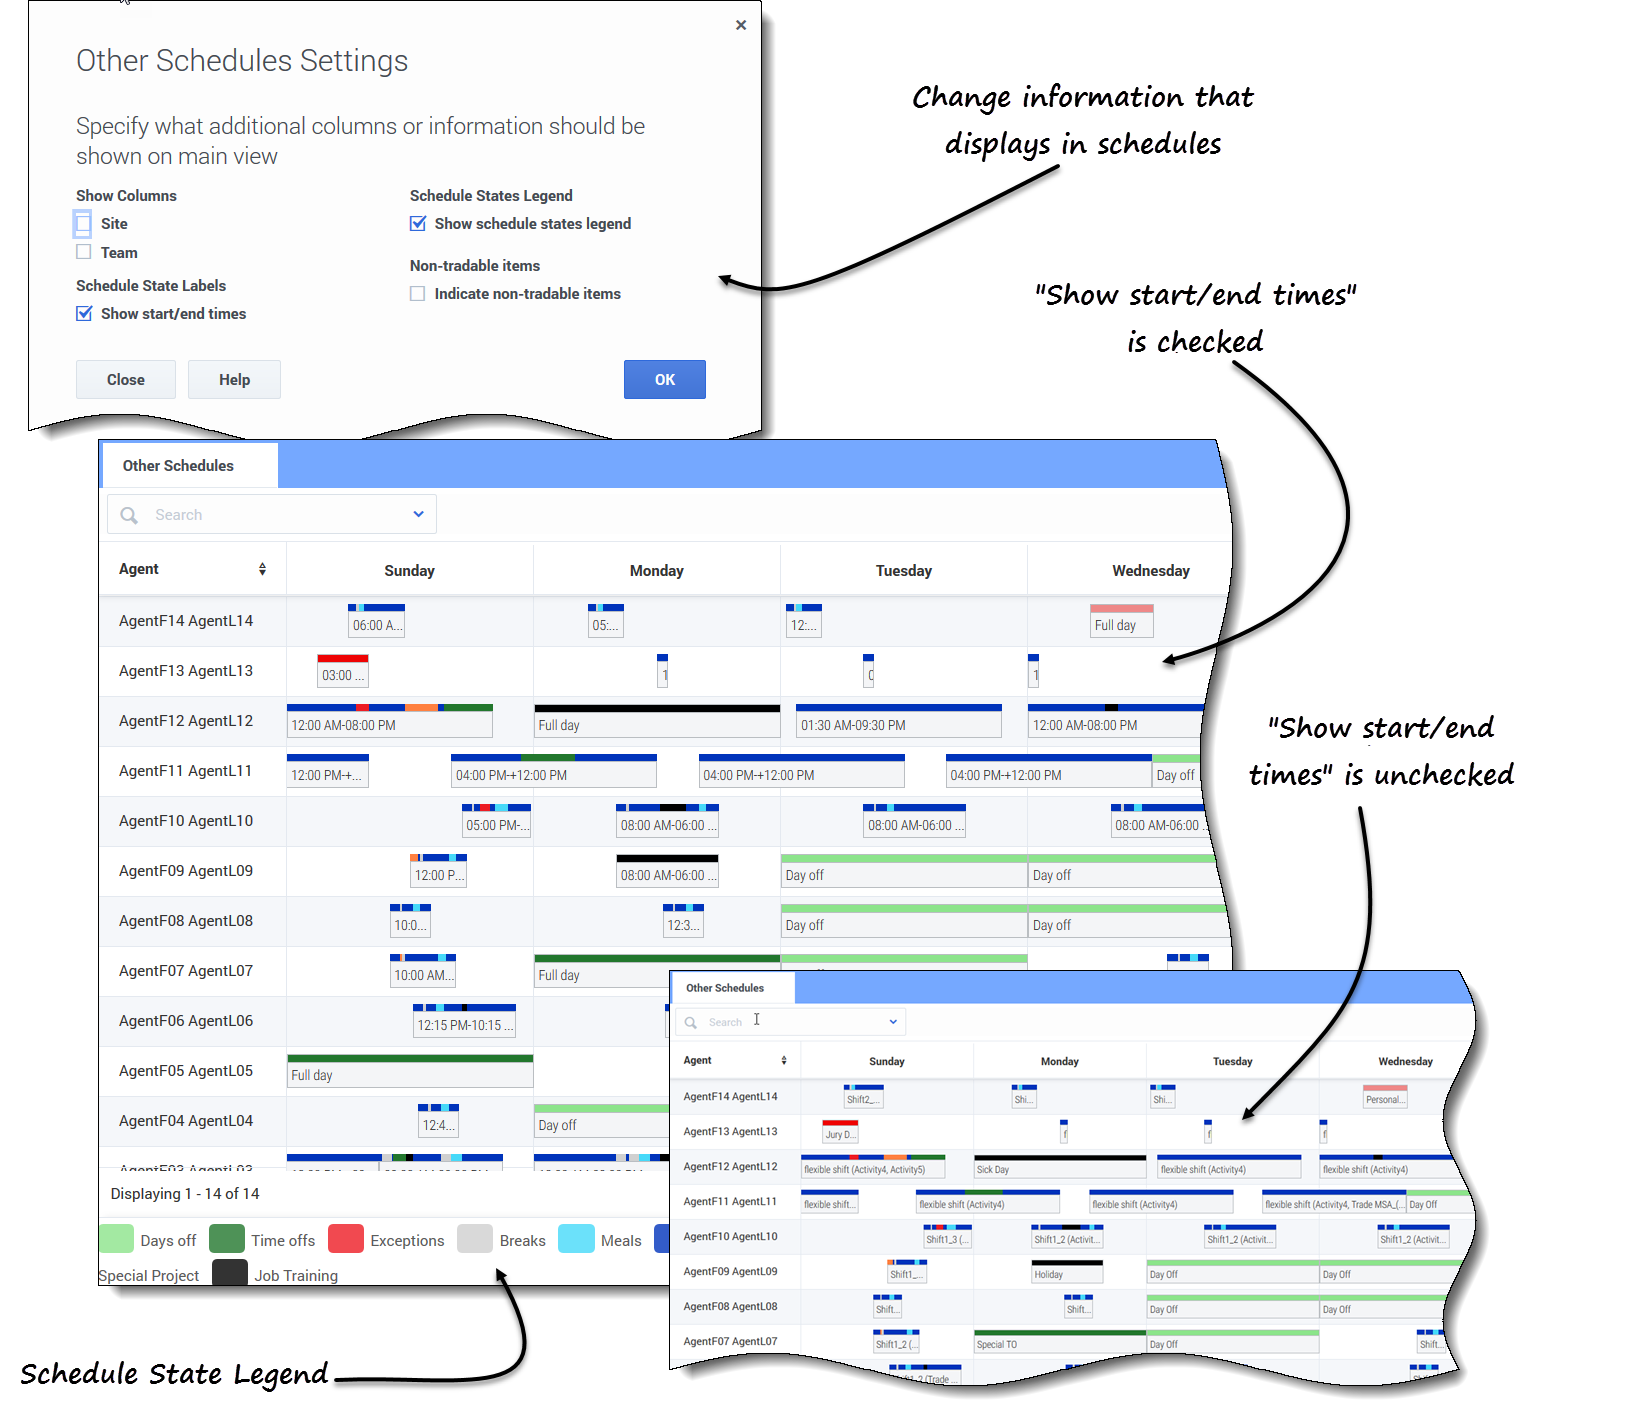
Click Settings ![]() to specify what columns or other information to show in schedules. You can choose to:
to specify what columns or other information to show in schedules. You can choose to:
- Add the Site and/or Team columns
- Show a legend for Schedule States
- Indicate non-tradable items in schedules
- Show start/end times (displayed, by default) or, if you clear the check box, show item names
Hover your cursor over truncated items in the schedule to see the information fully displayed in a pop-up tool tip. For example:

Filtering the displayed data
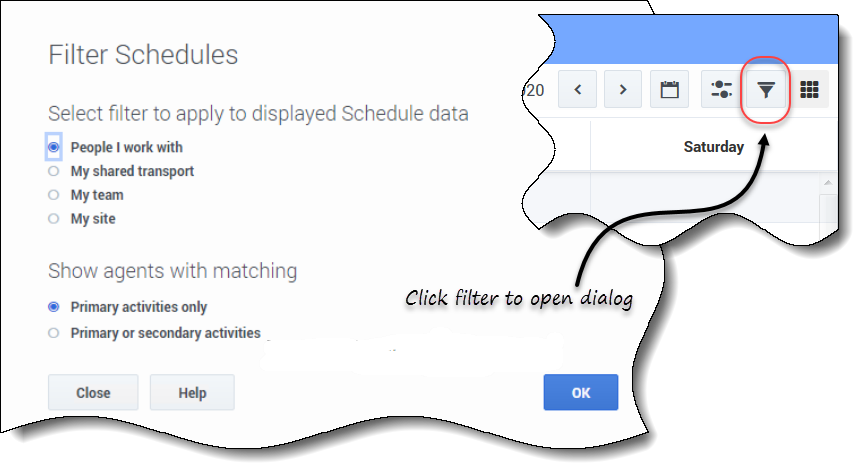
Click Filter ![]() to open the dialog box, where you can click the corresponding radio button to limit the display to one of these choices:
to open the dialog box, where you can click the corresponding radio button to limit the display to one of these choices:
- People I work with (the default setting)
- My shared transport (displayed only if the agent joined any shared transport)
- My team
- My site
- My business unit
Under Show agents with matching, select one of two settings:
- Primary activities only (the default setting)
- Primary or secondary activities
Viewing other agents' schedule details
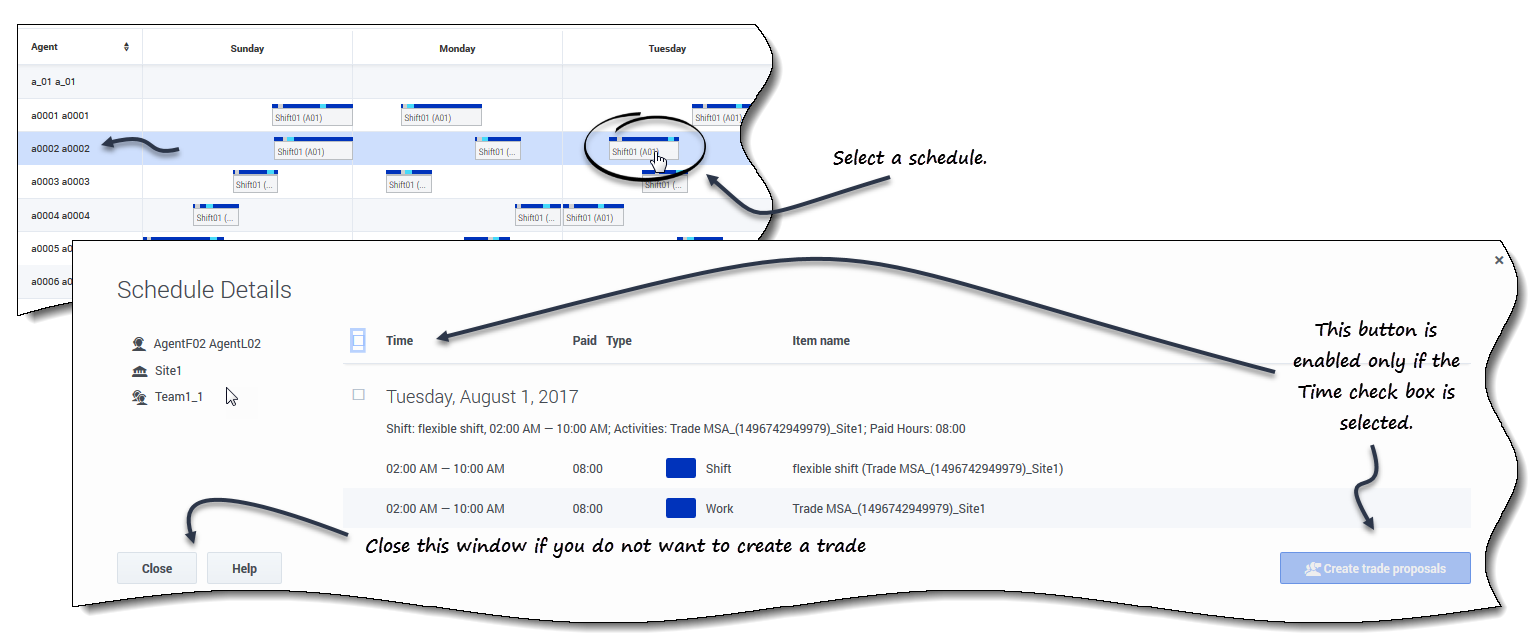
You can view the schedule details of other agents and create trade proposals in this view. It's as easy as clicking on any weekday column in the row that contains the agent's name to whom you want to propose a trade.
Viewing schedule details
To view other agents' schedule details:
- In the row containing the agent's name with whom you want to trade, click the weekday.
- The selected agent's schedule details open for that day.
- If you want to view the agent's schedule details for more than one day, click the agent's name.
- The selected agent's schedule details open for that week.
- If the dates and times in the schedule details are suitable, create a trade proposal for this agent.
- If you only want to view the details and are satisfied, click Close.
Creating the trade proposal
To create and send a trade proposal to the agent:
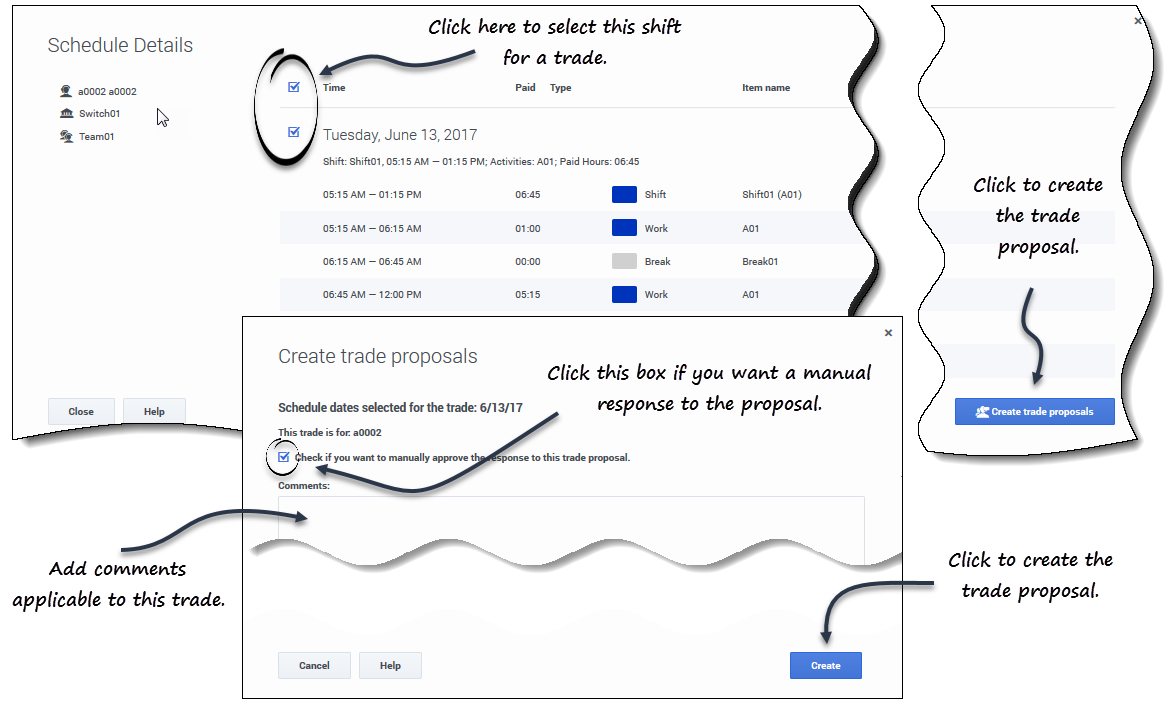
- In the Schedule Details window, click the check box near the weekday name.
- If you select at least one check box, the Create trade proposals button is enabled. To select all days in the dialog select the top-most check box.
- Click Create trade proposals.
- The Create trade proposals window opens.
- If applicable, click the Check if you want to manually approve the response to this trade proposal check box.
- In the Comments field, enter any information about this trade that you want the receiving agent or your supervisor to know.
- Click Create.
- The My Trades view opens and the trades is added to your list of trades.


