Configure SNMP Monitoring
This task, Configuring SNMP Monitoring for T-Servers and SIP Server, requires the skills and knowledge of a system administrator, and knowledge of the Genesys installation that is running on your site. Ideally, you or a current colleague installed the Genesys software, so you have—or can easily find—information that you need, such as the location of certain files. You also need an MIB Editor; ideally, one that you have used before.
Before you configure
Verify or perform these requirements:
- Your Genesys software installation must include a current Media Layer SNMP license. Verify with your Genesys marketing representative.
- The applications SNMP Master Agent and Solution Control Server must be installed, configured and running.
[+] SHOW HOW
- The SIP Server(s)/ TServer(s) that you wish to monitor must be provisioned with <TServer>\management-port and restarted.
For each SIP Server and T-Server, configure <TServer>\management-port. See the option settings in the
SIP Server 8.1 Deployment Guide.
[+] SHOW HOW
You can change T-Server common configuration options in the Options section of the Application object (for example: SNMP-MA, for the master SNMP).
Find the Application object in this directory:
- If you use Genesys Administrator: Application object > Options tab > Advanced View (Options)
- If you use Configuration Manager: Application object > Properties dialog box > Options tab
Option: management-port
Default Value: 0
Valid Values: 0 or any valid TCP/IP port
Changes Take Effect: after T-Server is restarted
This option specifies the TCP/IP port that management agents use to communicate with T-Server. If set to 0 (zero), this port is not used.
- The Network Management System (NMS) must be connected to the SNMP Master Agent.
See the section How to Activate SNMP Support in "Chapter 7: SNMP Interface" of the
Framework 8.5 Management Layer User's Guide.
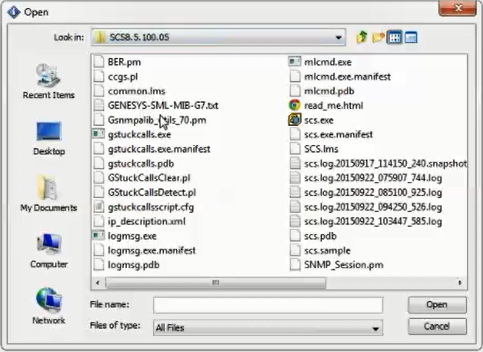
- Import the file GENESYS-SML-MIB-G7.txt to NMS.
Find this file in the working directory of the Solution Control Server application; the person(s) who installed Genesys for your company should know the location. This file contains Genesys-specific SML, MIB, and G71 definitions.
Summary
For each SIP Server / TServer...
- Query the gServersTable and record the value of:
gServerId (<index>).
- Set the value 4 (createAndGo) for:
Name/OID: gsCtrlRowStatus.<index>.5;
- Set the refresh timeout. For example, 5 seconds for:
Name/OID: gsCtrlAutomaticRefresh.<index>.5 for tsInfoTable
|
Consider the three steps above as general directions which you can execute in the most efficient way for you.
The Summary is intentionally generic because every MIB editor is different.
Consider the five steps below as an example of how one system administrator might configure SNMP Monitoring for T-Servers and SIP Server.
The real steps that you use to access SNMP data will depend on your site's NMS implementation and on your MIB editor.
|
Example steps to configure SNMP monitoring
Your actual steps will be similar:
- With the MIB Editor, Load the imported file GENESYS-SML-MIB-G7.txt.
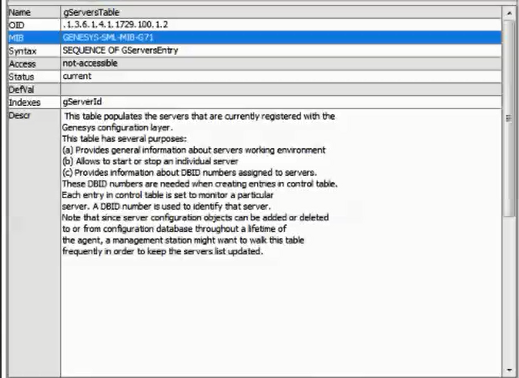
- Inside GENESYS-SML-MIB-G7.txt, find and read the DESCRIPTION for gServerControlTable and gsCtrlRowStatus.
The description contains information about a table's contents, purpose, and behavior—and how to request data from NMS.
[+] SHOW TABLE DESCRIPTION
gServerControlTable OBJECT-TYPE
. . .
DESCRIPTION
"Control table containing a set of parameters to set up and control data collection from Genesys server(s). This table facilitates the monitoring of multiple Genesys servers.
The following data tables defined in this MIB module are controlled by the gsControlTable:
- gsLogTable
- gsInfoTable
- gsClientTable
- gsPollingTable
- tsInfoTable
- tsCallTable
- tsDtaTable
- tsLinkTable
- tsCallFilterTable
- tsCallInfoTable
- tsLinkStatsTable
Entries in the above tables are created on behalf of an entry in the gServerControlTable. If a control row is destroyed, then corresponding row in the respective data table is destroyed too.
Some tables defined in this MIB module may just be used to perform some management function on a server (e.g.,gsPollingTable). When a management station creates a row in the control table for such a table, the agent will create a row in the corresponding table thus making it ready to be used to perform a management function for a selected server. This way, we are allowed to create multiple instances of a management object that can be used to perform a management function for multiple servers.
For example, in case of gsPollingTable a manager will be able to perform reconfig command for multiple Stat Servers."
- Get the value of gServerId(s) of SIP Server(s) / TServer(s) from the gServersTable.
[+] SHOW HOW
Scan the Table view for T-Servers or SIP Servers (in the column gServerType) that have "start" in the gServerCommandLine column. These should appear in the topmost rows of the Table View.
In the partial screen shot above, Line 2 reads "T-Server" in the gServerType column and "start" in the gServerCommandLine column. So that line contains the information that you need.
The T-Server in this row of data has an identifying number that appears in both the gServerId column and the Index column. You will need that value later.
In the example, that value is: 102.
- Then set the value 4 (createAndGo) for Name/OID: gsCtrlRowStatus.<index>.5;
…where <index> is the value of gServerId from the step above, to initiate the data collection for tsInfoTable.
Set other tables in the same way. For example: gsCtrlRowStatus.<index>.6 for tsCallTable(6).
[+] SHOW HOW
Go to this directory: MIB Tree > iso.org.dod.internet > private > enterprises > genesys > servers > genericServer > gsCleanupTimeout > gServerControlTable > gServersEntry > gsCtrlRowStatus
Select Set from the Operations drop-down. In the SNMP Set dialog box, find the OID field and append the number in it with this: ".102.5" (102 is the gServerId for the T-Server that you found in the previous step.
In the value field, enter 4 (for and ".4" (for createAndGo).
- Set the refresh timeout to 5 seconds for Name/OID: gsCtrlAutomaticRefresh.<index>.5 for tsInfoTable
Use a similar method to set other tables, for example:
gsCtrlAutomaticRefresh.<index>.6 for tsCallTable(6).


