Contents
Getting Started
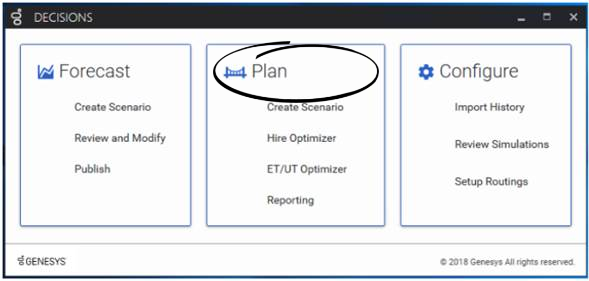
Open the Genesys Decisions Plan application from the Decisions main landing page.
In the Decisions Planning application, capacity plans are created, edited, and stored in files called scenarios (similar to spreadsheets in Excel). Each Decisions scenario can contain one capacity plan for each of your Contact Groups configured.
The first screen that displays after you start Genesys Decisions and open a scenario is the Main Grid or "Scenario Viewer". The body of the screen looks like a spreadsheet, with information about the selected contact center, staff type, and contact type.
Using Keyboard Alt Commands
To execute a command on a menu bar or within a dialog box, use the ALT key in conjunction with the underlined letter of a command. If the letters in the menu or dialog box are not underlined, press the ALT key to make the underlines appear.
Using Function Keys
The following table lists common function keys that you can use in the Genesys Decisions application interface.
| Press: | To do the following: |
|---|---|
| Ctrl+N | Open a new scenario file. |
| Ctrl+O | Open an existing scenario file. |
| Ctrl+S | Save a scenario file. |
| Ctrl+Z | Undo the last entry. |
| Ctrl+P | Print the scenario view data grid. |
| Ctrl+A | Copy all cells in the window to the Windows clipboard for pasting within Genesys Decisions or to another application. |
| Ctrl+C | Copy selected cells to the Windows clipboard for pasting within Genesys Decisions or to another application. |
| Ctrl+V | Paste selected cells from the Windows clipboard after copying within Genesys Decisions or from another application. |
Exploring Planning Scenarios
Creating different scenarios is very important in analyzing contact center plans. Genesys Decisions is a powerful tool that allows the user to create different "What-If" scenarios to see the outcomes and how certain metrics are affected. Different graphs and data tables can be created to show sensitivity analysis and trends. These different scenarios give the user a better understanding of how the contact center operates. The steps below describe the various steps involved in creating and exploring a scenario.
- Double-click the Genesys Decisions application icon on your desktop, or start the application from the Start > Programs menu using your Windows Start button. The login screen displays. Log in to Genesys Decisions using your login ID and password.
- Do one of the following:
- To open an existing file after the application opens, click File, and then Open (or Ctrl + O).
- To create a new file, in the dialog box that opens, choose the file name of the scenario to work with, and then click Open.
- Genesys Decisions scenario files have the filename extension .cbg. The name of the file in use will be listed at the top left of the Genesys Decisions application window following the company and software name.
- A workgroup or staff type is the group of agents in a physical contact center location. Select a workgroup and contact type using the Center, Staff Type, and Contact Type drop-down boxes immediately under the button toolbar in the area labeled Select.... The main grid will open and display assumptions and scenario output for the selected staff type and contact type in the contact center network over the time horizon of the scenario. A scenario is a simulated forecast of predicted service goals based on input or imported historical data.
- Columns of scenario information will have a different background color than columns of history actuals or scenario history. The default background colors are as follows:
- Actual History: Blue
- Scenario History: Green
- Scenario: White
- To change these settings, see Changing the Default Color Settings.
- To modify the value of any cell displayed in the Scenario Viewer, see Editing Main Grid Assumptions. Once a new value is entered, the system will calculate new performance forecasts, trend charts, sensitivity analysis, and reports.
- You can view your resulting network performance using the options under the Results menu for Report Expert, Trend Analysis, Sensitivity Analysis, Variance Analysis, and Distribution Viewer.
- To save your scenario with a new filename, click File > Save As. Type in your new file name, and click Save. Your file will automatically be saved with the extension .cbg. For more information, see Saving a Scenario.
Explore other features by selecting commands on the menu bar, or by using the toolbar buttons below the menu bar.

