Required and split staffing methods
Workforce Management (WFM) provides different methods to staff (define the number of agents required for) forecast scenarios, such as Required and Split Staffing.
Required staffing is a user-defined data series that you build, by using the Required Staffing wizard. The Split Staffing wizard enables you to split the number of agents required for a multi-site activities (MSA) into specific amounts for each activity within the MSA.
Using required staffing values
Use the Required Staffing wizard to define required staffing values in a forecast scenario's Staffing view.
Here's what you should know about required staffing and how you can use it:
- Required staffing data is user-defined staffing requirements for a forecast scenario.
- If you have compiled calculated-staffing values, you can set required staffing to the same values as calculated staffing.
- Forecasts can contain both calculated and required data. You can build schedules by using either set of data.
- Required staffing can be composed of a combination of template values, manually entered amounts, and calculated staffing values.
To set required staffing by using the wizard:
- In the navigation bar, click Forecast > Scenarios.
- The Scenarios view opens.
- Beside the scenario you want to staff, click Actions
 and then, select Open.
 - At the top, near the scenario name, click the Volumes drop-down menu and select Staffing.
- In the Activities pane, select an activity or multi-site activity and click Required
 .
.
- The Required Staffing wizard opens.
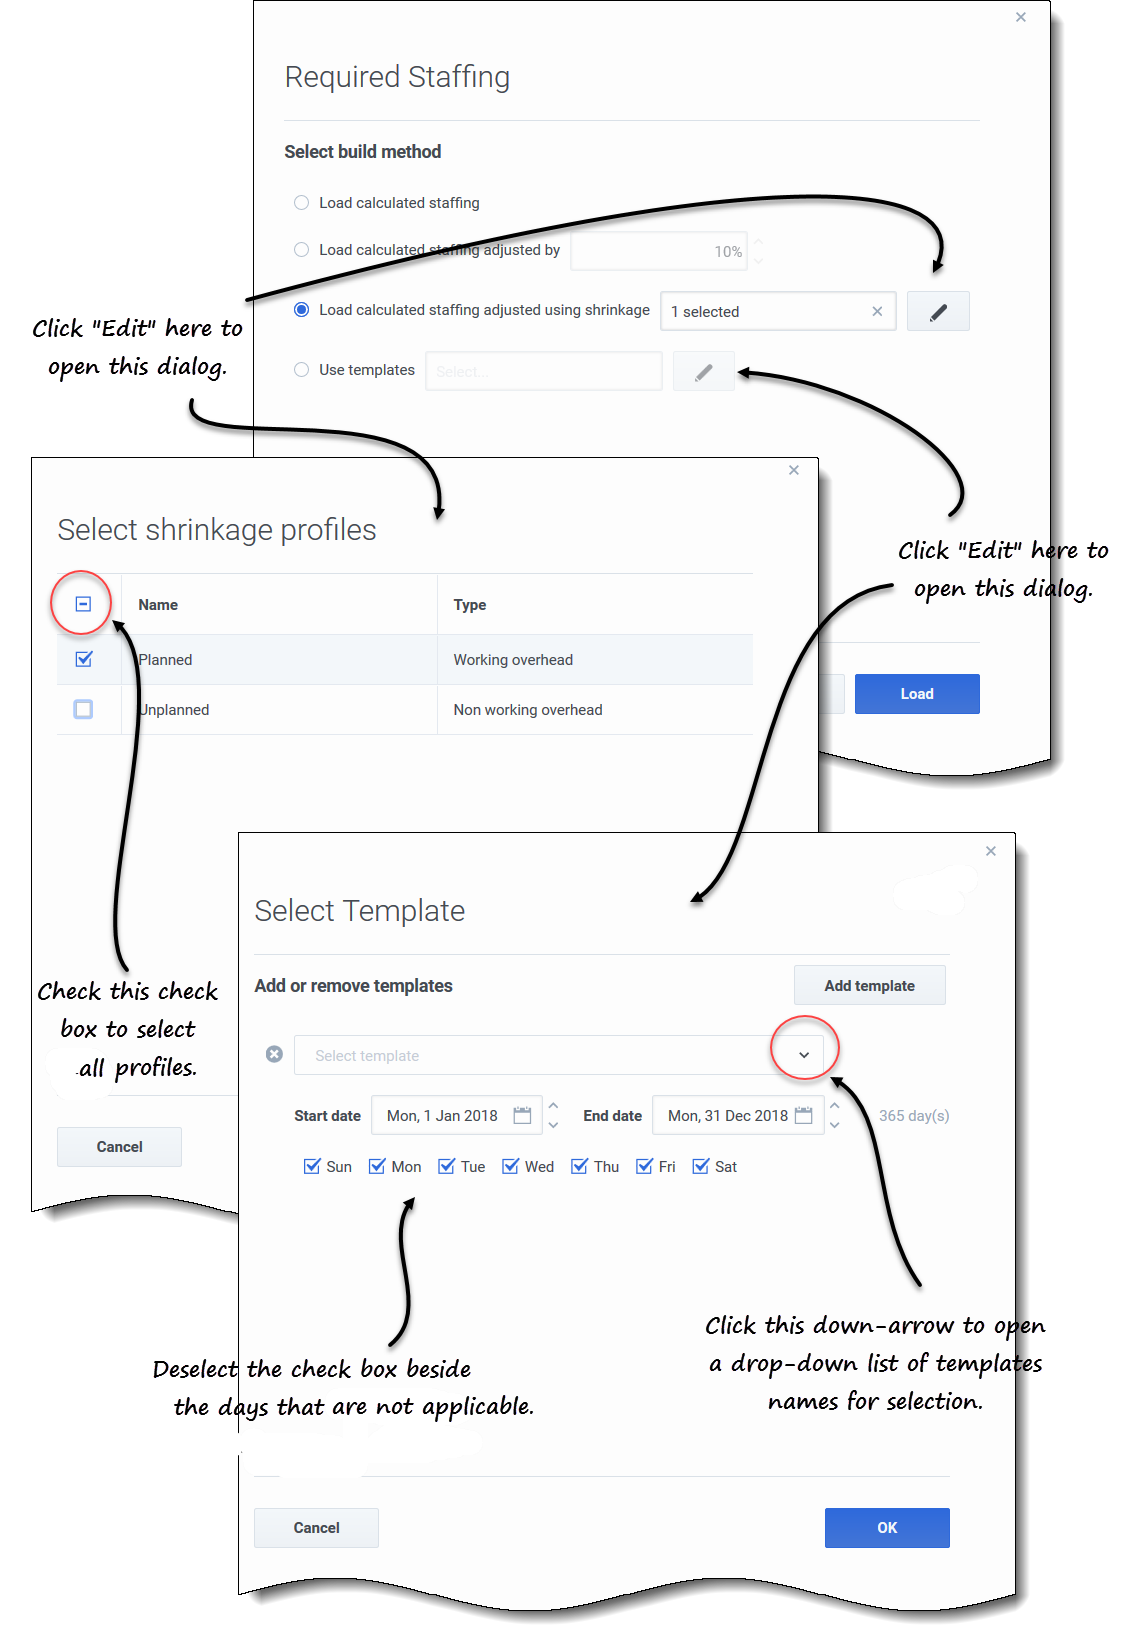
- Choose one of four build methods:
- Select Load calculated staffing to apply calculated staffing to required staffing with no changes.
- Select Load calculated staffing, adjusted by and enter a percentage to adjust calculated staffing before applying it to required staffing.
- Valid values are from -99 to 999.
- Select Load calculated staffing adjusted using shrinkage and click Edit
 to adjust calculated staffing, before applying it to required staffing.
- When the Select shrinkage profile dialog opens, select the check box beside the profiles you want to use, or select the top-most check box to select all profiles.
- Click OK to return to the Required Staffing dialog. The Load calculated staffing adjusted using shrinkage field is updated with the number of profiles you selected.
- Select Use templates and click Edit to apply one or more staffing templates
- When the Select Template dialog opens, click the down arrow in the empty field to select a template.
- To add another template, click Add template.
- For each template, enter a start and end date, or use the date selectors to set these fields.
- Deselect the check boxes for the week days that are not applicable.
- Click OK to return to the Required Staffing dialog. The Use templates field is updated with the number of templates you selected.
- Click Load.
- When the loading process is complete, click OK.
Splitting the staffing data
Use the Staffing Split Wizard to split staffing from a multi-site activity Staffing forecast scenario.
A multi-site activity (virtual activity set) has one or more associated activities (existing activities). After building calculated and required staffing for a multi-site activity, you can then use this wizard to split the result between associated activities.
To split staffing for a multi-site activity:
- In the navigation bar, click Forecast > Scenarios.
- The Scenarios view opens.
- Beside the scenario you want to staff, click Actions
 and then, select Open.
 - At the top, near the scenario name, click the Volumes drop-down menu and select Staffing.
- In the Activities pane, select multi-site activity and click Split
 .
.
- The Split Staffing wizard opens.
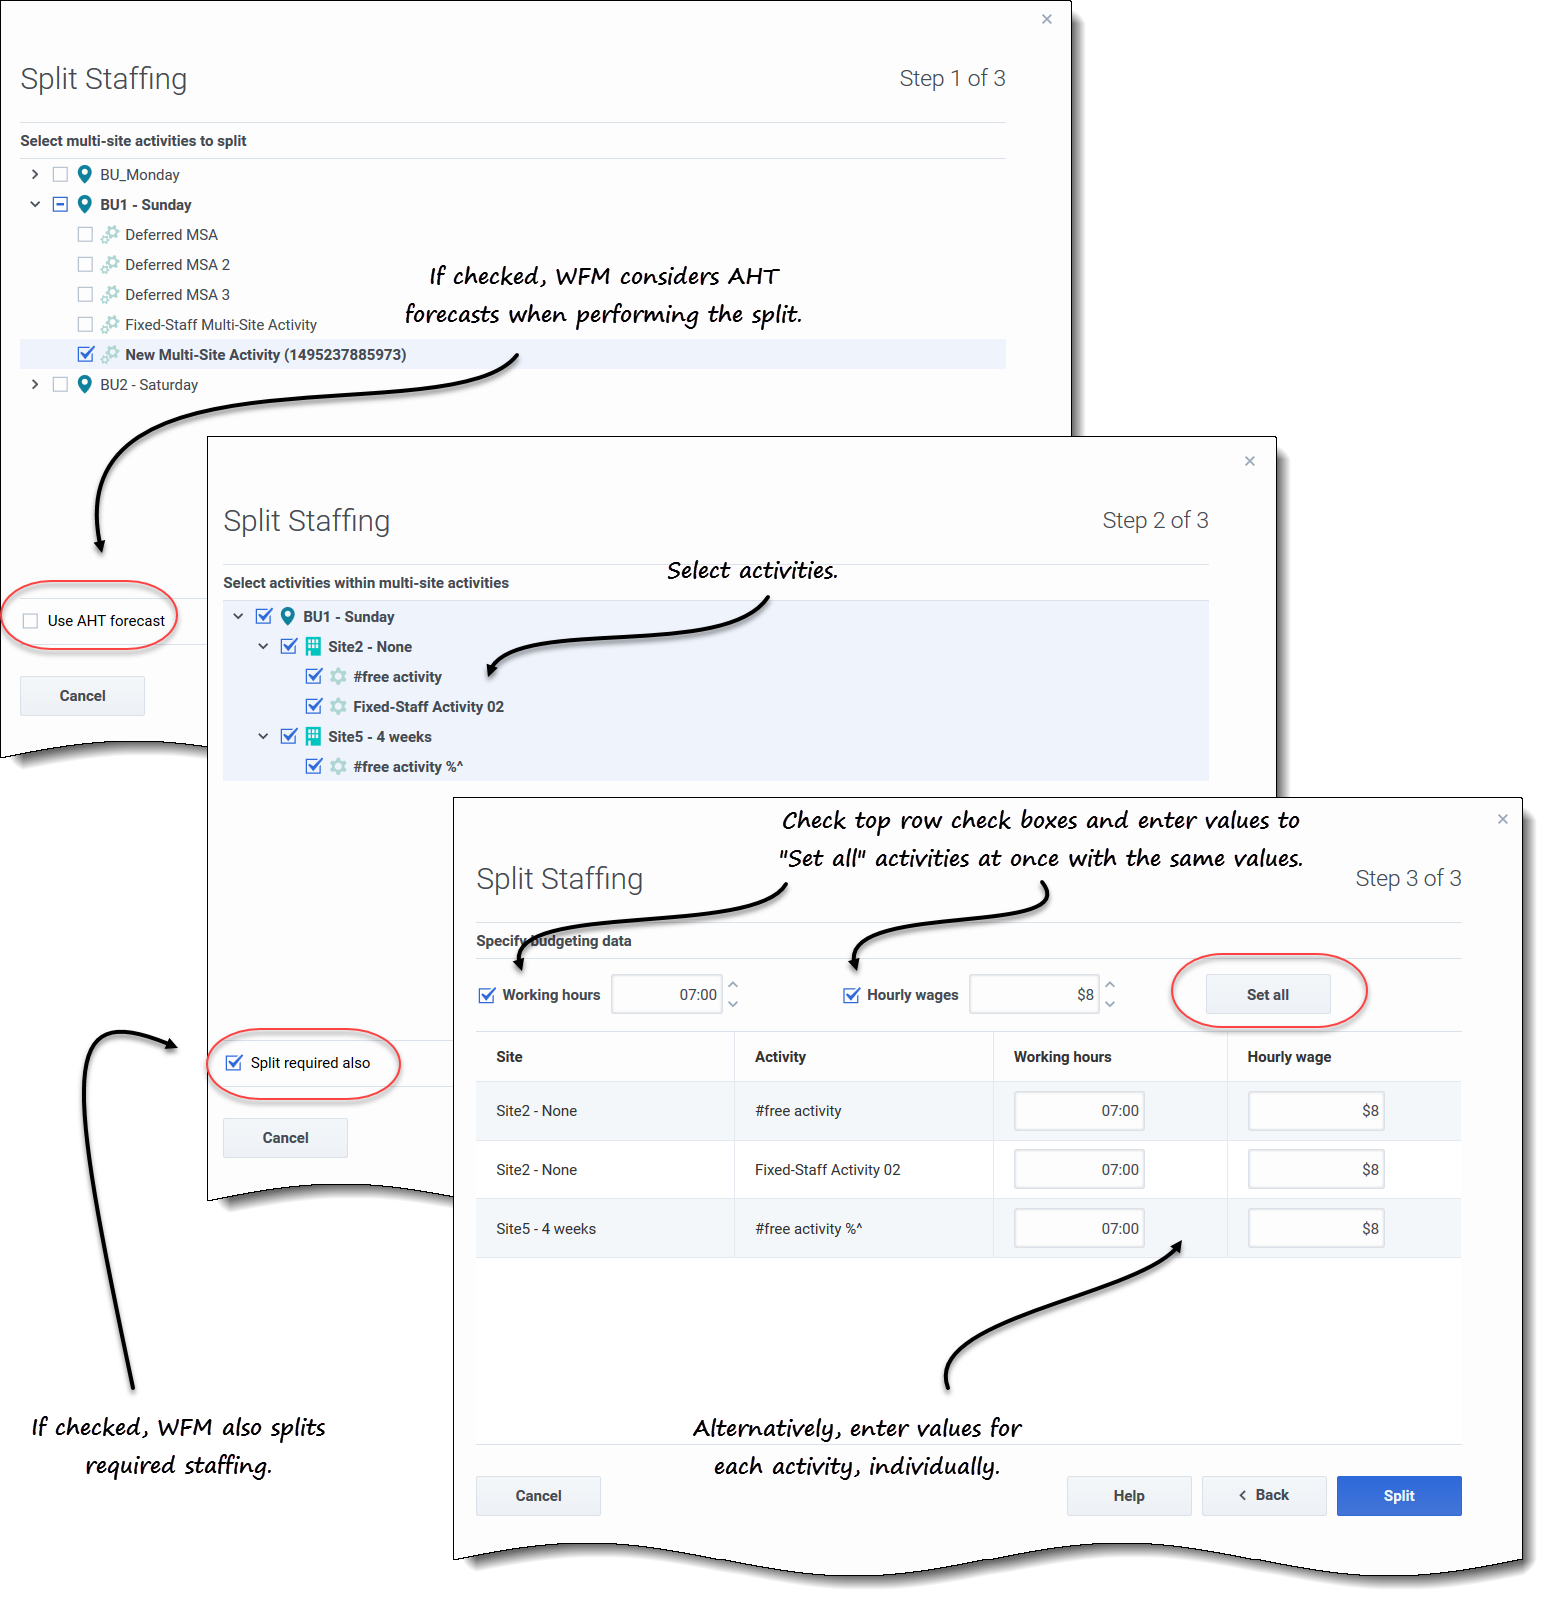
- Using the check box, select the multi-site activity that you want to be split between associated activities.
- You can select several multi-site activities within the same business unit.
- Select Use AHT forecast if you want WFM Web to consider average handling time forecasts when performing the split and then, click Next.
- Step 2 of the wizard opens.
- At the bottom of the pane, select Split required also, if you also want to split required staffing.
- Select the local (target) activities into which you want to split the multi-site activities and then, click Next.
- Step 3 of the wizard, Specify budgeting data, opens.
- If you want each activity to have the same values, in the top row:
- Select and enter the Working hours (paid hours per day).
- Select and enter the Hourly wages.
- Click Set all.
- If you want activities to have different values, enter Working hours and Hourly wages for each activity, individually.
- Click Split.
- WFM Web displays a progress dialog while it splits the activities.
- When the split process is complete, click OK.
You can click Cancel in this dialog at any time, if you want to cancel the split.


