Configure SNMP Monitoring
Contents
Configuring SNMP Monitoring for T-Servers and SIP Server requires the skills and knowledge of a system administrator, and knowledge of the Genesys installation that is running on your site. Ideally, you or a current colleague installed the Genesys software, so you have—or can easily find—information that you need, such as the location of certain files. You also need an MIB Editor; ideally, one that you have used before.
Before you configure
Verify or perform these requirements:
- Your Genesys software installation must include a current Media Layer SNMP license. Verify with your Genesys marketing representative.
- The applications SNMP Master Agent and Solution Control Server must be installed, configured and running. [+] Show steps
- The SIP Server(s)/TServer(s) that you wish to monitor must be provisioned with <TServer>\management-port and restarted.
For each SIP Server and T-Server, configure <TServer>\management-port. Follow the steps on page 653, and the option settings on page 657, of the SIP Server 8.1 Deployment Guide.
[+] Show steps - The Network Management System (NMS) must be connected to the SNMP Master Agent.
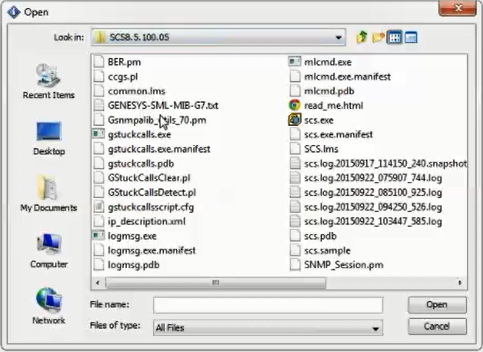
See How to Activate SNMP Support. - Import the file GENESYS-SML-MIB-G7.txt to NMS.
Find this file in the working directory of the Solution Control Server application; the person(s) who installed Genesys for your company should know the location. This file contains Genesys-specific SML, MIB, and G71 definitions.
Summary
For each SIP Server / TServer...
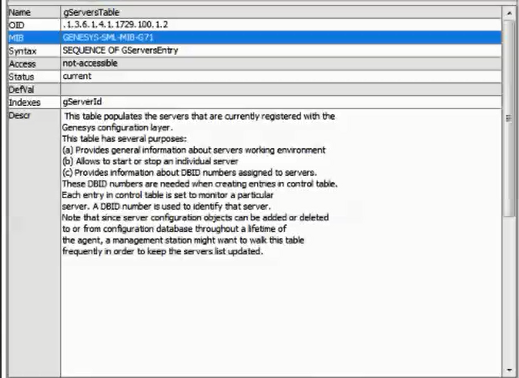
- Query the gServersTable and record the value of:
gServerId (<index>). - Set the value 4 (createAndGo) for:
Name/OID: gsCtrlRowStatus.<index>.5; - Set the refresh timeout. For example, 5 seconds for:
Name/OID: gsCtrlAutomaticRefresh.<index>.5 for tsInfoTable
| Consider the three steps above as general directions which you can execute in the most efficient way for you. The Summary is intentionally generic because every MIB editor is different. |
| Consider the five steps below as an example of how one system administrator might configure SNMP Monitoring for T-Servers and SIP Server. The real steps that you use to access SNMP data will depend on your site's NMS implementation and on your MIB editor. |
Example of configuring SNMP monitoring
Your actual steps will be similar:
- With the MIB Editor, Load the imported file GENESYS-SML-MIB-G7.txt.
- Inside GENESYS-SML-MIB-G7.txt, find and read the DESCRIPTION for gServerControlTable and gsCtrlRowStatus.
The description contains information about a table's contents, purpose, and behavior—and how to request data from NMS.
[+] Show table description - Get the value of gServerId(s) of SIP Server(s) / TServer(s) from the gServersTable.
[+] Show steps - Then set the value 4 (createAndGo) for Name/OID: gsCtrlRowStatus.<index>.5;
…where <index> is the value of gServerId from the step above, to initiate the data collection for tsInfoTable.Set other tables in the same way. For example: gsCtrlRowStatus.<index>.6 for tsCallTable(6).
[+] Show steps
- Set the refresh timeout to 5 seconds for Name/OID: gsCtrlAutomaticRefresh.<index>.5 for tsInfoTable
Use a similar method to set other tables, for example:
gsCtrlAutomaticRefresh.<index>.6 for tsCallTable(6).
This page was last edited on December 13, 2017, at 19:17.
Comments or questions about this documentation? Contact us for support!


