Installing and Configuring the PSTN Connector
Procedure: Installing the PSTN Connector (Linux)
Install and use the PSTN Connector on the host only after careful consideration—because the Dialogic boards used in PSTNC are no longer sold. Although Dialogic supports this hardware until 2018, that support may have limitations and there is no assurance that future versions of GVP will preserve backward support for PSTNC.
- Verify that:
- The PSTN Connector host was prepared for the installation. See Preparing the Hosts for GVP.
- The PSTN Connector Application object template was imported, and an Application object was created. See Preinstallation Activities.
- At the Linux host, log in as the root user and enter su.
- Navigate to the directory that contains the PSTN Connector installation package.
- Complete Steps 3 to 13 of the procedure Manually Installing GVP on Linux, substituting PSTN Connector for Media Control Platform.
- Configure the PSTN Connector Application object to start automatically. See Procedure: Configuring Application Objects to Start Automatically.
Dialogic and gcc support
A Dialogic installation automatically compiles its drivers. You must install gcc to enable this functionality.
- The official versions of gcc supported by Dialogic are gcc 3.2, gcc 3.4.4, and gcc 3.4.6. There is no official support extended to the latest versions of gcc viz or gcc 4.x. However, Dialogic confirms that even if their drivers are built with gcc 4.x compiler, it is acceptable if you have also installed hcc 3.4 backwards-compatibility libraries.
- With RHEL5 installation, gcc 4.x is the default version installed. This creates a conflict because Dialogic drivers are either compiled with gcc 3.4 or gcc 3.2. To avoid any discrepancies in the functionalities of the drivers, Dialogic suggests installing the compatibility-gcc 3.4.x libraries during the installation of the Linux OS. This is performed during the OS-installation steps. Thus, no additional steps are required for RHEL5 for installing Dialogic.
Dialogic Installation
This installation contains two procedures and two configurations:
Procedure: Installing LiS
LiS is a mandatory component; Dialogic will not install without it. For this, LiS drivers have to be made into Kernel modules. This step requires availability of Linux source code on the system. This was already installed as part of the OS installation.
The LiS package is provided with the Dialogic package; there is no need to download LiS separately.
- To create a tar file, unzip the .gz file in the Dialogic package:
gunzip lnxdlgcsu317.tar.gz - Untar the tar file:
tar xf lnxdlgcsu317.tar
Untarring creates the directories needed by the Dialogic installation. - Unzip and untar the LiS package file.
Under the redistributable-sources/ directory, you can find the LiS/ directory where the LiS package is located, because a .gz file will be present.
Go to the directory LiS2.x/ and issue the command:
# make This step prompts for various options but the first prompt asking whether to run LiS as Kernel module or User module alone is the most important. Choose the Kernel module option in this step. All subsequent options can have the default values. Once this is complete without errors, enter this command:
# make install - Reboot the system.
- Install Dialogic.
Procedure: Installing Dialogic
- Go to the top directory of the untarred Dialogic package and start the installation: install.sh
- Subsequent steps offer various Dialogic packages for installation. Only these two are important to install:
- Drivers for DMV/JCT boards
- Global call library packages
- If the installer asks Please install LiS, then reboot the system.
- When the installer asks to install redistributable-sources package, select Yes and press Enter. For further installation/configuration instructions, if needed, please refer to the Dialogic installation documents.
- Configure your Dialogic boards. See Configuring Dialogic Boards, below.
Configuring Dialogic Boards
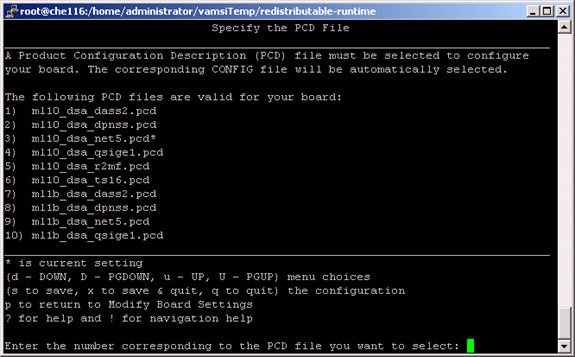
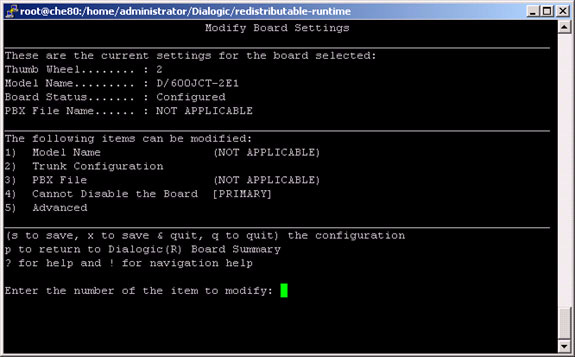
When the installation is complete, the Dialogic installer prompts you to run config.sh. Select Y to proceed with the configuration. There are two other ways to begin the configuration:
- Run config.sh in the /redistributable-runtime/ directory.
- Run the CFG utility in the Dialogic installation /bin/ directory.
Both methods begin the installation and display the same first screen:
From here, perform the appropriate procedure:


