
Contents
Installation
- For a list of supported operating systems and databases, see the Genesys Supported Operating Environment Reference Guide, which is available on the Genesys Documentation website at docs.genesys.com.
- Genesys does not recommend installation of its components via a Microsoft Remote Desktop connection. The installation should be performed locally.
Installation Package Location
The installation package, whether on CD or from an FTP site, contains a setup folder for Orchestration Server.
When FTP delivery is used, there are separate setup folders for Windows and Linux. Linux compatibility packages always should be installed before installing Genesys IPs.
On the Orchestration Server CD, the setup file is located as follows:
Find the file in the folder named for your operating system:
\\solution_specific\orchestration_server\linux
\\solution_specific\orchestration_server\windows
Note: If you install several instances of Orchestration Server component on the same computer, a separate shortcut is created for each one, based on the Application name stored in Configuration Layer.
Installing on Windows
The installation process does not present the option of installing a server component as a service. By default, starting with 7.5, all server components (excluding Genesys Desktop and Multimedia/eServices components) are installed as services in automatic startup mode.
Using the Installation Wizard
- Double-click setup.exe.
- On the Orchestration Server CD, this file is located in the following folder: \\solution_specific\orchestration_server\windows. If Orchestration Server was downloaded from an FTP site, the file is located in the download directory. The Install Shield opens the Welcome screen.
- Click Next. The Connection Parameters to the Configuration Server dialog box appears.
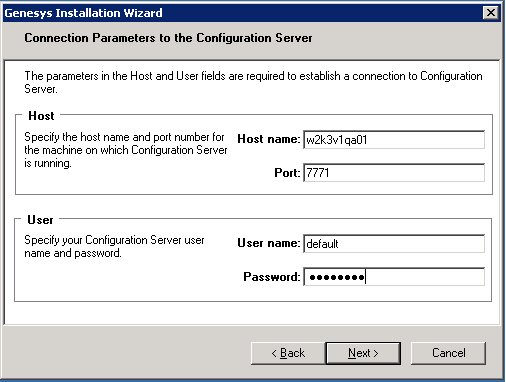
- Under Host, specify the Host name and port number for the computer on which Configuration Server is running. This is the main "listening” port entered in the Server Info tab for Configuration Server, which is used for authentication in the Configuration Manager login dialog box.
- Under User, enter the user name and password used for logging on to Configuration Server.
- Click Next to open the Client Side Port Configuration dialog box.
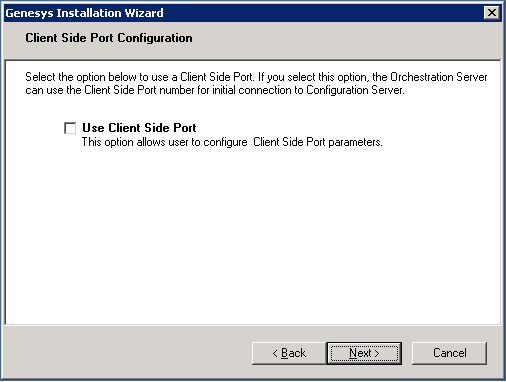
- If you are setting up client-side port configuration for the initial connection to Configuration Server as described in the Genesys 8.1 Security Deployment Guide, select the Use Client Side Port check box to reveal additional fields.
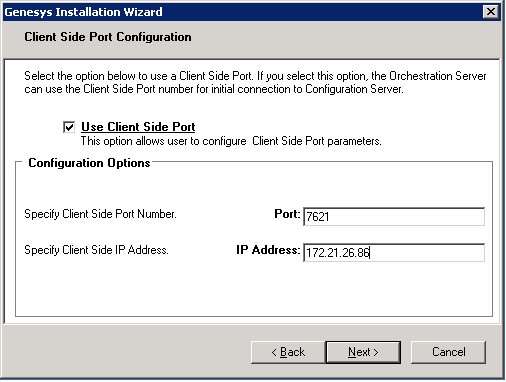
- Specify the following parameters:
- Enter any free port number (this is not the Listening port in the Server Info tab of the Orchestration Server Application object).
- Enter the IP Address of the computer on which you are installing and running the Orchestration Server Application.
Note: After entering this information, the installation process will add the necessary command line arguments (-transport-address and -transport-port) for connecting to Configuration Server during Application startup.
- Click Next. The Enhanced Orchestration Cluster Configuration dialog box appears.
- Specify the following parameters:
- Select the Use Enhanced Orchestration Cluster Configuration checkbox to allow users to define cluster configuration options at one place and reflect across nodes.
- Specify the name of the Transaction List object used to define the cluster configuration options.
- Click Next. The Select Application dialog box appears. Example entries are shown below.
- Select the Orchestration Server Application that you are installing. The Application Properties area shows the Type, Host, Working Directory, Command Line executable, and Command Line Arguments information previously entered in the Server Info and Start Info tabs of the selected Orchestration Server Application object.
- Click Next. The Choose Destination Location dialog box appears.
- Under Destination Folder, keep the default or browse for the installation location for Orchestration Server.
- Click Next. The Ready to Install dialog box appears.
- Click Next. The Genesys Installation Wizard indicates it is performing the requested operation for Orchestration Server. When through, the Installation Complete dialog box appears.
- Click Finish.


Installing on UNIX-Based Platforms
Before you start the installation, make sure all instances of Orchestration Server are already installed on your computer and shut down. If you do not do this, you will not be able to back up your files if you want to use the same installation directory for another version of those components. Linux compatibility packages should be always installed before installing Genesys IPs.
- Go to the directory where the installation is created.
- Copy all files to a temporary directory. Note: Files included in the installation package require permission to execute.
- Run the installation script by typing./install.sh
- When prompted, enter the host name of the computer where Orchestration Server will be installed or press the Enter key for the supplied entry.
- When prompted, enter the following information about your Configuration Server:
- Configuration Server Host name
- Network port
- User name
- Password
Client Side Port Configuration
Select the option below to use a Client Side Port. If you select this option,
the application can use Client Side Port number for initial connection to Configuration Server.
Do you want to use Client Side Port option (y/n)
- When prompted, type either Y for yes or N for no. The instructions below assume you typed Y.
- Enter an IP address or press Enter for the supplied entry after the following prompt:
Client Side IP Address (optional), the following values can be used:
- Choose the Orchestration Server Application to install after this prompt (which may list several Orchestration Servers):
Please choose which application to install:
1: ORS_application
- When prompted, type either Y for yes or N for no, to use the Enhanced Cluster Configuration feature.
Do you want to use Enhanced Orchestration Cluster Configuration?
This option will provision the Orchestration Cluster via dedicated Transaction List object. (y/n)?
- If you had typed Y in the previous step, enter the name of the Transaction List object when prompted.
Please enter the name of Transaction List object
- Enter the destination directory for the installation after this prompt:
Please enter full path of the destination directory for installation:
After you enter the destination directory, the installation continues. A message appears that starts with
Extracting tarfile: data.tar.gz to directory:
- When this instruction appears:
There are two versions of this product available: 32-bit and 64-bit.
Enter 32 or 64 according to the Linux (Solaris)type that you use.
As soon as the installation process is finished, a message appears announcing that installation was successful. The process created a directory, with the name specified during the installation, containing Orchestration Server.