
When downloading content, you may encounter issues that are easily resolved. If these tips don't help, please Contact Us, and we will try to send you the file directly.
Downloading Help files
Save the Help file to your local hard drive, and uncompress (extract) it to an empty folder. To open the Help file, open the folder into which the .zip file was extracted, then do one of the following:
- If there is only one file in the folder, click that file.
- If there is more than one file in the folder, click the <name of compressed file>.htm file.
Viewing Help files
If, when you open the Help file, the contents do not display in the right window, consider the following:
- Are you trying to open the file on a remote computer? If so, copy it to your local machine. Due to a Microsoft security update, you cannot properly view a HTML-based (CHM) Help if it is located on another machine on your network.
- What is your permissions setting? Right-click the file, select Properties from the context menu, look for an Unblock button, and click it.
Pacing Algorithm
Contents
Genesys Web Engagement includes an intelligent pacing algorithm that predicts when and how many new Web Engagement invites should be generated to reach an optimization goal that you can set. The pacing algorithm can predict agent availability for both proactive (outbound) and reactive (inbound) traffic and can help keep a balanced workflow in your contact center by avoiding the extremes of either overloading or underloading the system.
About pacing algorithms
- For a more in-depth look at the pacing algorithm and the usage methodology behind it, click HERE to download the "Pacing Algorithm Usage Methodology" Word document. See download tips
- If you want to combine proactive (outbound) and reactive (inbound) traffic, find out more about how Web Engagement handles dual pacing.
- You can also customize the way the pacing algorithm is used in the Engagement Logic Strategy. For details, see Accessing Pacing Information from the Engagement Logic Strategy.
To enable the pacing algorithm, complete the procedures below.
Configuring your optimization model
Note: Starting with version 8.5.000.33, Web Engagement allows you to use Agent Group objects as the primary way to configure pacing settings. You can still configure these settings in the Web Engagement Cluster or Web Engagement Server application objects—as shown in this section and the following section—but settings configured in the Agent Group objects have a higher priority.
Complete this procedure to enable the pacing algorithm to predict traffic for your Web Engagement solution.
Start
- Open Genesys Administrator and navigate to Provisioning > Environment > Applications.
- Edit the Web Engagement Cluster application and click the Options tab.
- In the [pacing] section, set the algorithm option. The supported values are:
- SUPER_PROGRESSIVE — Recommended for small agent groups (1-30 agents); only proactive traffic is predicted.
- SUPER_PROGRESSIVE_DUAL — Recommended for small agent groups (1-30 agents); both proactive and reactive traffic are predicted.
- PREDICTIVE_B — Recommended for bigger agent groups (start from 30 agents); only proactive traffic is predicted
- PREDICTIVE_B_DUAL — Recommended for bigger agent groups (start from 30 agents); both proactive and reactive traffic are predicted.
- Set the optimizationTarget option. The supported values are:
- ABANDONMENT_RATE — Percentage of interactions that will be abandoned.
- BUSY_FACTOR — Percentage of time during which an agent plans to be busy with an interaction-related activity.
- Set the optimizationGoal option. The value you set for this option depends on the value you set for optimizationTarget:
- If your optimization target is ABANDONMENT_RATE, Genesys recommends that you use small values. For example, from 3 to 5.
- If your optimization target is BUSY_FACTOR, Genesys recommends that you use big values. For example, from 70 to 85.
- If you chose a dual algorithm in Step 3 (SUPER_PROGRESSIVE_DUAL or PREDICTIVE_B_DUAL), specify a value for the proactiveRatio option.
- This option basically controls the minimal percentage of agents that will be reserved for processing proactive engagement interactions.
- Set the refreshPeriod option. This option controls how frequently the pacing algorithm provides predictions. Genesys recommends that you use values from 1 to 5.

End
Next Steps
Configuring the agent groups
In the previous procedure, you set the algorithm option according to the size of your agent group and the type of traffic the algorithm should handle. In this procedure, you configure your agent groups for the pacing algorithm to use.
When you install Genesys Web Engagement, the Provisioning Tool automatically creates two agent groups:
- Web Engagement Chat
- Web Engagement Voice
In the steps below, you'll confirm that the agent groups were created and then add agents to them.

Start
- Open Genesys Administrator and navigate to Provisioning > Accounts > Agent Groups. Make sure that the Web Engagement Chat and Web Engagement Voice groups are created. You can use the filter to display the groups.
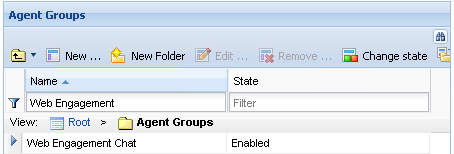 The default agent groups
 - Navigate to Provisioning > Accounts > Users.
- Select an agent that should manage Web Engagement interactions and click Edit....
- Select the Agent Group tab and click Add. The Browse dialog opens.
- Select one of the groups and click OK.
 The agent named Spencer now belongs to the Web Engagement Chat group.
 - Repeat Steps 3-5 for each agent you want to add to the chat or voice agent groups.


End
Using Agent Groups to configure pacing
Starting with version 8.5.000.33, Web Engagement allows you to use Agent Group objects as the primary way to configure pacing settings. You can still configure these settings in the Web Engagement Cluster or Web Engagement Server application objects, but settings configured in the Agent Group objects have a higher priority.
Note: You must enable the Access to Web Engagement Pacing Configuration privilege for any users who need to control pacing settings.
Select the Pacing Configuration menu (1) in GAX to configure your other agent groups. Note: You can still configure these options in the Web Engagement Cluster or Web Engagement Server application objects, but options configured in the Agent Group objects have a higher priority.
The checkbox in the Used for Pacing column (2) shows whether a group uses pacing:

You can sort the columns by clicking their headings:

To turn on pacing for a group, select it from the list. The pane that appears to the right will indicate whether or not pacing is enabled for that group:

You can click the Include Pacing Configuration checkbox to include or exclude the group. If you include the group, the Pacing Configuration pane appears:

You can use this pane to select the pacing options listed in the next section.
Pacing Options
| Dual | Check this to enable dual pacing. For proactive pacing only, uncheck it. |
| Pacing Algorithm To Use | Specifies the type of pacing algorithm to be used by the system. Changes take effect after server restart. |
| Optimization Goal | Specifies the optimal percentage value for your chosen optimization target, which can be either ABANDONMENT_RATE or BUSY_FACTOR, as specified in the Optimization Based On field that appears just below this field. |
| Optimization Based On | Specifies whether to optimize based on ABANDONMENT_RATE or BUSY_FACTOR. Changes take effect after server restart. |
| Percentage Of Proactive Traffic | Specifies the minimum percentage of agent resources that are reserved for handling proactive interactions. If 0 is specified, no resources are specifically allocated to handle proactive interactions, but proactive traffic is still allowed.
If 100 is specified, all resources are allocated to handle proactive interactions and no reactive interactions are allowed. |
| Recalculation Interval | Specifies the frequency, in seconds, of predictions produced by the pacing algorithm. Changes take effect after server restart. |
| Queues Used For Tracking Engagements | A list of the channels and queues used for tracking engagements. Note:
|
Associating media types and queues
You can pair each media type with a queue that tracks engagements for that media type.
- You must specify at least one media-queue pair.
- A media-queue pair can only specify one media type and one queue.
- Web Engagement 8.5 supports chat and webcallback medias.
- You can only specify interaction queues. Virtual queues are not supported.
To add a new media-queue pair, click the plus button, then fill out the resulting form, and save it:

To delete a media-queue pair from the list, click the checkbox that appears on the right side of the list item:

Next Steps
- Return to the Genesys Web Engagement Features page.