
Installing the Plug-in for Interaction Workspace
The Genesys Web Engagement Plug-in for Interaction Workspace allows you to enable chat and web callback engagement features in Interaction Workspace. See Genesys Web Engagement Plug-in for Interaction Workspace Help for details.
To install this plug-in, complete the following procedures:
- Installing the Plug-in for Interaction Workspace
- Importing the Plug-in for Interaction Workspace Template
- Adding a Connection to the Backend Server if you are following the Standalone deployment scenario. If you are following the Clustering deployment scenario, complete Adding a Connection to the Load Balancer for the Backend Servers.
- Configuring Role-Based Access Control
- Genesys Web Engagement can also work with agents who are Team Leads. For details about how to configure Team Leads, see the following topics in the Interaction Workspace Deployment Guide:
Installing the Plug-in for Interaction Workspace
Prerequisites
- Your environment includes Interaction Workspace. See Genesys environment prerequisites for compliant versions. For more information about installing Interaction Workspace, refer to the Interaction Workspace Deployment Guide.
Start
- In your installation package, locate and double-click the setup.exe file.
- Click Next. The Select Installed Application screen appears.
- Select your Interaction Workspace application.
- Click Next. The Ready to Install screen appears.
- Click Install. The Genesys Installation Wizard indicates it is performing the requested operation for the Genesys Web Engagement Plug-in for Interaction Workspace. When through, the Installation Complete screen appears.
- Click Finish to complete your installation. As a result of the installation, the following files are copied to the Interaction Workspace installation directory:
- InteractionWorkspace\Genesyslab.Desktop.Modules.WebEngagement.dll
- InteractionWorkspace\Genesyslab.Desktop.Modules.WebEngagement.module-config
- InteractionWorkspace\Newtonsoft.Json.Net35.dll
End
Importing the Plug-in for Interaction Workspace Template
Prerequisites
- You completed Installing the Plug-in for Interaction Workspace
Start
- In Genesys Administrator, navigate to Provisioning > Environment > Application Templates.
- In the Tasks panel, click 'Upload Template.
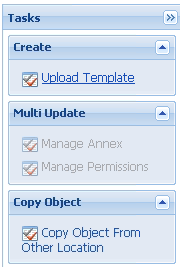 Upload Template link in the Tasks panel
 - In the Click 'Add' and choose application template (APD) file to import window, click Add.
- Browse to the Web_Engagement_iWS_Plug-in.apd file. The Configuration tab for the new template opens.
- Click Import Metadata.
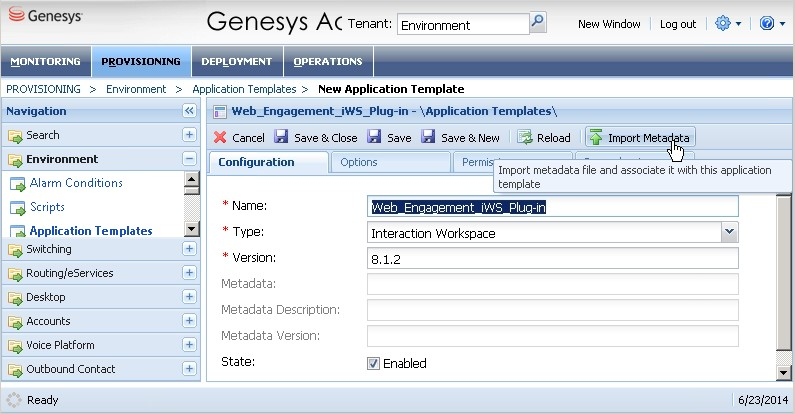 Click Import Metadata.
 - Select the Web_Engagement_iWS_Plug-in.xml metadata file and click Open. The metadata fields in the Configuration tab are now filled.
- Click Save & Close.


End
Adding a Connection to the Backend Server
Prerequisites
- You completed Importing the Plug-in for Interaction Workspace Template
- You are following the Standalone deployment scenario and need to add a connection to a single Backend Server.
Start
- In Genesys Administrator, navigate to Provisioning > Environment > Applications, select the Interaction Workspace application, and click Edit....
- In the Connections section, click Add. The Browse Applications window opens.
- Select the Web Engagement Backend Server application and click OK. The Backend Server is added to the list of Connections.
- Click Save & Close.
End
Adding a Connection to the Load Balancer for the Backend Servers
Prerequisites
- You completed Importing the Plug-in for Interaction Workspace Template
- You are following the Clustering deployment scenario and need to add a connection to the load balancer for the Backend Servers.
Start
- In Genesys Administrator, navigate to Provisioning > Environment > Applications, select the Interaction Workspace application, and click Edit....
- Select the Options tab and click New.
- Set the following values:
- Location: Options
- Section: settings
- Name: loadbalancer
- Value: The address of your load balancer for the Backend Servers — for example, http://198.51.100.12:8000.
- Click OK. The option is added to the [settings] section.
- Click Save & Close.
End
Configuring Role-Based Access Control
Complete this procedure to allow specific users or groups to manage Web Engagement in Interaction Workspace.
Prerequisites
- You completed Importing the Plug-in for Interaction Workspace Template
Start
- In Genesys Administrator, navigate to Provisioning > Accounts > Roles.
- Edit or create a Role responsible for managing Web Engagement in Interaction Workspace. For instance, create the Agent can Monitor Web Engagement role by clicking the New button.
- Select the Role Privileges tab.
- In the Add/Remove Products top panel, enable Interaction Workspace and expand the Interaction Workspace Web Engagement Privileges section.
- Set the Allowed value for the Agent - Can Monitor Web Activity option.
 Select Allowed
 - In the Members section of the Configuration tab, add the users or groups who should get this role.
- Click Save & close.

End
Next Steps
This page was last edited on November 25, 2014, at 17:38.
Comments or questions about this documentation? Contact us for support!