Contents
Manual Deployment of UCS
This chapter describes procedures for manual configuration and installation of UCS and UCS Manager.
Creating or Editing the UCS Application Object
Prerequisites
- UCS requires one database (the main database). It can optionally use a second (archive) database to store older UCS data and ease storage in the main database.
Procedure
- Create the main and (optional) archive databases if you have not already done so. See also Creating Databases and Running Scripts.
- Run the SQL script located in the sql_scripts folder of the UCS starting directory.
- Create a Database Access Point (DAP) for the main database. Create a second DAP for the archive database if you have one. Use the JDBC connection type.
- Create a UCS Application object if it does not already exist.
- Import the UCS application template from the Interaction Management CD.
- Create a new Application object based on the template.
- Open the Properties dialog box of the Application object.
- On the Server Info tab, enter the host name and communication port.
- On the Start Info tab, enter the working directory.
- On the Connections tab, add connections to:
- Message Server
- Stat Server
- The two DAPs that you created in Step 3. Click Apply.
- On the Security tab, in the Log On As area, select the This Account check box, and then select a Person or Access Group with privileges that are high enough to include write permission.
- On the Options tab, ports section, specify for the option ucsapi a valid network port number that UCS will use for connections from Java clients.
Creating or Editing the UCS Manager Application Object
- Create a UCS Manager Application object if it does not exist.
- Import the UCS Manager application template from the Interaction Management CD.
- Create a new Application object based on the template.
- On the Connections tab, add a connection to UCS and click Apply.
Installing UCS on Windows
Prerequisites
- The UCS Application object has been configured.
- The Interaction Management CD.
Procedure
- Locate the Setup.exe for Universal Contact Server (available on the Interaction Management CD).
- Double-click Setup.exe.
- Enter the login information for your Configuration Server:
- Host
- Port
- User
- Password
- Select the appropriate UCS Application object from the list.
- Click Install.
Installing UCS on AIX, Solaris, or Linux
Prerequisites
- The UCS Application object has been configured.
- The Interaction Management CD.
Procedure
- Locate the install.sh file for Universal Contact Server.
- Start the installation script with the command >install.sh.
- Provide the absolute path to the directory containing the Java executable.
- Press Enter to confirm the host name for the installation.
- Enter the login information for your Configuration Server:
- Host
- Port
- User
- Password
- From the list of applications, select one and enter its number in the list.
- Press Enter to confirm the suggested destination directory, or choose another one.
- Answer other questions, if required.
Installing UCS Manager
Prerequisites
- The Universal Contact Server Manager Application object has been configured.
- The Interaction Management CD.
Procedure
- Locate and double-click Setup.exe for UCS Manager on the Interaction Management CD.
- Click Next.
- Enter or browse to the location of the destination folder. Click Next.
- Select JDK version in the list. Click Next.
- Click Install.
- Click Finish.
Configuration Server access permissions
UCS requires the following access permissions:
- Read permission for the Environment tenant and any other tenants configured in the UCS application.
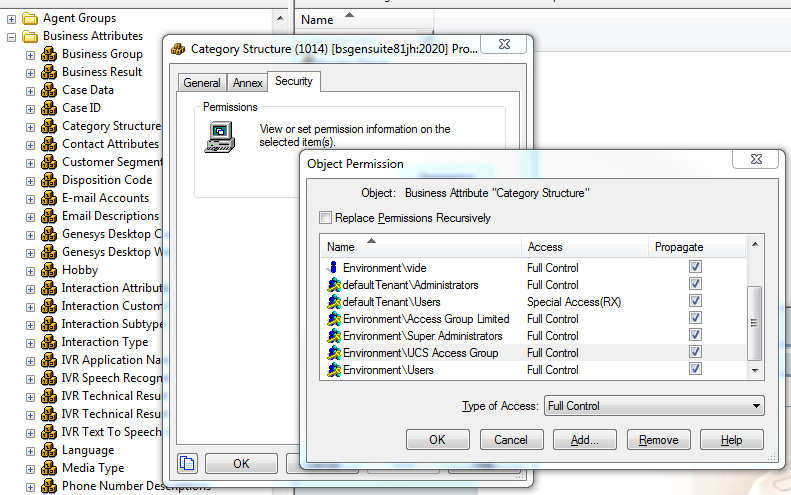
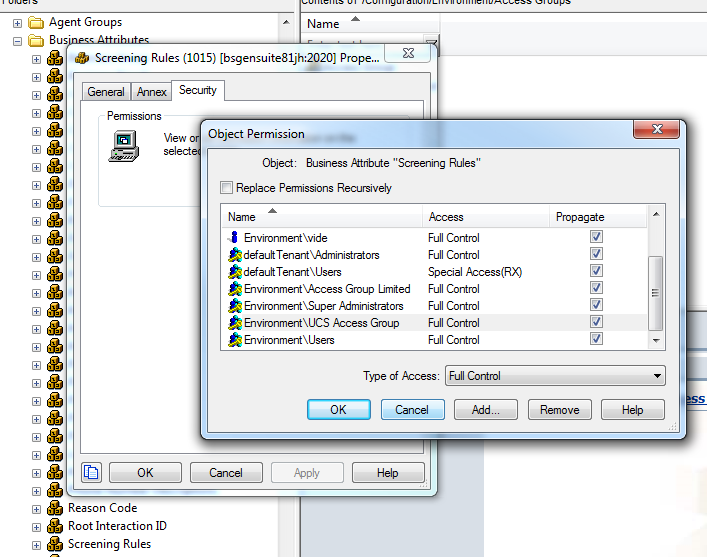
- Full Control permission to the Category Structure and Screening Rules business attributes.
To prevent overwriting of object permissions, you must apply permissions to higher-level objects first (for example, at the tenant level) before applying permissions to lower-level objects.
Open Configuration Manager and refer to the steps below for more information.
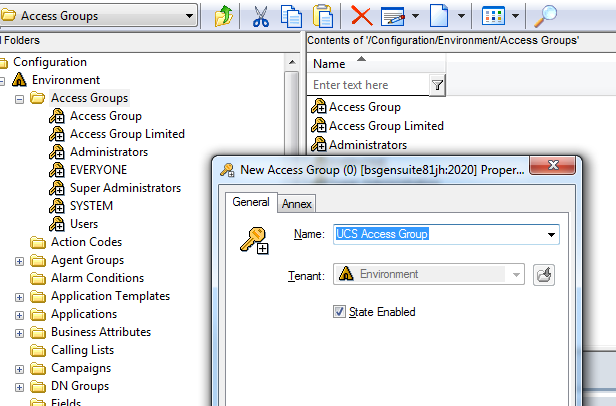
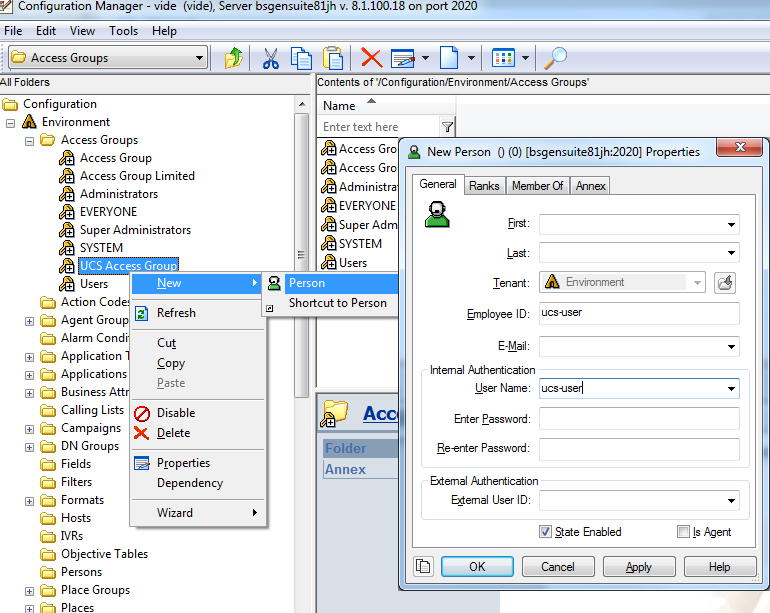
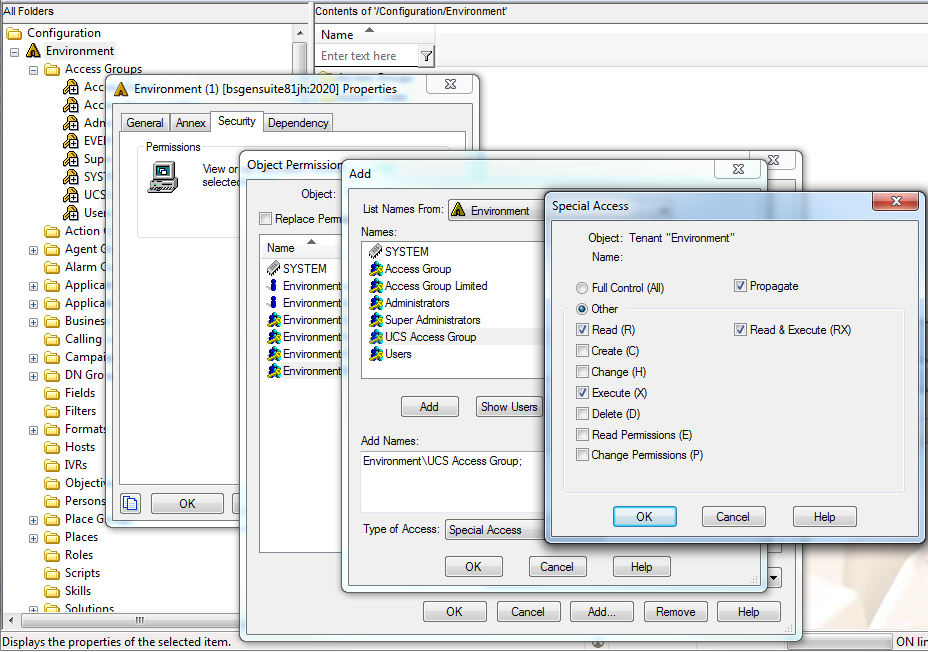
Environment tenant
- Create an access group.
- Open the access group you created and create a user.
- Assign Read and Execute (RX) permissions to the Environment tenant.
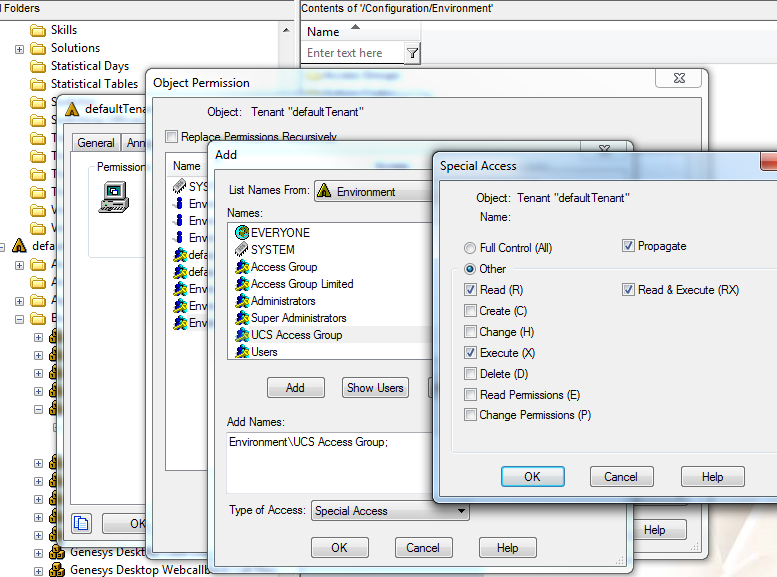
UCS tenants
- Assign Read and Execute (RX) permissions to the tenants configured in the UCS application.
- Assign Full Control permission to the Category Structure business attribute. Ensure all Propagate check boxes are selected.
- Assign Full Control permission to the Screening Rules business attribute. Ensure all Propagate check boxes are selected.
- Repeat these steps for all tenants configured in the UCS application.
UCS application
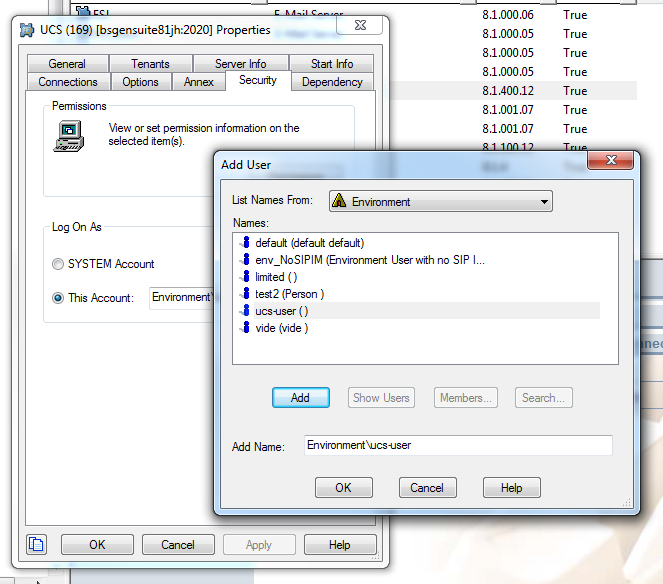
- Assign the user you created in the Environment tenant section to the UCS application. Also add this user to the backup UCS application, if it exists.
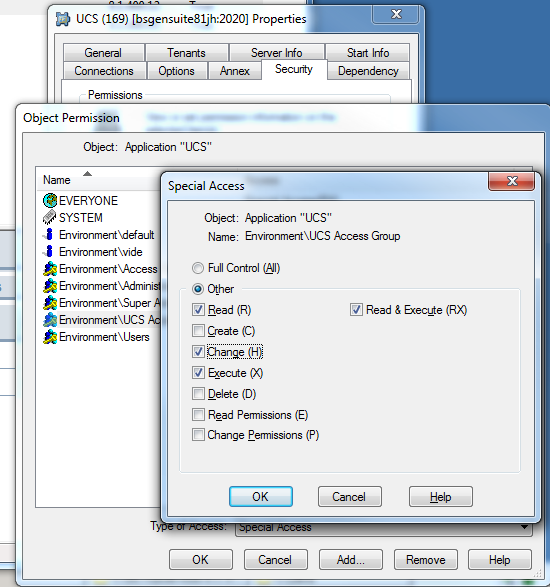
- If you intend to use UCS Manager, you must log in with the user account that has Change (write) permission for the UCS application object in Configuration Server.
Restart UCS servers
Finally, restart the primary and backup UCS instances to apply the changes.
This page was last edited on September 8, 2020, at 09:13.
Comments or questions about this documentation? Contact us for support!

