Deployment Prerequisites
This section discusses prerequisites to installing Microsoft Lync on the server. In order to do this, Active Directory must also be installed and configured, together with Active Directory Certificate Services.
If you are deploying the SIP Server / UC Connector - based integration on a active Lync or Skype for Business Enterprise Voice installation the procedures described in this page are not necessary, as Active Directory will already have been configured. But you may need to perform these tasks if installing Lync / Skype for Business from scratch, for instance in a lab setting.
The process of installing Active Directory on your Windows Server 2008 environment consists of two steps: the first step is to install Active Directory and the second step is to configure your installation. Once this is complete, your Windows server will become a Domain Controller.
- Access the Server Manager screen. From the Windows taskbar, select Start > Administrative Tools > Server Manager.
- Under Roles Summary, click Add Roles.
- At the welcome page for the wizard, click Next.
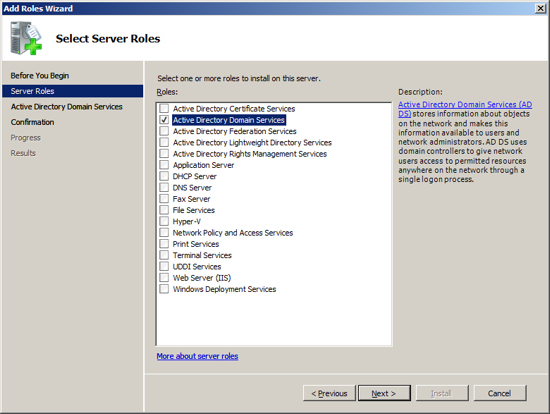
- On the Select Server Roles screen, select Active Directory Domain Services.
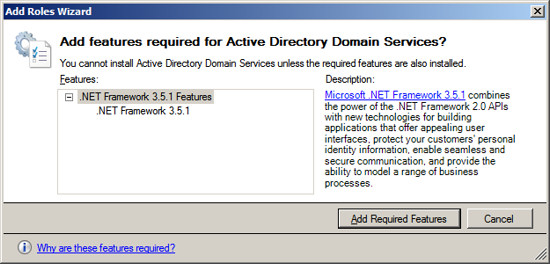
- In the new dialog, click Add Required Features.
- Click Next.
- Review the information presented in the Active Directory Domain Services screen, and click Next.
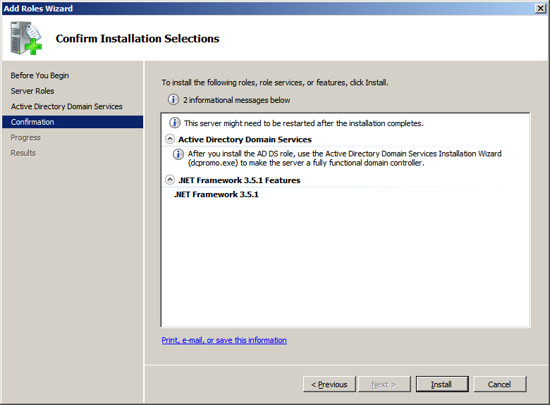
- Review the information on the Confirm Installation Selections screen, and click Install.
- On the Installation Results screen, click Close.
- Access the Server Manager screen. From the Windows taskbar, select Start > Administrative Tools > Server Manager.
- Confirm that the Role added in "Installing Active Directory" is displayed under "Roles Summary".
- Click the Windows Start button and select Run.
- Type dcpromo.exe in the box and click OK. This will launch the Active Directory Domain Services Installation Wizard.
- On the Welcome page, click Next.
- On the Operating System Compatibility page, click Next.
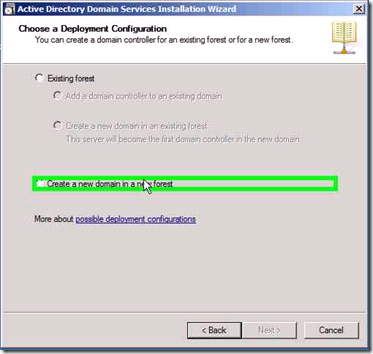
- On the Choose a Deployment Configuration page, select the Create a new domain in a new forest option, and click Next.
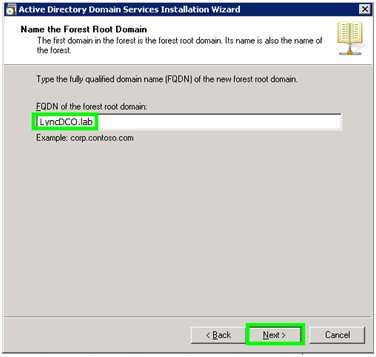
- On the Name the Forest Root Domain page, enter the fully qualified domain name (FQDN) of the forest root domain and click Next.
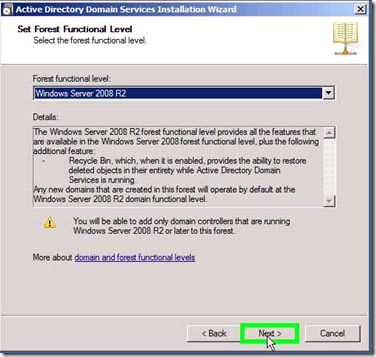
- On the Set Forest Functional Level page, select Windows Server 2008 R2 and click Next.
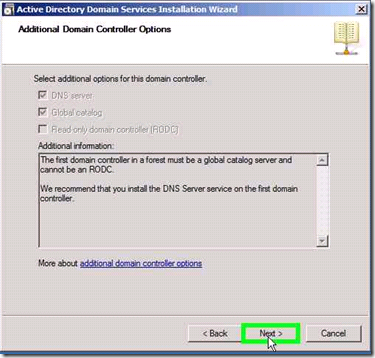
- On the Additional Domain Controller Options page, ensure that DNS server is selected, and click Next.
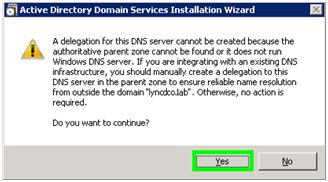
- Click Yes on the delegation for DNS server warning.
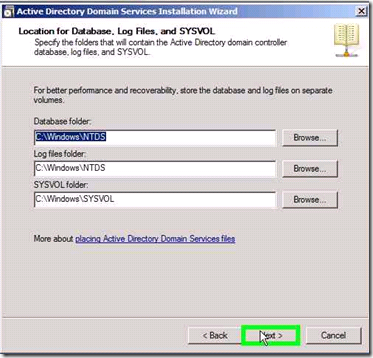
- On the Location for Database, Log files, and SYSVOL page, accept the defaults, and click Next.
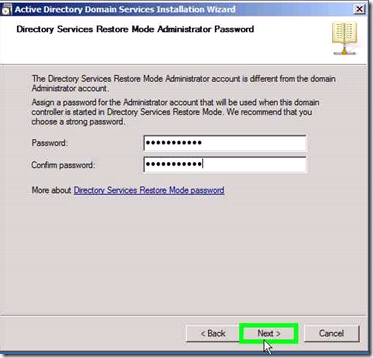
- On the Directory Services Restore Mode Administrator Password page, enter and confirm a password, and click Next.
- On the Summary page, verify the information and click Next.
- Select the Reboot on completion option to reboot the server when the installation is complete.
Once your Windows server is configured a Domain Controller, you must install the Active Directory Certificate Services.
- Log on to the Domain Controller as [server name]\Administrator.
- Go to Start > Administrative Tools > Server Manager.
- Access the Server Manager screen. From the Windows taskbar, select Start > Administrative Tools > Server Manager.
- Under Roles Summary, click Add Roles.
- At the welcome page for the wizard, click Next.
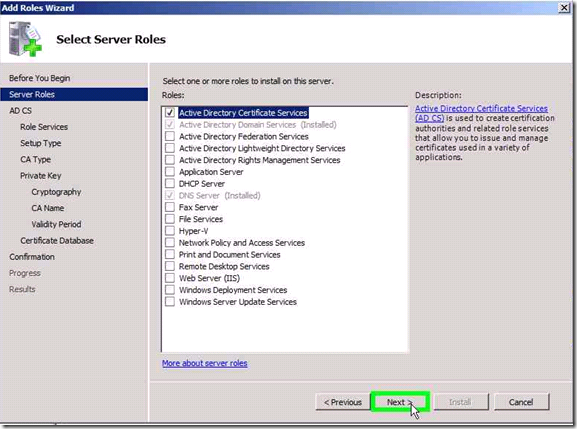
- On the Select Server Roles page, select Active Directory Certificate Services and click Next.
- On the Introduction to Active Directory Certificate Services page, click Next.
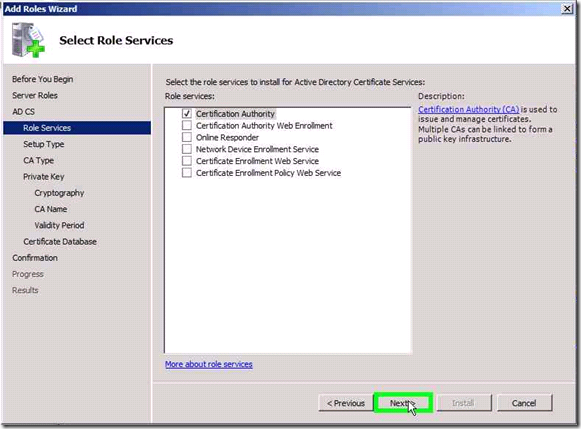
- On the Select Role Services page, ensure that both Certification Authority and Certification Authority Web Enrollment are selected, and click Next.
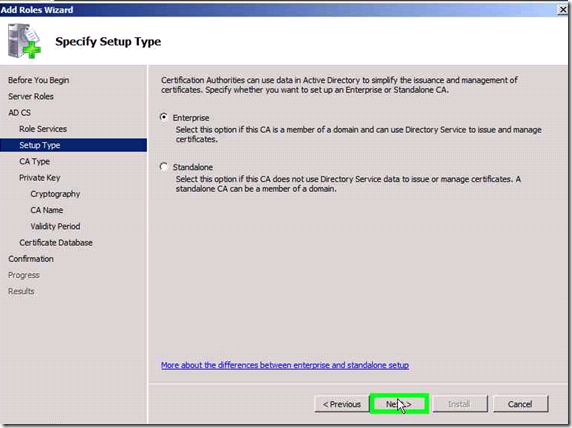
- On the Specify Setup Type page, ensure that Enterprise is selected and click Next.
- On the Specify CA Type page, ensure that Root CA is selected and click Next.
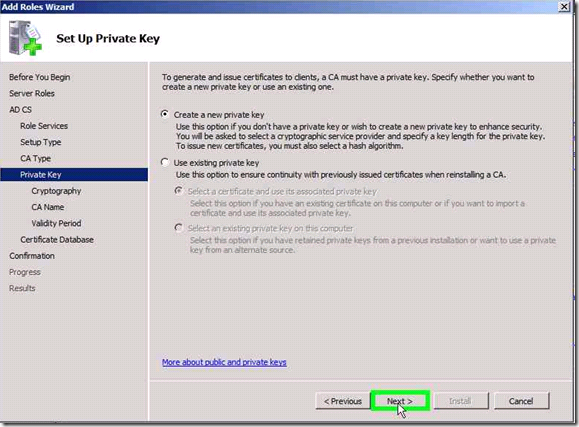
- On the Set Up Private Key page, ensure that Create a new private key is selected, and click Next.
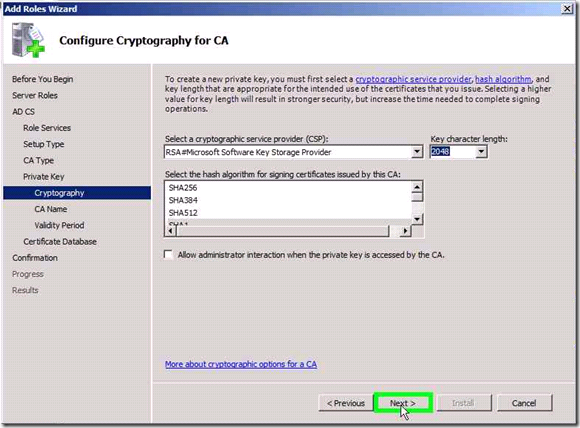
- On the Configure Cryptography for CA page, accept the defaults and click Next.
- On the Configure CA Name page, accept the defaults and click Next.
- On the Set Validity Period page, accept the defaults and click Next.
- On the Configure Certificate Database page, accept the defaults and click Next.
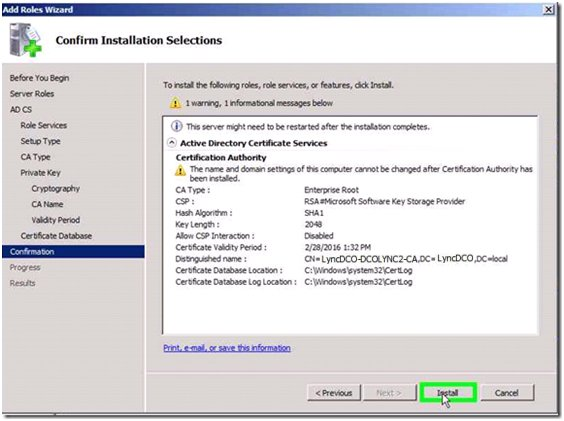
- On the Confirm Installation Selections page, click Install.
- Once the installation is complete, click Close.

