external_url_base
Section: server
Default Value:
Valid Values: http://<hostname>:<port>/ or https://<hostname>:<port>/
Changes Take Effect: Immediately
Specifies the external URL used by the Storage Service to allow the retrieval of a binary attachment. Configure this option in the case of a Load Balancer deployment.
- The valid value is http://<hostname>:<port>/, where:
- <hostname> is used by the cluster service to identify a node
- <port> is used by the cluster service to identify a node.
The <port> value must be the same as the GMS port described in the jetty configuration file, otherwise, an alarm will be displayed in Solution Control Interface (SCI) and GMS will stop.
node_id
Section: server
Default Value: 1
Valid Values:
Changes Take Effect:
Specifies a two digit number that should be unique in the GMS deployment. It is used in the generation of DTMF access tokens.
web_scheme
Section: server
Default Value: http
Valid Values: http or https
Changes Take Effect: Immediately
Scheme of the internal URL to https if GMS jetty is configured to support only SSL/TLS for one node or for a cluster of nodes.
Optional, required for GMS internode communication.
web_port
Section: server
Default Value: 80
Valid Values: Valid TCP port; for HTTPS internode communication, 8443 or check either your jetty configuration or restriction port
Changes Take Effect: Immediately
Sets a port different from the port that GMS uses.
Note: GMS uses port 8080, which can be changed in the jetty-http.xml file. This option can be used in the case of proxy role of the customer to forward requests.
At startup, GMS checks that a GMS is available on the port specified by web_port. If a GMS is not available, the web_port option alarm (EventId 2002) is thrown.
Required to ensure the GMS internode communication.
web_host
Section: server
Default Value: Result of InetAddress.getLocalHost()
Valid Values: Valid host name
Changes Take Effect: Immediately
The default InetAddress.getLocalHost() value will be used in the most cases. Change this configuration value if you have issues obtaining the local name when your environment has multiple network interfaces. In this scenario, to ensure GMS internode communication, set this option's value to the IP Address used by the Jetty interface (which is not configurable).
This option is required for internode communication.
node_id
Section: server
Default Value: 1
Valid Values:
Changes Take Effect:
Specifies a two digit number that should be unique in the GMS deployment. It is used in the generation of DTMF access tokens.
Create an Application Object
Import the GMS Application Templates
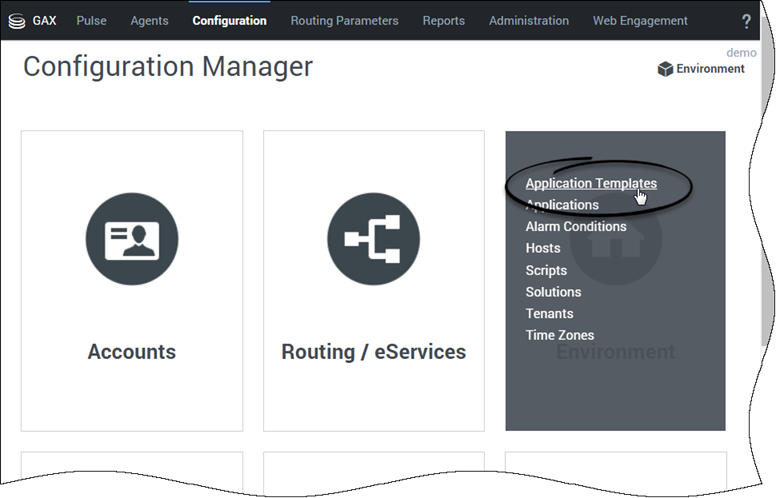
In Genesys Administrator Extension, find the Configuration Manager > Environment menu and click Application Templates.
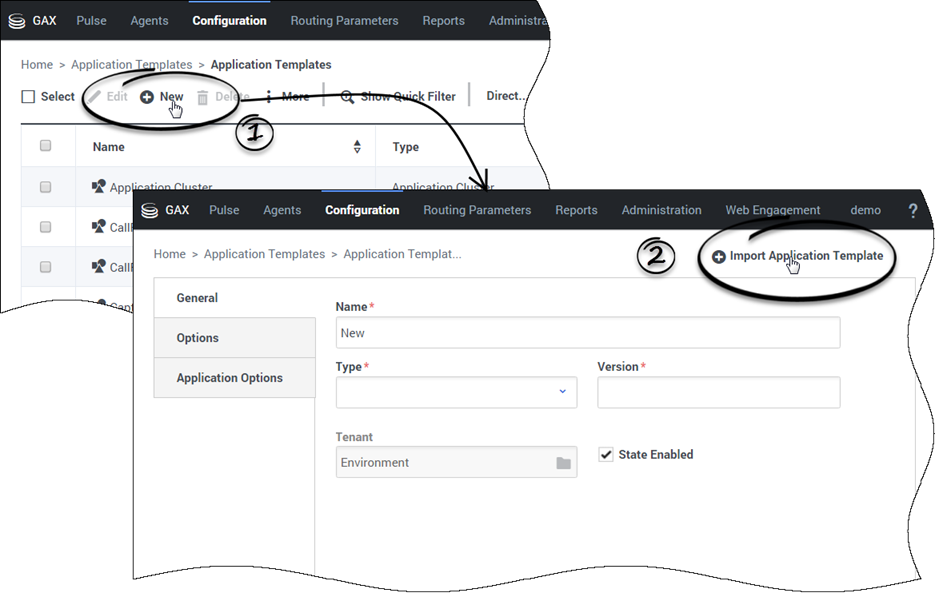
Click +New, then click Import Application Template. Navigate to the Templates directory of your Installation Package (IP) and add the following files:
- GMS_851.apd - This template is used to deploy GMS with default options.
- ApplicationCluster_851.apd - You do not need this template for a single node deployment. This template is used for deploying all GMS's into the same cluster. The Cluster Application will contain shared configuration for GMS nodes.
Create a GMS Administrator
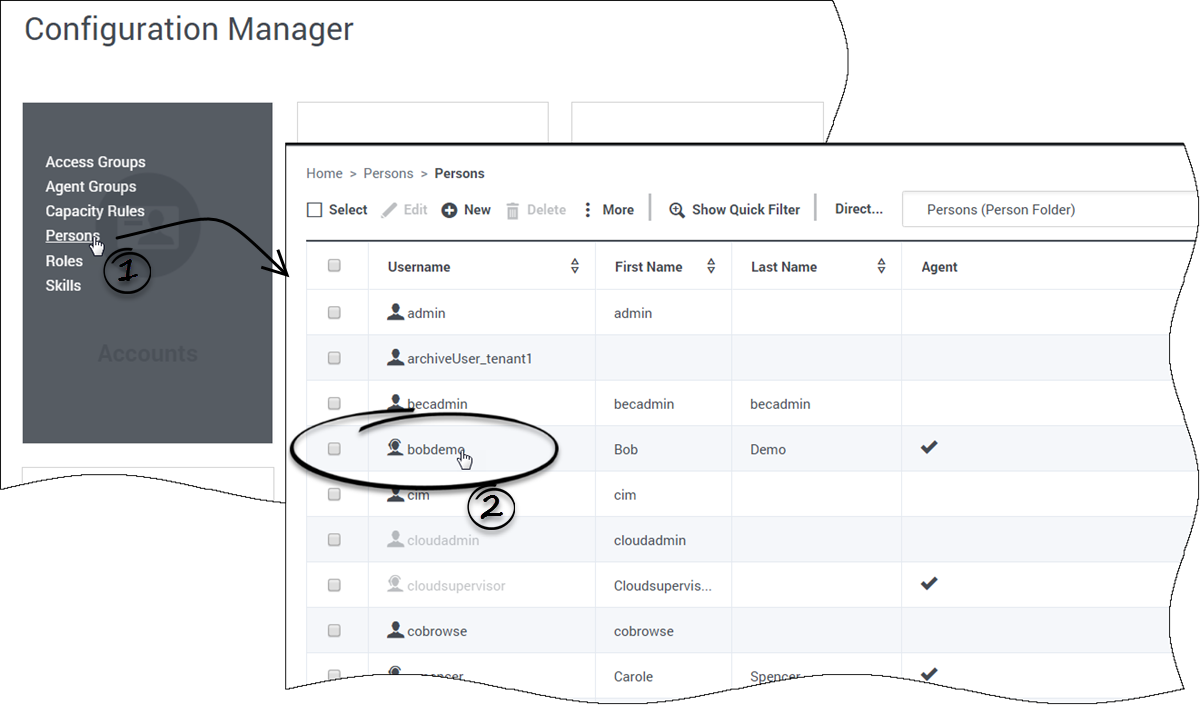
Open GAX and select the Configuration Manager section. In the Accounts menu, select Persons to get the list of configured users.
Edit the person who will be logging into the Service Management UI. You are going to give this user the permissions to read/write data into Callback related configuration objects (for example, GMS Application, Business Attributes, Transaction Lists for Resources/Patterns, and so on).
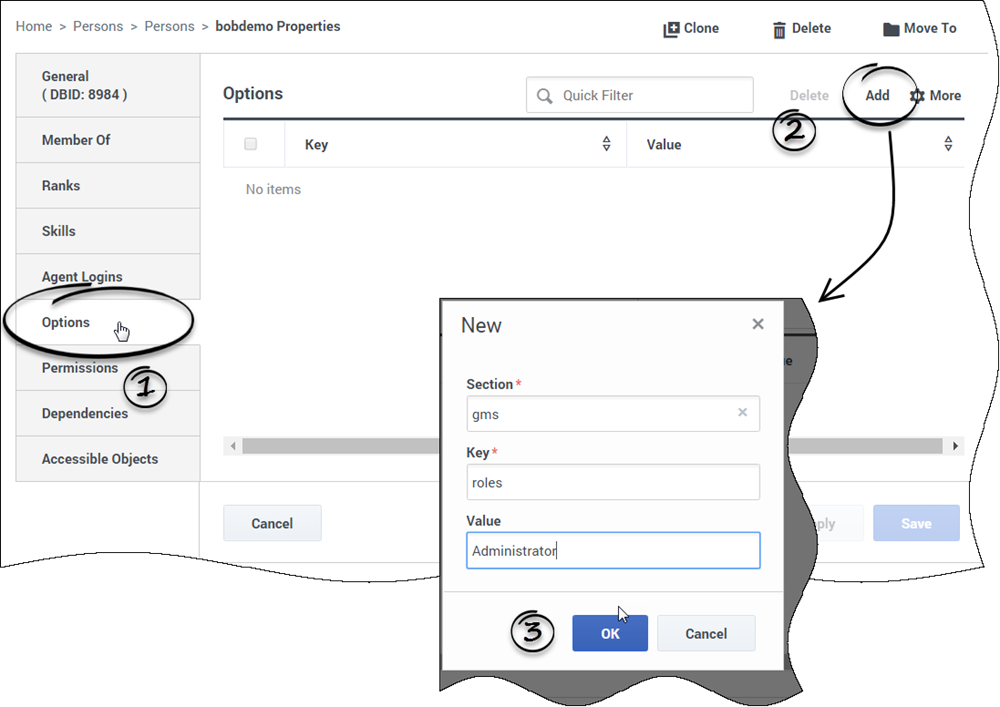
In the Options tab, click Add to set the gms/roles option:
- Enter gms for Section,
- Enter roles for Key,
- Enter one of the following values: and its value to:
- Supervisor: Role used to monitor and configure Callbacks only.
- Administrator: Role used to administer the creation of Callback Services. This role provides access to all panels and includes the Supervisor role.
Set Administrator Permissions
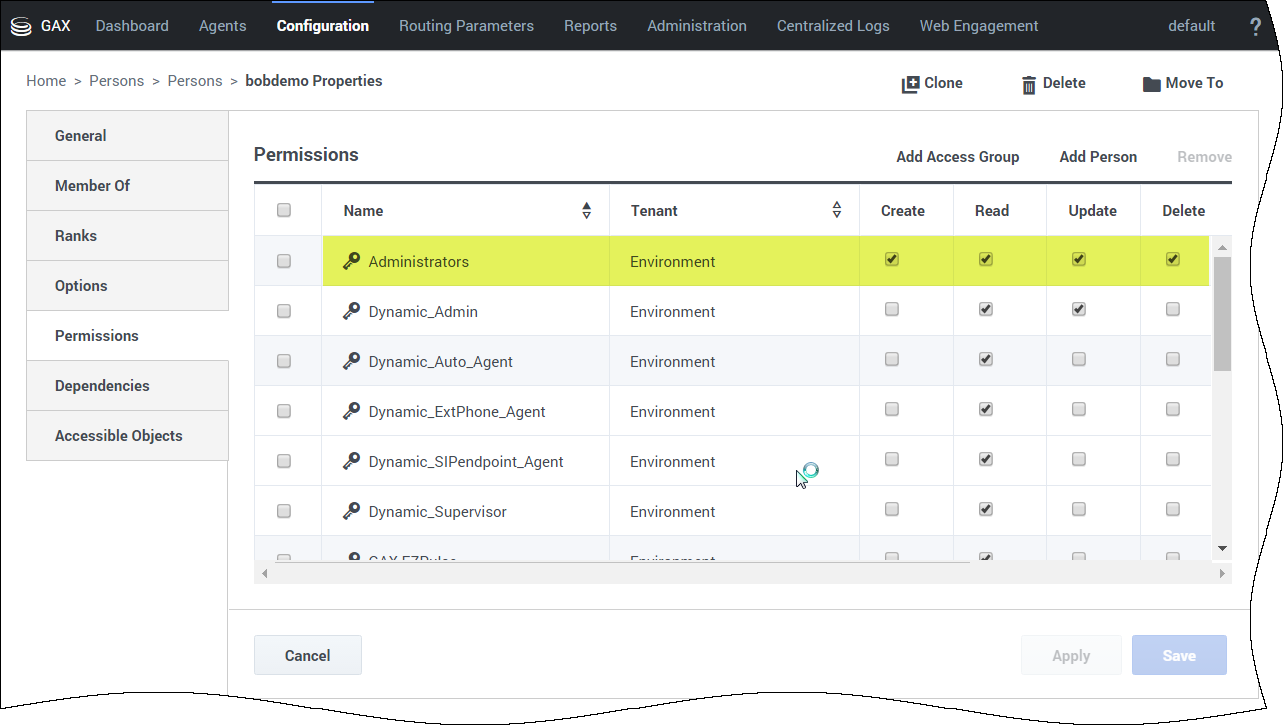
In the Permissions tab, make sure to add Environment\Administrators.
This step enables your GMS administrator to manage configuration objects that GMS reads and writes.
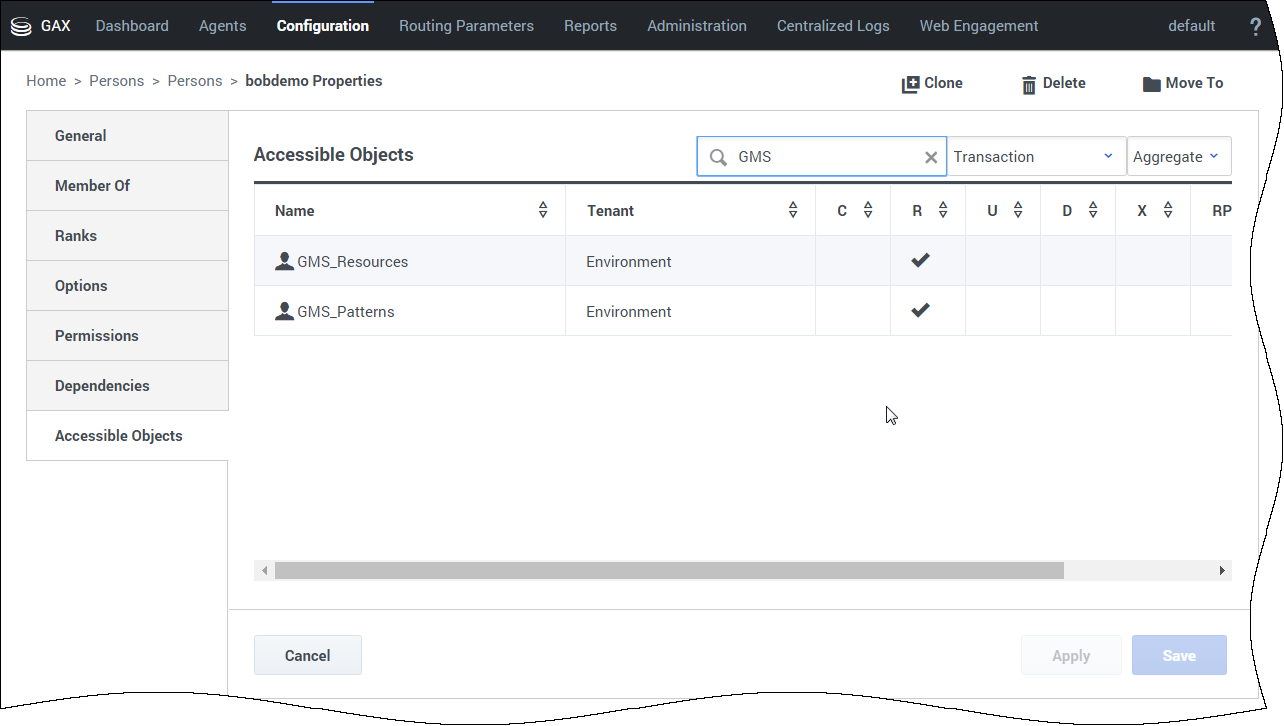
Select the Accessible Objects tab. For other GMS objects, you need to set the following permissions:
- Application (GMS/GMS Cluster): Read, Change
- Transactions: Read, Change
- Hosts: Read
- Persons: Read
Next Steps:
- For a GMS cluster deployment, go to Cluster Deployment.
- For a single node deployment, go to Single Node Deployment.
Single Node Deployment
Purpose: To create and configure a GMS Application object for a single GMS node (no cluster).
Prerequisites:
Create the GMS Application Object (Single Node)
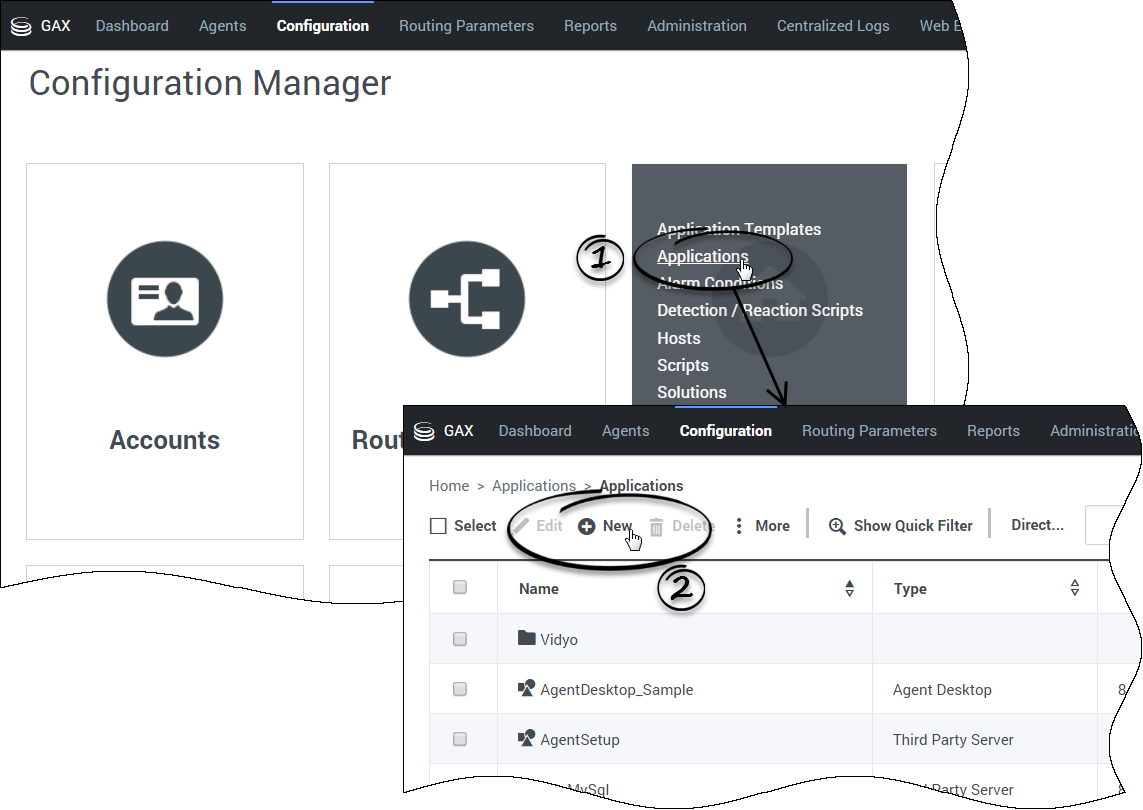
In the Configuration Manager tab, click the Applications link in the Environment menu; then, click + New .
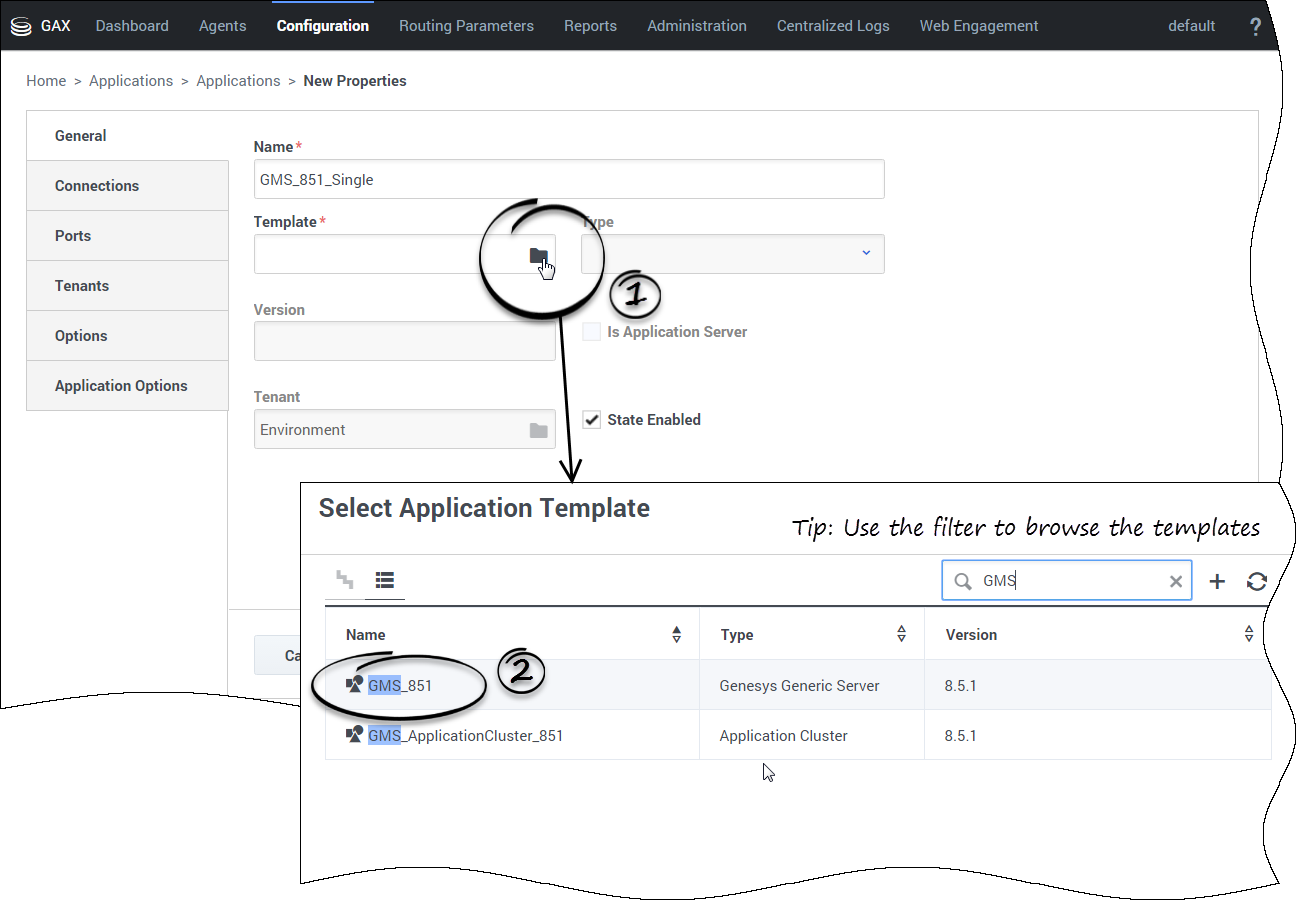
Browse your template
General Settings
- Select Component for Component Type.
- In the Command Line Arguments text box, enter a dummy value. It will be overwritten when Genesys Mobile Services is installed; however, having values in these fields is required to save the Application object.
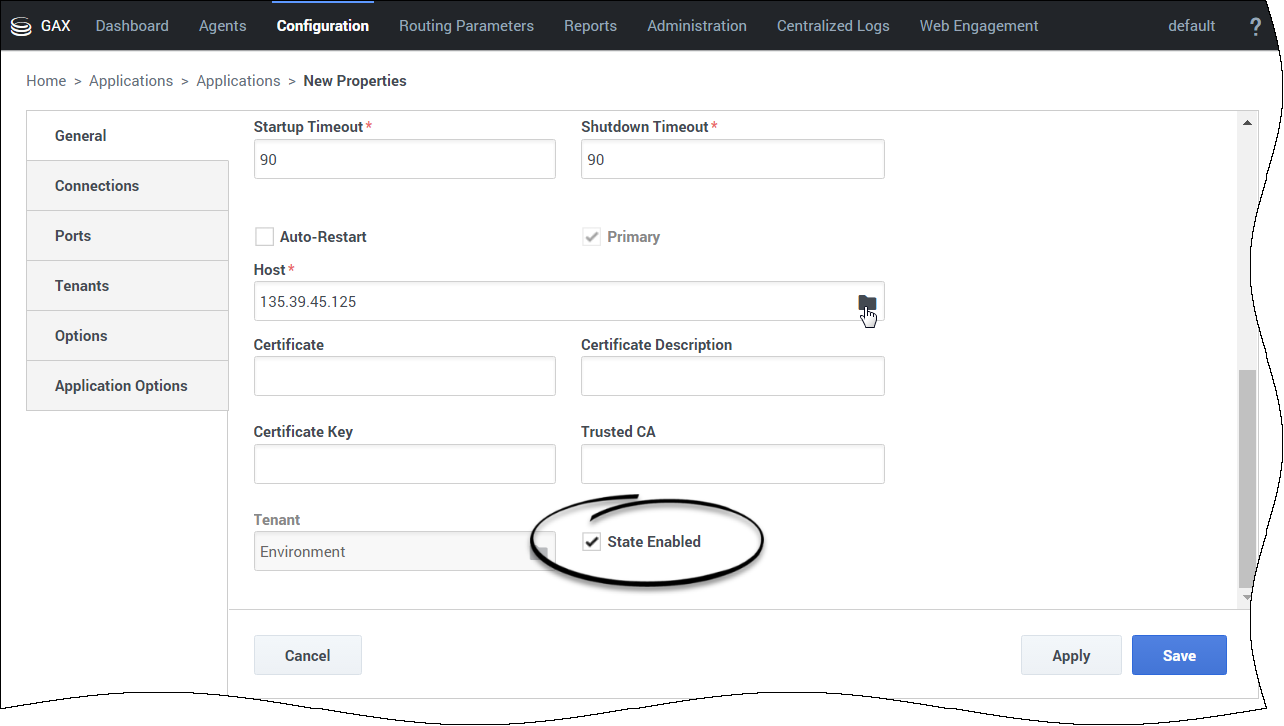
Check that the State is enabled, and browse your hostname for this application.
Click Apply or Save.
Your application is created.
Configure the GMS Application Object for Single Node
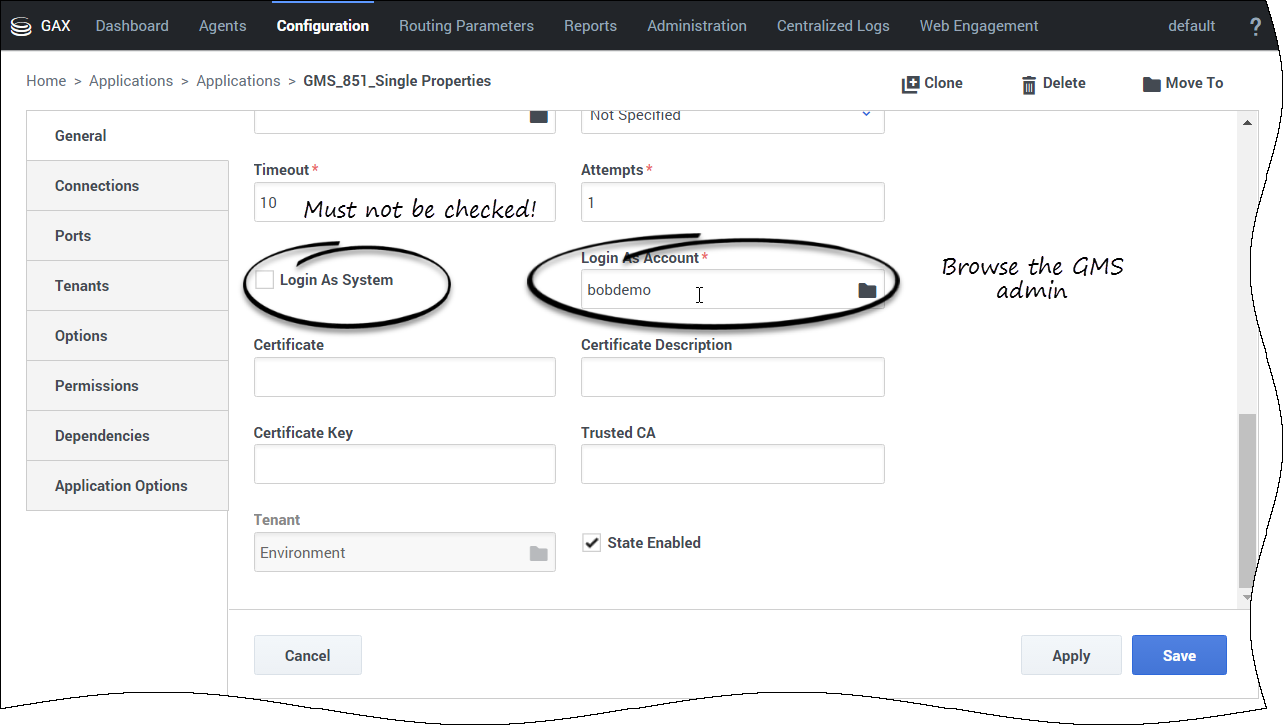
In the General tab, uncheck Log On As System option and browse your GMS Admin account to set up Log On Account. If you do not set up Log On Account, the GMS Admin UI will throw permission errors when you will try to create GMS Built-in services.
Set up your Connections
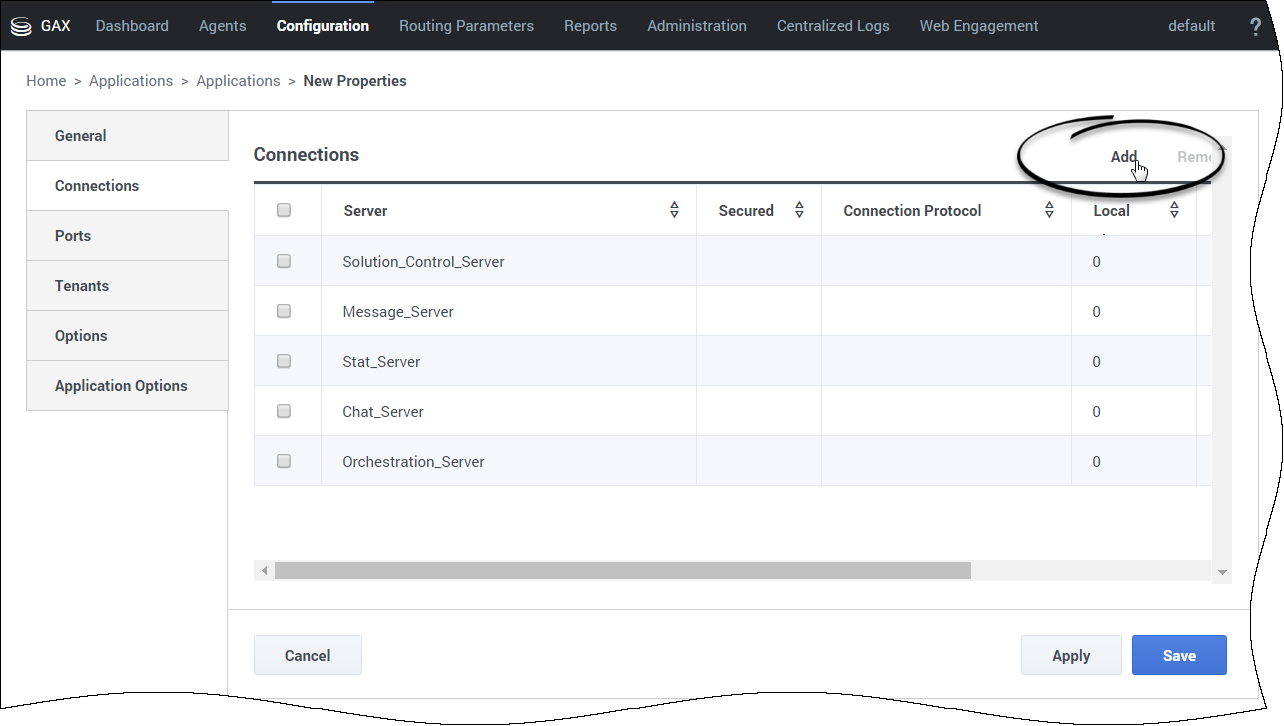
In the Connections tab, click Add to add the following connections:
- Orchestration Server (ORS) - optional: Add this connection (using HTTP) if you plan to use GMS Callback features.
- Solution Control Server - optional: Add this connection if you plan to use GMS Chat features.
- Chat Server - optional: Add this connection if you plan to use GMS Chat features.
- Stat Server - optional: Add this connection if you plan to use GMS Reporting features.
- Message Server - optional: Add this Connection if you plan to use Log features.
- URS Server - optional: Add this Connection if you plan to use EWT features.
In the Ports tab, check that a default dummy port is created.
Set up Server Information
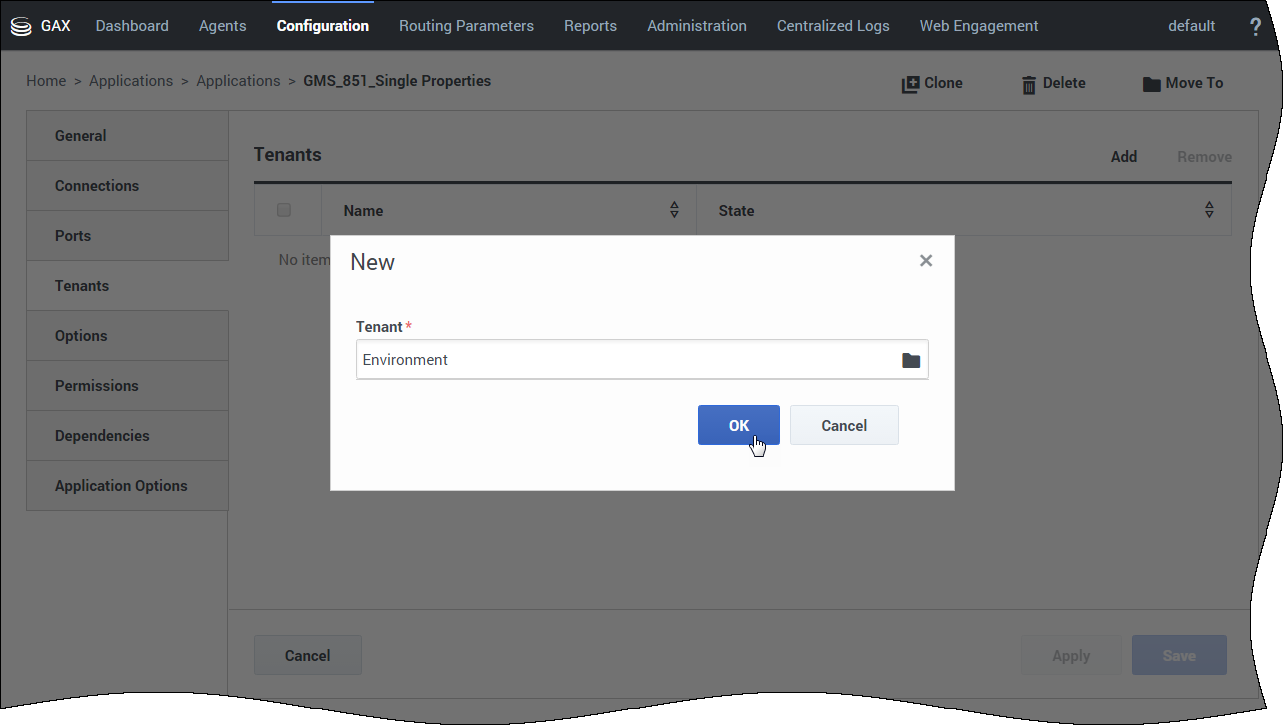
In the Tenants tab, click Add to set up the list of tenants that use your Genesys Mobile Services application.
Verify your Metadata
Set up Permissions for GMS Users
In the Permissions tab, you must add a user that is allowed to read/write data into GMS related configuration objects (for example, GMS Application, Transaction Lists for Resources/Patterns, and so on).
To do this, either click Add Access Group to browse the Environment\Administrators or Add User to browse the GMS Administrator set up previously.
Alternatively, you can simply use the Default user, which is already part of the Administrator Group.
Set up GMS options
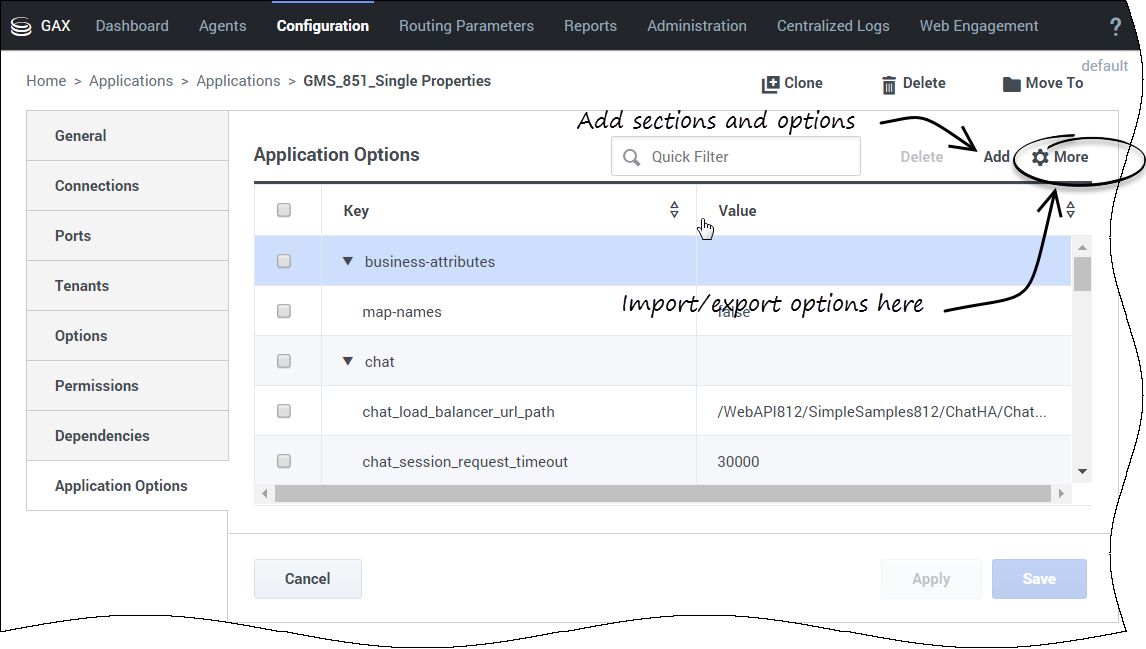
In the Application Options tab, you can set up all your GMS options. Refer to the Options reference for details and check further chapters of this book. For Digital Channels API configuration options, refer to Configuring the Digital Channels API.
You can now save and close your GMS application object.
Next Steps: Install Genesys Mobile Services.
Cluster Deployment
Purpose: To create and configure a GMS Application Cluster object for Genesys Mobile Services.
Prerequisites: Import the Application Templates.
Create a folder for the GMS cluster (Best practice)
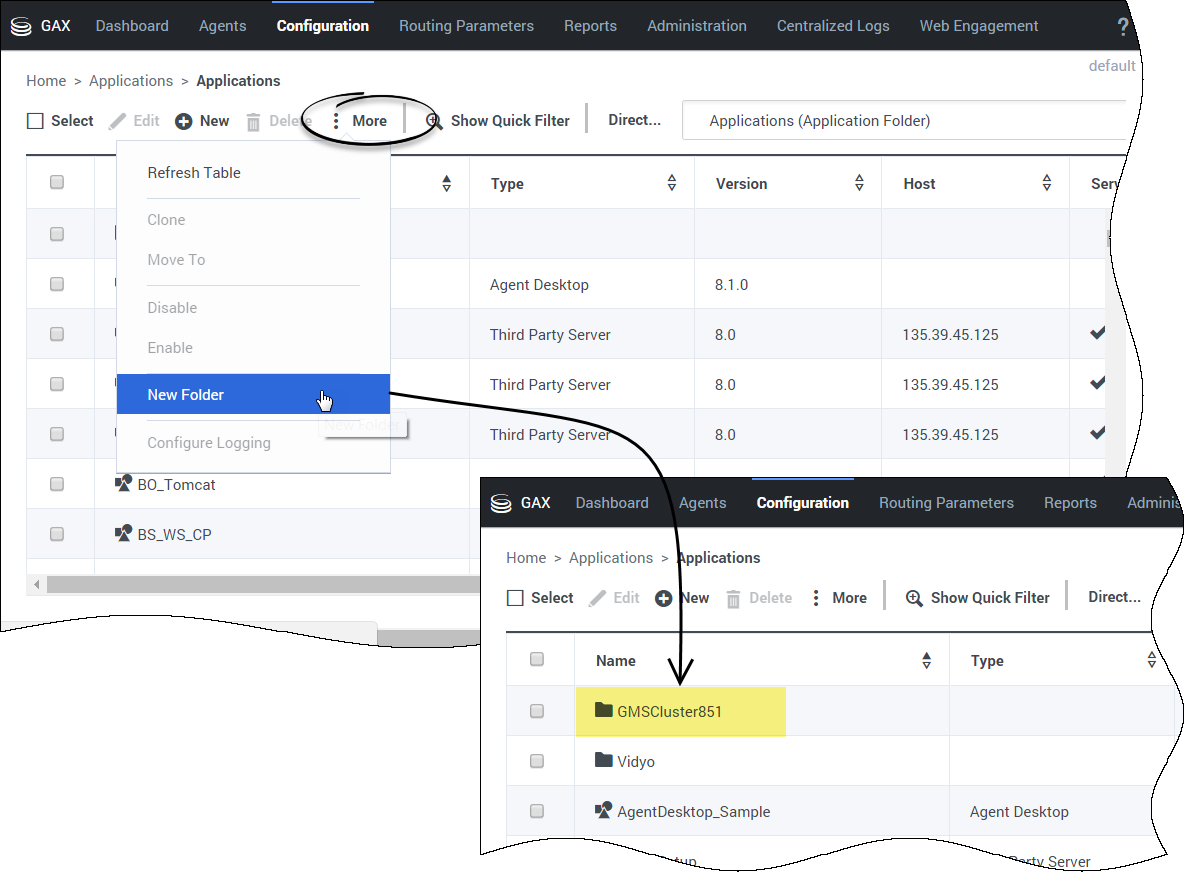
In the Configuration Manager tab, click the Applications link in the Environment menu; then, click More > New Folder to create a folder that will contain all of your application nodes. Set the new folder to a meaningful name, such as GMSCluster851.
Create a GMS cluster application
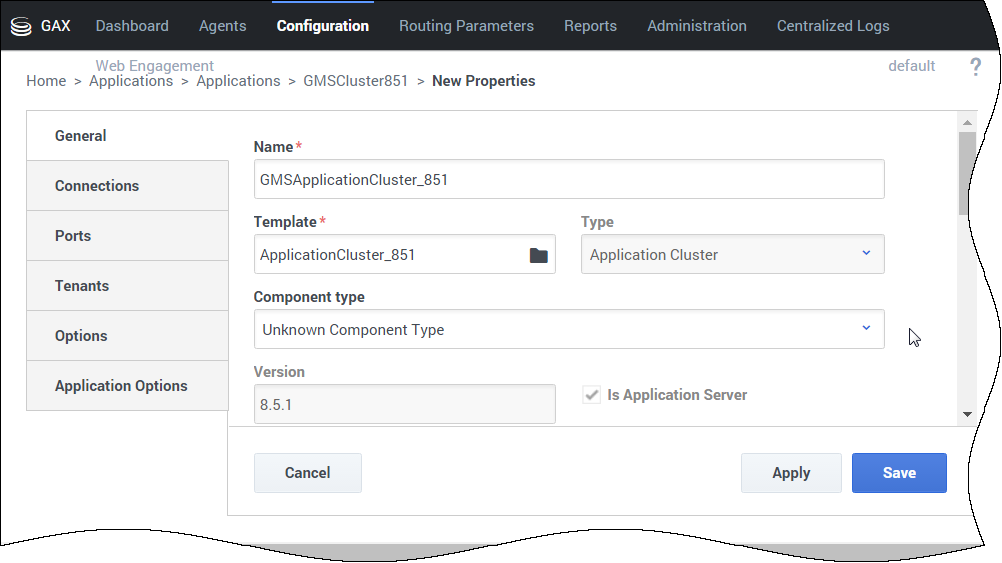
Create a new application with the wizard (as detailed for a single node), but use the ApplicationCluster_851.apd template instead of the regular template.
- Select Unknown Component Type in Component type.
Set the Cluster General Settings
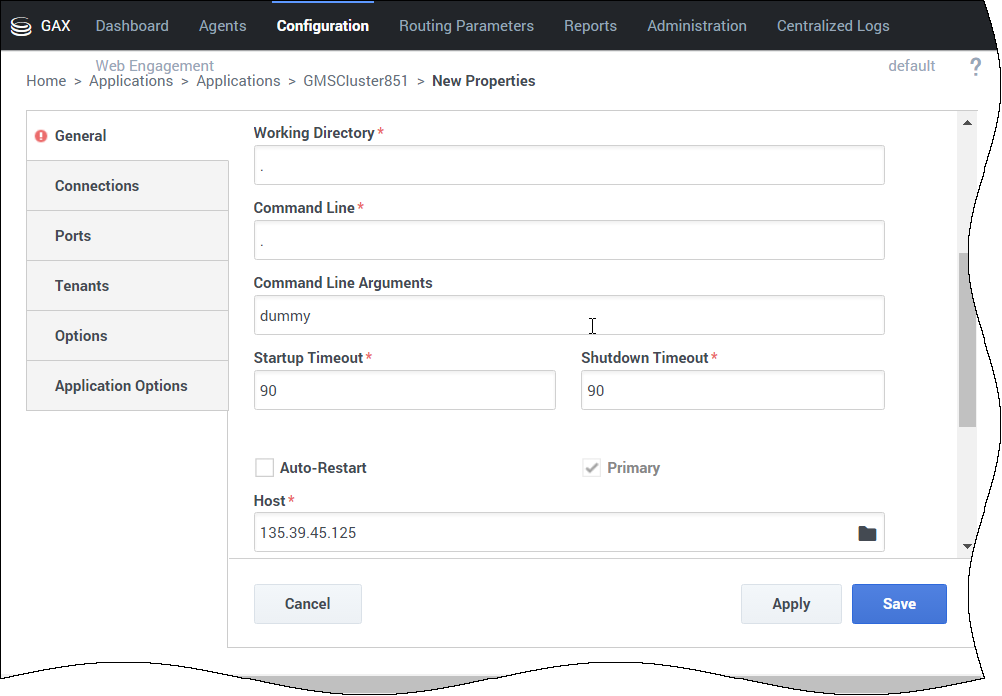
- Type dummy values in Working Directory field; this option will be overwritten when Genesys Mobile Services is installed; however, having values in these fields is required to save the Application object.
- Uncheck Log On As System option and browse to your GMS Admin account to set up Log On Account. If you do not set up Log On Account, the GMS Admin UI will throw permission errors when you will try to create GMS Built-in services.
- Check that the State is enabled, and browse your hostname for this application.
Click Apply or Save. Your application is created.
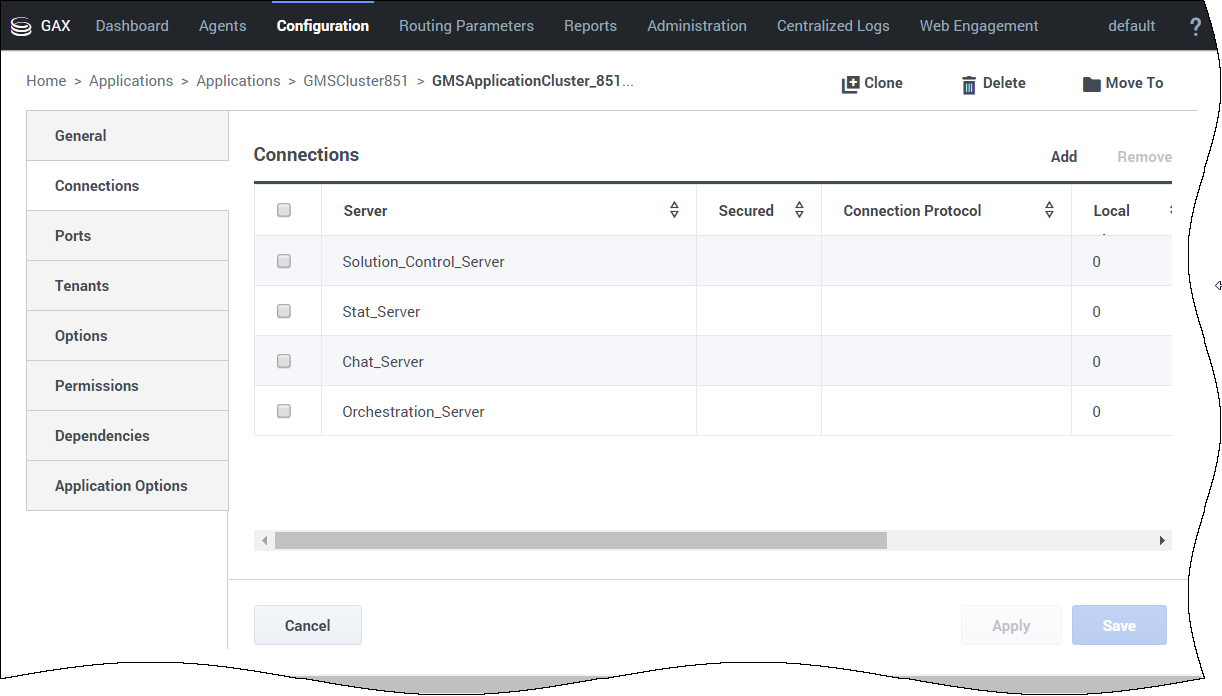
Set the Connections list and specify all of the servers to which Genesys Mobile Services must connect:
- Orchestration Server (ORS) - optional: Add this connection (using HTTP) if you plan to use GMS Callback features.
- Solution Control Server - optional: Add this connection if you plan to use GMS Chat features.
- Chat Server - optional: Add this connection if you plan to use GMS Chat features.
- Stat Server - optional: Add this connection if you plan to use GMS Reporting features.
- Message Server - optional: Add this Connection if you plan to use Log features.
- URS Server - optional: Add this Connection if you plan to use EWT features.
- In the Tenants section, click Add to set up the list of tenants that use your Genesys Mobile Services applications (one or more in a multi-tenant environment).
Create and Configure a GMS Application Node (Cluster)
Purpose: To create and configure a GMS Application object for a GMS node that is part of a cluster.
Prerequisites:
- Import the Application Templates
- Create a GMS Administrator
- Create the GMS Application Cluster Object
Create your nodes
To create a GMS Node, you must create a GMS application in your newly created Application Cluster folder.
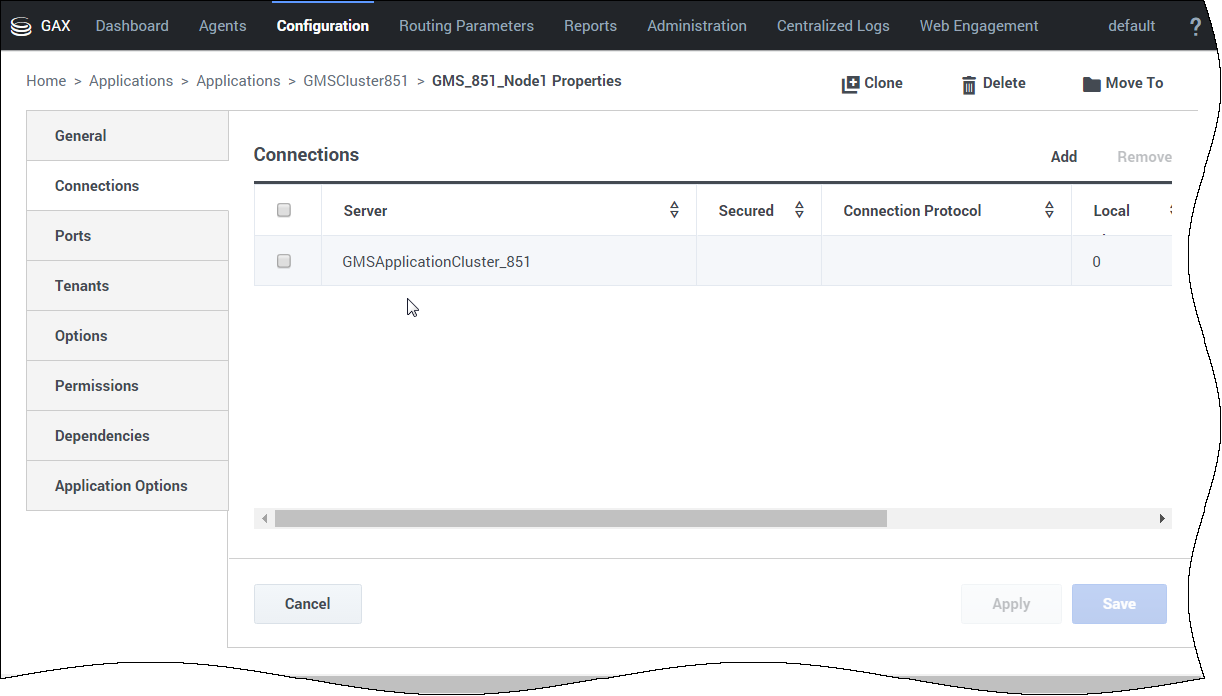
When setting your node connections, add the GMS Application Cluster that you just created previously.
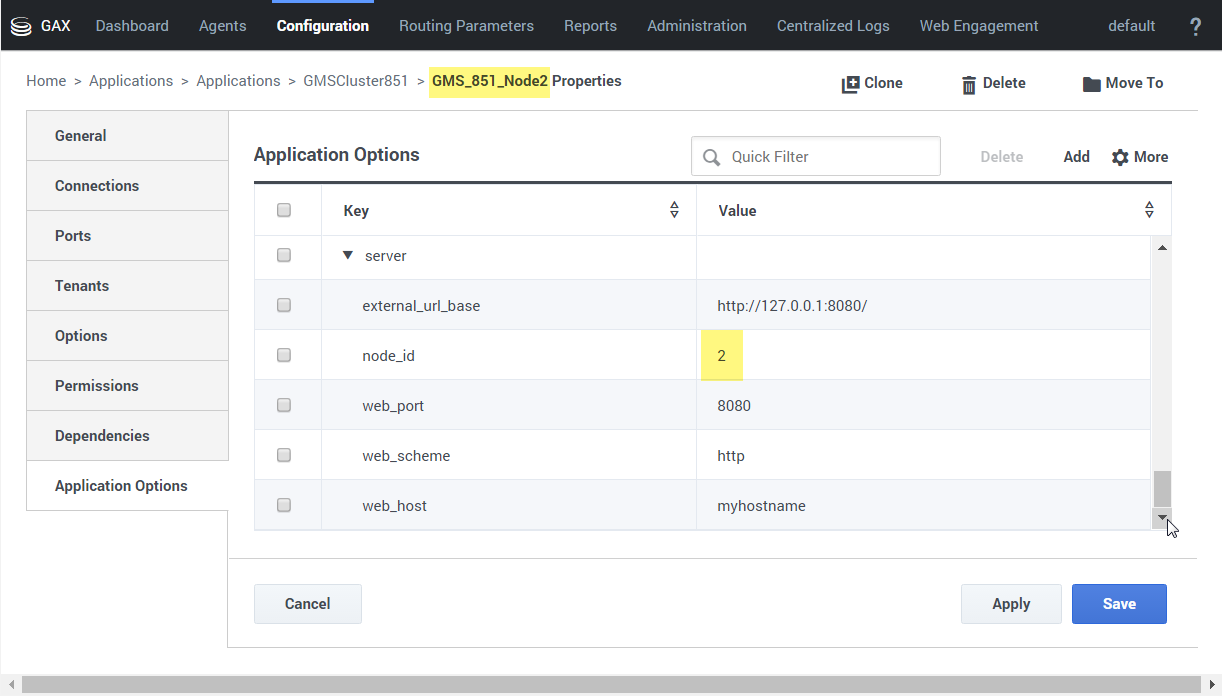
For each node, select the Application Options tab and configure node_id in the server section. The node ID is used to identify each GMS node and will be used for resource allocation, access code, and more. node_id must be unique and must be defined in each GMS application, and not at Cluster level.
Configure the following optional parameters in the server section if you need to force GMS to discover your nodes:
web_host is used for GMS communications between other GMS nodes and other servers like ORS and URS. When used with web_port and web_scheme, web_host enables you to build the GMS address for other servers that need to communicate with GMS.
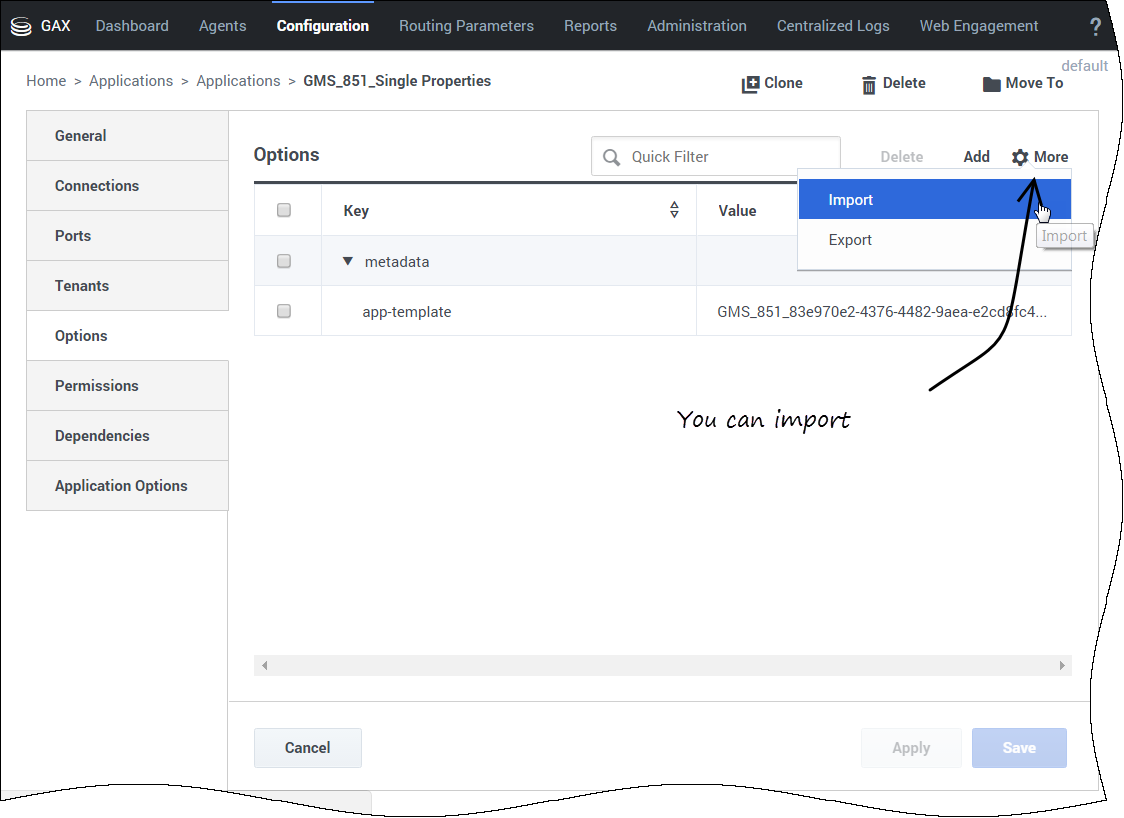
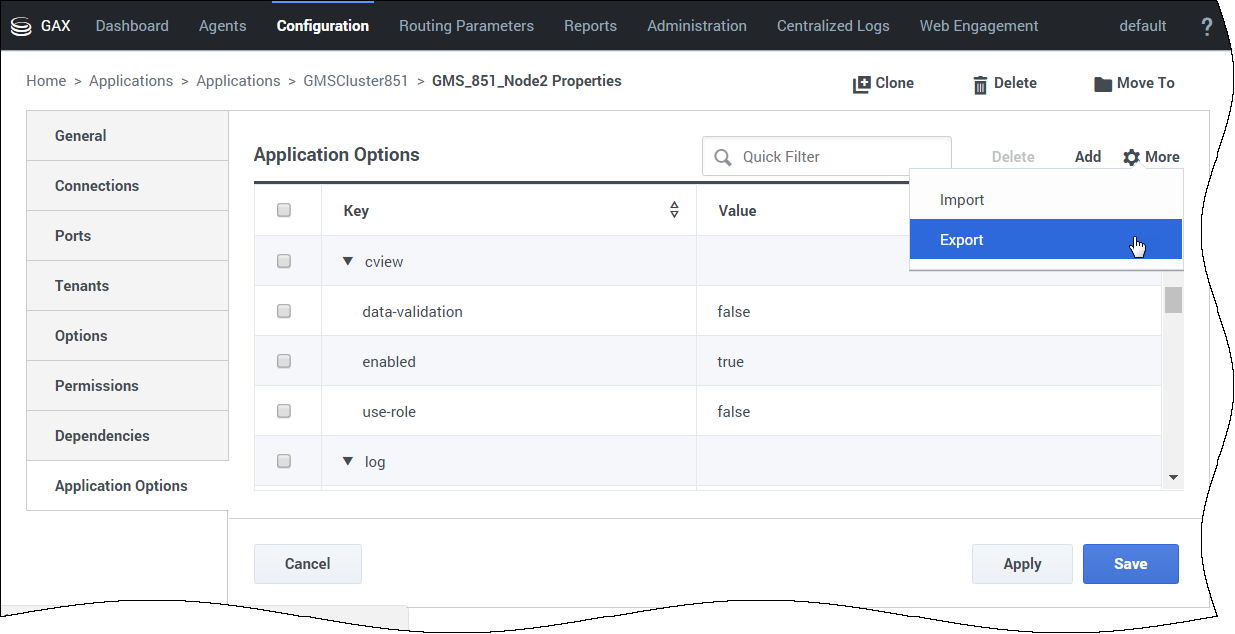
Set up additional configuration options in one of your nodes (as detailed in further chapters), and then click Export to save these options to a file.
Then:
- Remove all these options from your node, and save.
- Edit the GMS Application Cluster and click Import in the Options tab to load the options file.
- Make sure to remove the node_id setting from your cluster's configuration.
Enable Load Balancing in your Cluster Application
In the Options tab of your GMS Cluster application, section server, select external_url_base.
Set this option to the external URL of your cluster's load balancer, which will receive the requests submitted by your client applications.
You can now save and close your GMS application cluster object.
Next Steps: You must now install Genesys Mobile Services for each node of the cluster.

