Contents
Restricting Ports
You can control access to GMS APIs by configuring your firewall to allow or block other hosts (such as public internet, intranet, specific IP addresses, and so on) from accessing TCP/IP ports on the host where GMS is running.
You can configure and enable port control through the following process:
- Set configuration options.
- Copy code snippet from Service Management UI.
- Paste code snippet into the jetty.xml file.
- Restart GMS.
Configuration
Configuration Options
You can control port access to GMS APIs by adding a port_restrictions section in the GMS configuration, at the node level or cluster level. This section is optional and not defined in the default template. The content of this section is a list of key/values. Where key is an URI pattern (/genesys/1/storage/*, /genesys/1/service/*, /genesys/1/service/request-interaction, and so on), and the value is a list of ports or a port range.
- In Configuration Manager, select Environment > Applications.
- Locate and open the Application object for GMS.
- Select the Options tab.
- Add the port_restrictions section, and then set the options and values with the URL and ports you wish to control.
- Save your changes.
Example port_restrictions section:
| Option Name | Option Value | Description |
|---|---|---|
| /genesys/1/storage* | 80-90 | Storage API will be accessible from port 80 to port 90. |
| /genesys/1/service/* | 92-98,100 | Services API will be accessible from port 92 to port 98, plus the port 100. |
Notes:
- There are no default values or default option names. You can define various URL patterns; such as /genesys/1/resource*, /genesys/1/resource*, /genesys/1/service/*, /genesys/1/service/request-interaction, and so on.
- If the request is sent on another port, an HTTP error 403 Forbidden occurs.
- The Admin UI and APIs not listed in the port_restrictions section will be available on all ports listed in the port_restrictions section.
Service Management UI
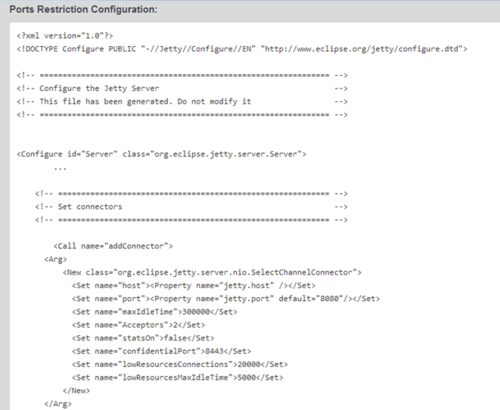
- In the Service Management User Interface, go to the Lab > Config tab. The xml snippet is displayed.
- Select and copy the entire Set connectors code snippet.
Example code snippet:
jetty.xml File
- Go to the <GMS_HOME>/etc/jetty.xml file, and add the code snippet in the Set connectors section of the file, after the GMS default HTTP connector (used to open default port 8080).
Example Set connectors section:
 <!-- =========================================================== -->
    <!-- Set connectors                                              -->
    <!-- =========================================================== -->

	 <Call name="addConnector">
      <Arg>
          <New class="org.eclipse.jetty.server.nio.SelectChannelConnector">
            <Set name="host"><Property name="jetty.host" /></Set>
            <Set name="port"><Property name="jetty.port" default="8080"/></Set>
            <Set name="maxIdleTime">300000</Set>
            <Set name="Acceptors">2</Set>
            <Set name="statsOn">false</Set>
            <Set name="confidentialPort">8443</Set>
	    <Set name="lowResourcesConnections">20000</Set>
	    <Set name="lowResourcesMaxIdleTime">5000</Set>
          </New>
      </Arg>
    </Call>


	<!-- Paste Port Definition Snippet here -->
2. Restart GMS.
Disabling Port Restrictions
- In Configuration Manager, select Environment > Applications.
- Locate and open the Application object for GMS.
- Select the Options tab.
- Select the port_restrictions section.
- Right-click, and enter a hash tag (#) in front of port_restrictions so it appears like this: #port_restrictions. The port restrictions are now disabled, and the Service Management User Interface > Lab > Config tab will display: port restrictions has not been enabled.

