
Setting Up the SQL Server for SpeechMiner
Installing SQL Server 2012
To install SQL Server 2012 for use with SpeechMiner, run the normal setup wizard first and follow the instructions.
- Run the installation program. The SQL Server Installation Center window opens, with the Planning screen open.
- From the menu on the left, select Installation. The Installation screen opens. Select New installation or add features to an existing installation. The installation wizard opens.
- Follow the on-screen instructions. When the screens mentioned below open, follow the instructions below to select the required settings and options for SpeechMiner.
- From the Setup Role screen, select SQL Server Feature Installation.
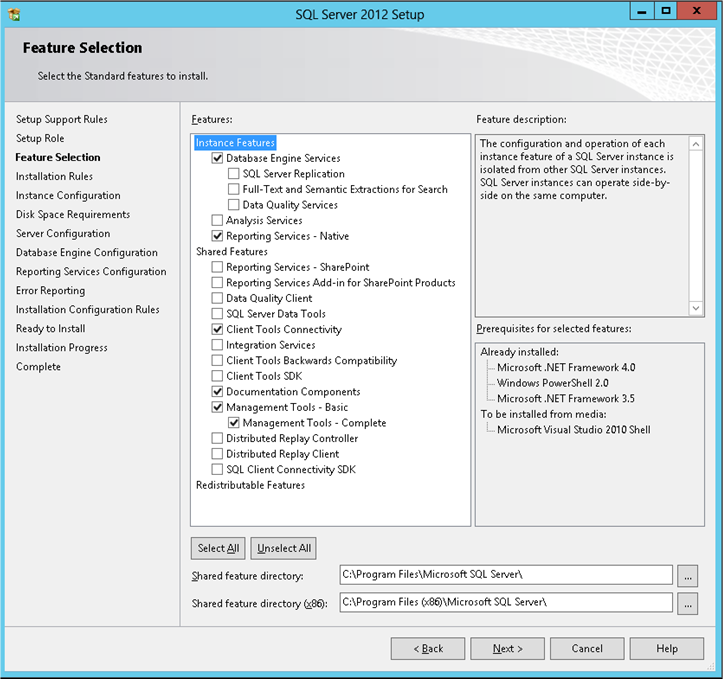
- From the Feature Selection screen, select the following options:
- Database Engine Services
- Reporting Services
- Client Tools Connectivity
- SQL Server Books Online
- Management Tools Basic
- Management Tools Complete
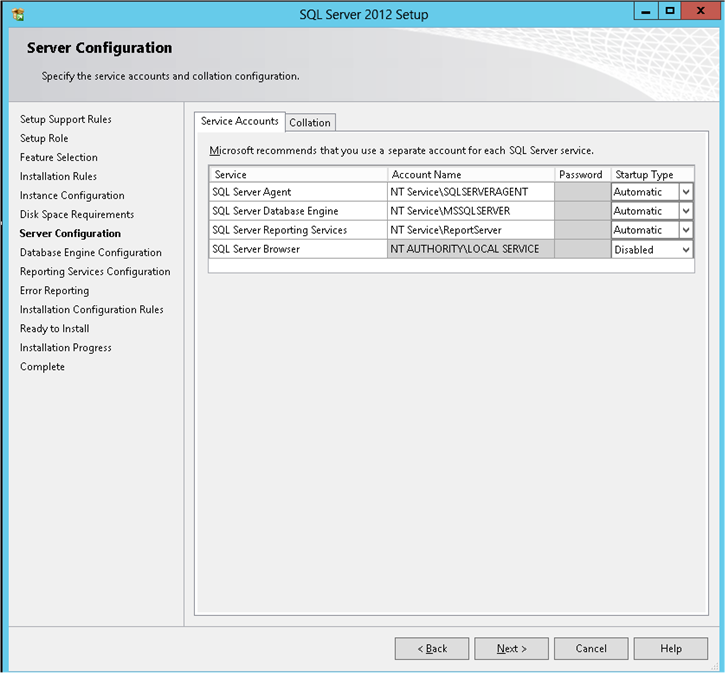
- From the Server Configuration screen, in the Service Accounts tab, for the SQL Server Agent, SQL Server Database Engine, and SQL Server Reporting Services, do the following:
- Enter the user account and password of the service account.
- Under Startup Type, select Automatic.
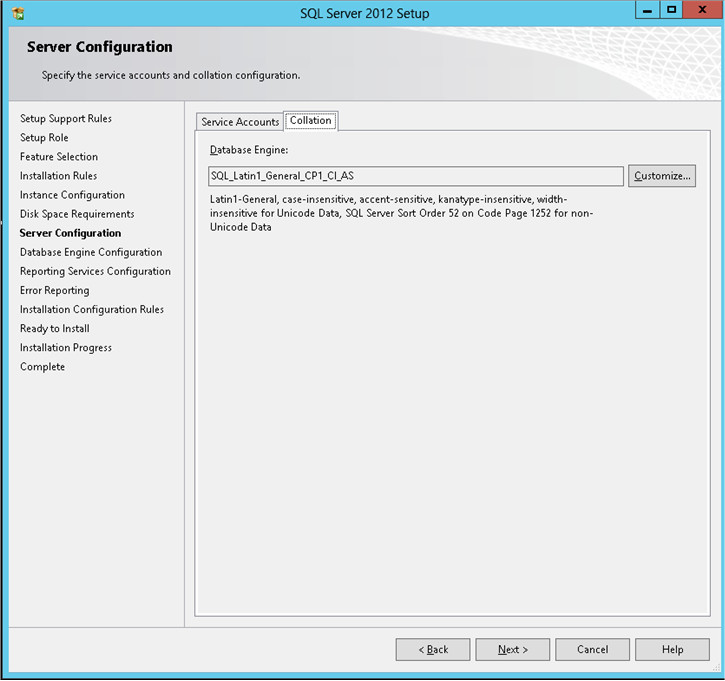
- From the Server Configuration screen, in the Collation tab, under Database Engine, select SQL_Latin1_General_CP1_CI_AS (the default value).
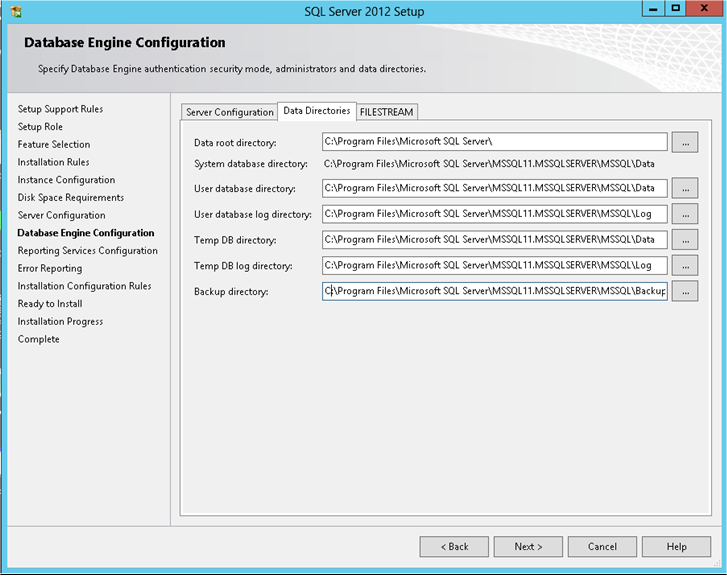
- From the Database Engine Configuration screen, in the Data Directories tab, select the locations for the database folders. If possible, put the User database directory, the Temp DB directory, and the Backup directory on a separate drive from the other folders.
- From the Reporting Services Configuration screen, select Install the native mode default configuration.
- When you finish installing SQL Server, restart the machine on which you installed it.


Installing SQL Server 2014
To install SQL Server 2014 for use with SpeechMiner, run the normal setup wizard first and follow the instructions.
- Run the installation program. The SQL Server Installation Center window opens, with the Planning screen open.
- From the menu on the left, select Installation. The Installation screen opens.
- Select New SQL Server stand-alone installation or add features to an existing installation. The installation wizard is activated.
- Follow the on-screen instructions. Refer to the instructions below to select the required settings and options for SpeechMiner.
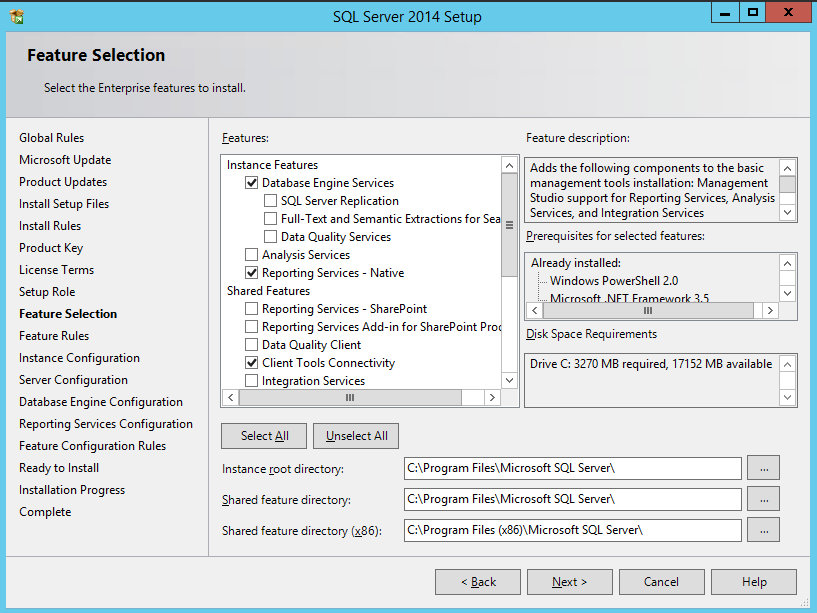
- In the Setup Role screen, select SQL Server Feature Installation and click Next.
- In the Feature Selection screen, select the following features, and click Next:
- Database Engine Services
- Reporting Services - Native
- Client Tools Connectivity
- Management Tools Basic
- Management Tools Complete
- In the Instance Configuration screen select the Instance Configuration option and set the Instance ID name.
- In the Server Configuration > Service Accounts tab, perform the following for the SQL Server Agent, SQL Server Database Engine, and SQL Server Reporting Services and click Next:
- Enter the service Account Name and Password.
- Under Startup Type, select Automatic.

- In Server Configuration > Collation tab, under Database Engine, select SQL_Latin1_General_CP1_CI_AS (the default value) and click Next.
- In the Database Engine Configuration > Server Configuration tab, select an Authentication Mode and click Next. If required specify the SQL Server administrators password.
- In the Database Engine Configuration > Data Directories tab, select the database folder locations and click Next.
Note: It is recommended that the User database directory, Temp DB directory, and Backup directory be located on a drive that is different from the Data directories. - In the Reporting Services Configuration screen, select Install and configure and click Next.
- In the Ready to Install screen, click Install.
- When you finish installing SQL Server, restart the machine on which you installed it.


Installing SQL Server 2016
To install SQL Server 2016 for use with SpeechMiner, run the normal setup wizard first and follow the instructions.
- Run the installation program. The SQL Server Installation Center window opens, with the Planning screen open.
- From the menu on the left, select Installation. The Installation screen opens.
- Select New SQL Server stand-alone installation or add features to an existing installation. The installation wizard is activated.
- Follow the on-screen instructions. Refer to the instructions below to select the required settings and options for SpeechMiner.
- In the Product updates screen, click Next.
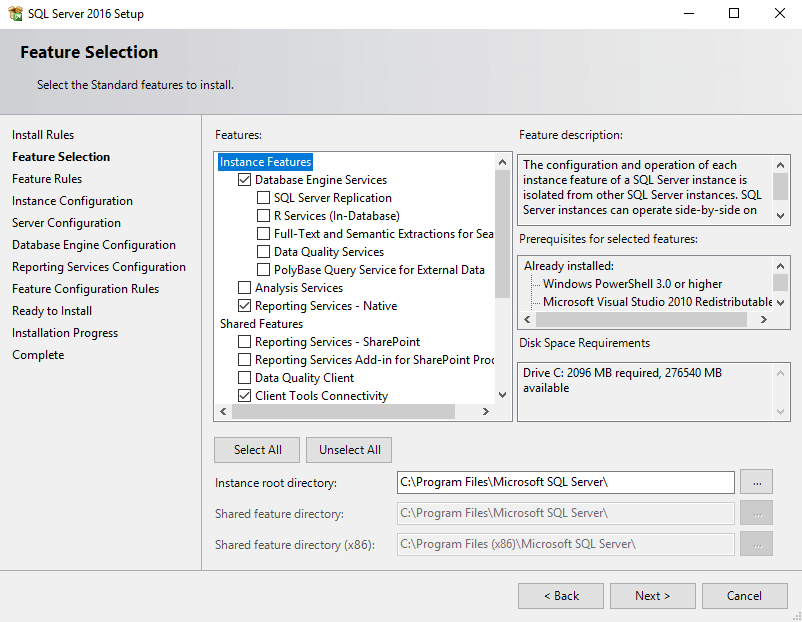
- In the Feature Selection screen, select the following features, and click Next:
- Database Engine Services
- Reporting Services – Native
- Client Tools Connectivity
- In the Instance Configuration screen select the Instance Configuration option and set the Instance ID name.
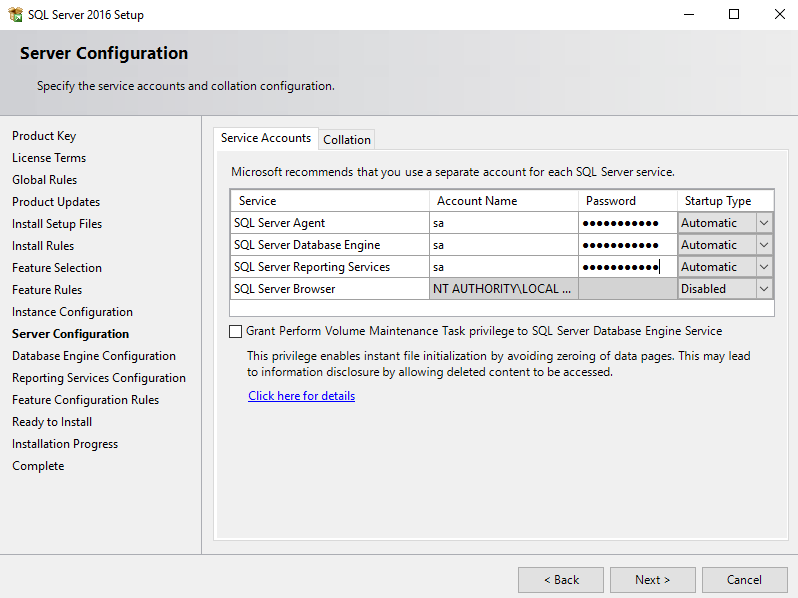
- In the Server Configuration > Service Accounts tab, perform the following for the SQL Server Agent, SQL Server Database Engine, and SQL Server Reporting Services and click Next:
- Enter the service Account Name and Password.
- Under Startup Type, select Automatic.
- In Server Configuration > Collation tab, under Database Engine, select SQL_Latin1_General_CP1_CI_AS (the default value) and click Next.
- In the Database Engine Configuration screen, in the server configuration add the Authentication mode. In the Data Directories tab, select the locations for the database folders. If possible, put the User database directory, the Temp DB directory, and the Backup directory on a separate drive from the other folders. Click Next.
- In the Reporting Services Configuration screen, select Install the native mode default configuration and click Next.
- When you finish installing SQL Server, restart the machine on which you installed it.


Configuring the SQL Server Setting
After the SQL server is installed, do the following:
- Ensure that the SQL server is running
- Configure the SQL server to start automatically
- Enable both the TCP/IP and the Named Pipes protocols
To configure the SQL server and enable the required protocols:
- From the Start menu, navigate to Microsoft SQL Server 2008 (or later) > Configuration Tools > SQL Server Configuration Manager. The SQL Server Configuration Manager opens.
- On the left side of the window, select SQL Server Services.
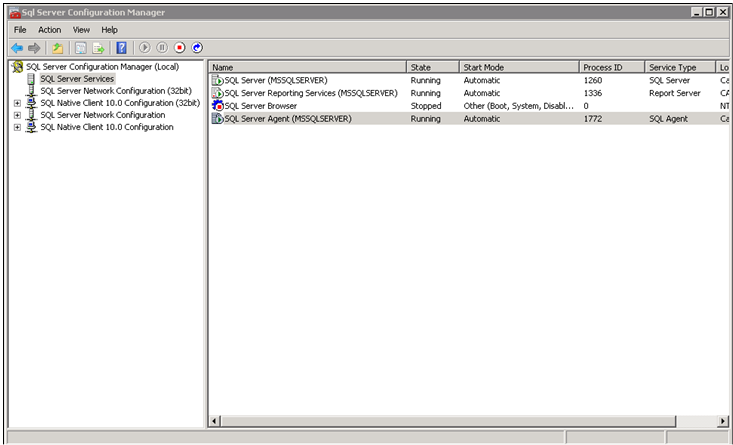
- On the right side of the window, for SQL Server Agent, check that the Status is Running, and the Start Mode is Automatic.
- If one or both of these values are not as they should be, do the following:
- Double-click the row. The Properties window opens.
- In the Service tab, set the Start Mode to Automatic.
- If the service is not running, in the Log On tab, select Start.
- Click OK to implement the changes.
- On the left side of the SQL Server Configuration Manager window, select SQL Server Network Configuration > Protocols for MSSQLSERVER.
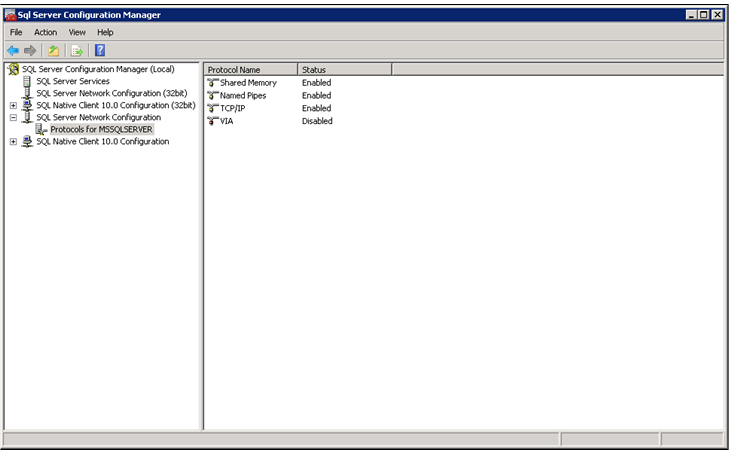
- On the right side of the window, for TCP/IP and for Named Pipes, check that the Status is Enabled.
- For each of these protocols, if it is not enabled, do the following:
- Double-click the row. The Properties window opens.
- In the Protocol tab, under Enabled, select Yes.
- Click OK to implement the changes.


Configuring the Reporting Services (Pre SQL Server 2019)
The SQL reporting services should be configured as explained below.
To configure the SQL reporting services:
- In the Start menu, under All Programs, select SQL Server 2008 R2 > Configuration Tools > Reporting Services Configuration Manager. The Reporting Services Configuration Connections window opens.
- Enter the report server name and the instance name (if they are not already there), and click Connect. The Reporting Services Configuration Manager opens, with the Report Server Status screen displayed.
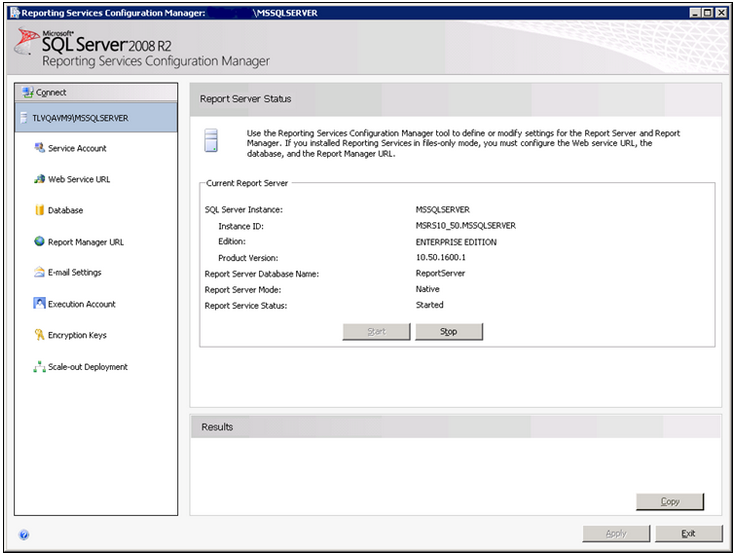
- Check whether the report server is running. If it is not, click Start.
- On the left side of the window, select Service Account.
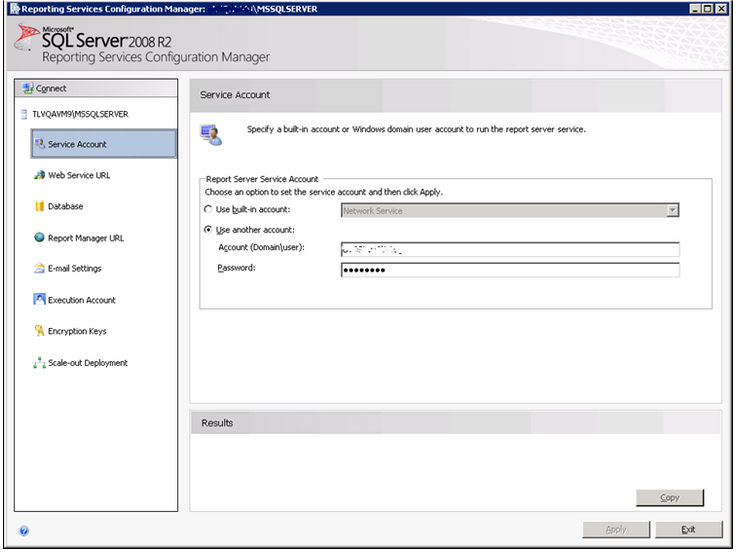
- Configure the account name and password of the service account that will be used to run the report-server service, as required. Use either a local administrator account or an account that can log in as a service and run services on the local machine.
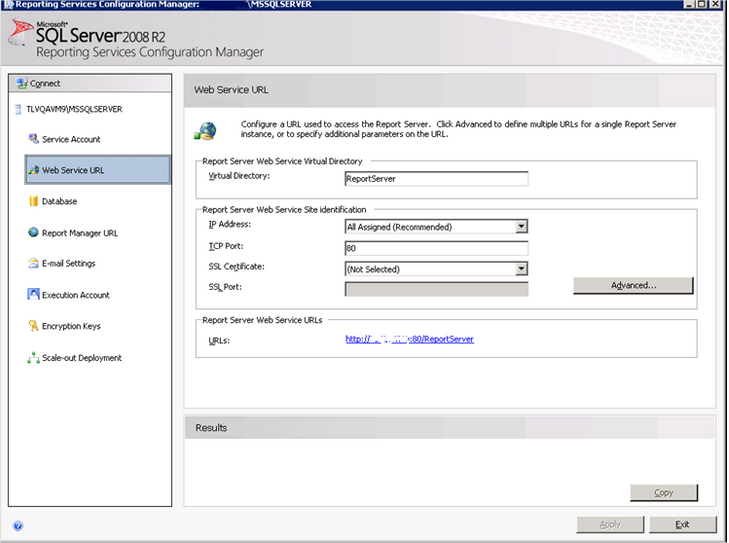
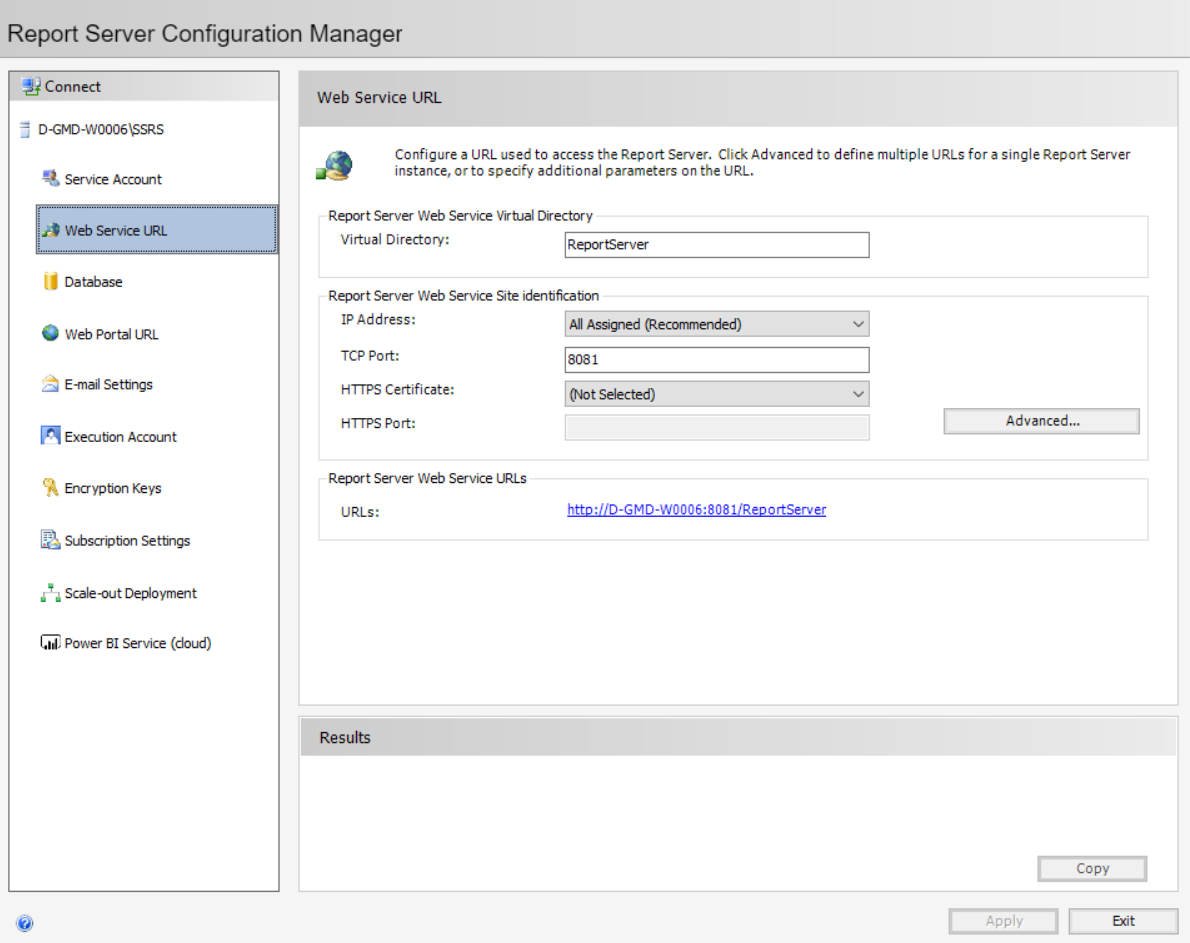
- On the left side of the window, select Web Service URL; make sure the settings in the screen match the settings as follows:
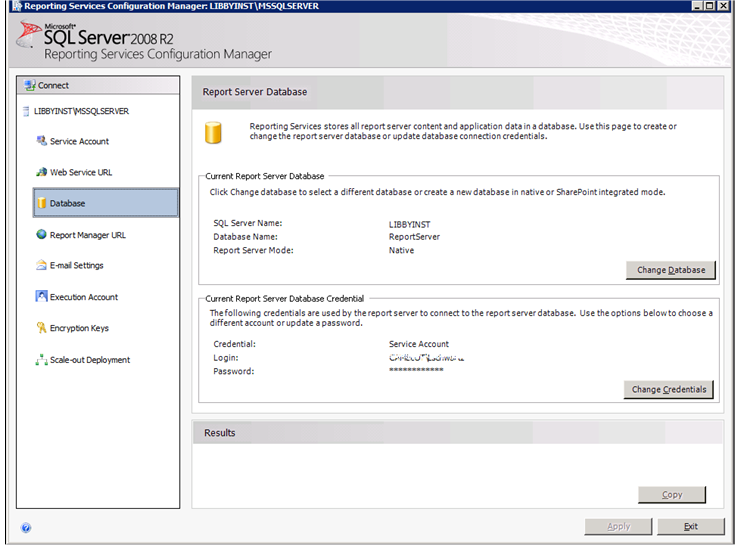
- On the left side of the window, select Database. If you created a report-server database when you installed SQL Server, it appears under Current Report Server Database. If you did not, create it now.
- On the left side of the window, select Report Manager URL; make sure the settings in the screen match the settings as follows:

- On the left side of the window, select E-mail Settings.
- Enter the settings for the e-mail account you want the report server to use to send reports to SpeechMiner users.

- Click Exit to close the Reporting Services Configuration Manager.
- In the Report Server config file (rsreportserver.config) change the MaxActiveReqForOneUser parameter value from 20 to 250. For more details see: http://msdn.microsoft.com/en-us/library/ms157273.aspx


The user must be a Domain user.


Configuring the Reporting Services (SQL Server 2019)
The SQL reporting services should be configured as explained below.
To configure the SQL reporting services:
- In the Start menu, under All Programs, select SQL Server 2019 > Configuration Tools > Reporting Services Configuration Manager. The Reporting Services Configuration Connections window opens.
- Enter the report server name and the instance name (if they are not already there), and click Connect. The Reporting Services Configuration Manager opens, with the Report Server Status screen displayed.
- Check whether the report server is running. If it is not, click Start.
- On the left side of the window, select Service Account.
- Configure the account name and password of the service account that will be used to run the report-server service, as required. Use either a local administrator account or an account that can log in as a service and run services on the local machine.
- On the left side of the window, select Web Service URL; make sure the settings in the screen match the settings as follows:
- On the left side of the window, select Database. If you created a report-server database when you installed SQL Server, it appears under Current Report Server Database. If you did not, create it now.
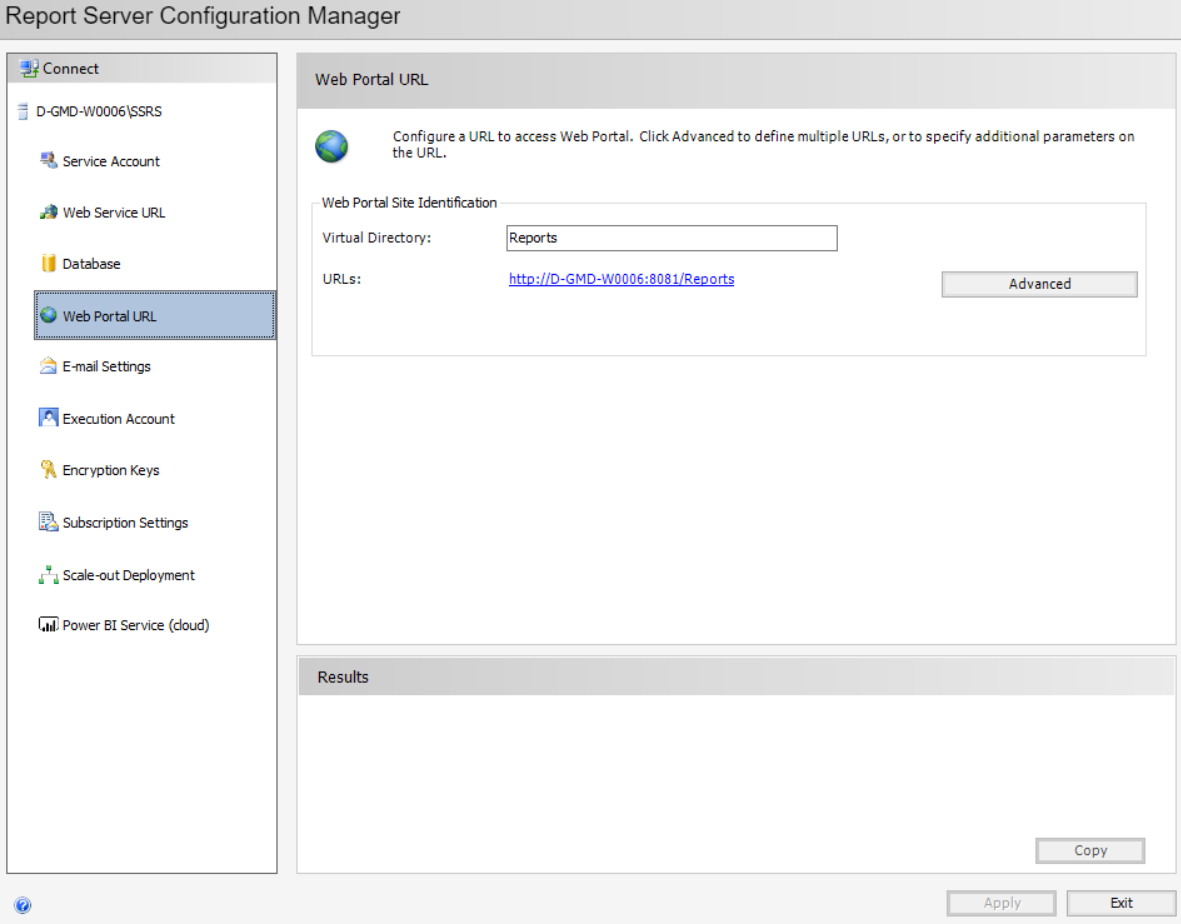
- On the left side of the window, select Web Portal URL; make sure the settings in the screen match the settings as follows:
- On the left side of the window, select E-mail Settings.
- Enter the settings for the e-mail account you want the report server to use to send reports to SpeechMiner users.
- Click Exit to close the Reporting Services Configuration Manager.
- In the Report Server config file (rsreportserver.config) change the MaxActiveReqForOneUser parameter value from 20 to 250. For more details see: http://msdn.microsoft.com/en-us/library/ms157273.aspx
The user must be a Domain user.


Creating the Report-Server Database
If the report-server database was not created automatically when you installed SQL Server, you can create it in the Report Server Database Configuration Wizard.
To create the report-server database:
- Open the Reporting Services Configuration Manager.
- From the Database screen, under Current Report Server Database, click Change Database. The Report Server Database Configuration Wizard opens.
- In the wizard, fill in the fields as they are filled in in the examples shown (except, of course, for the server name and the credentials, which you must specify as appropriate for your system). Click Next to progress from screen to screen until you have finished creating the database.
Action
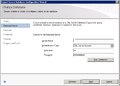
Database Server
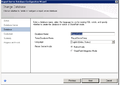
Database
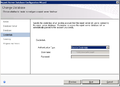
Credentials


Click on the image to enlarge.
Configuring Report Server Load Value
To ensure that the Report Server does not crash due to overload, verify that your Report Server is configured to enable a large amount of concurrent reports.
- Open the report server configuration file. By default the configuration file can be found in rsreportserver.config under \\SERVER_NAME\c$\Program Files\Microsoft SQL Server\MSRS12.MSSQLSERVER\Reporting Services\ReportServer.
- Change the value of MaxActiveReqForOneUser to the recommended value. The value of MaxActiveReqForOneUser depends on your deployment. Contact Customer Care for the value recommended for your deployment.
- Change the SME data source connection string:
- Go to the Report Server web interface. By default the location is http://SERVER_NAME/reports.
- Click on the database folder.
- Click SME datasource.
- Add the following string: max pool size = 10000 to the end of the connection string field.
- Click Apply.
Setting the Maximum Memory Usage
If the SQL-server's memory usage is not limited, it will consume all of the available memory. Therefore, it is recommended to limit the memory usage of the SQL Server by setting the max server memory value.
You can see the current max server memory value, and modify it as required, in the SQL Server Management Studio.
To view or modify the max server memory value:
- From the SQL server, open the SQL Server Management Studio. (For example, in the Start menu, under All Programs, select Microsoft SQL Server 2008 R2 > SQL Server Management Studio.)
- On the left side of the window, right-click the SQL server and then select Properties. The Server Properties window opens.
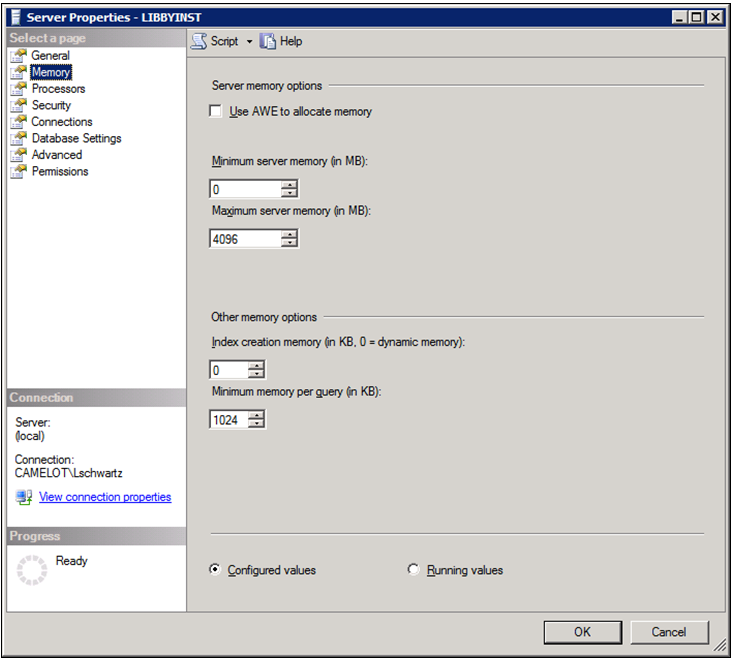
- On the left side of the window, select Memory. The memory settings are displayed.
- Under Maximum server memory (in MB), enter the value you want to use.
- Click OK. The setting is implemented, and the window closes.

If you prefer, you can also set the max server memory property by executing a query:
To set the max server memory by executing a query:
- On the SQL server, open the SQL Server Management Studio. (For example, in the Start menu, under All Programs, select Microsoft SQL Server 2008 R2 > SQL Server Management Studio.)
- On the left side of the window, right-click the SQL server and then select New Query. A blank text area opens on the right side of the window.
- Copy the following commands and paste them into the text area:
sp_configure 'show advanced options', 1;
GO
RECONFIGURE;
GO
sp_configure 'max server memory', 4096;
GO
RECONFIGURE;
GO
- The code sets the max server memory to 4GB (4096MB). If you want to set it to a different value, in the text area, change 4096 to the required value.
- Above the text area, select Execute. The commands are executed. When the process is completed successfully, Query executed successfully appears at the bottom of the window.


Recommended SQL Server Configuration
- On the SQL server, open the SQL Server Management Studio. (For example, in the Start menu, under All Programs, select Microsoft SQL Server 2008 R2 > SQL Server Management Studio.)
- On the left side of the window, right-click the SQL server and then select New Query. A blank text area opens on the right side of the window.
- Copy the following commands and paste them into the text area:
sp_configure 'show advanced options',1
reconfigure
exec sp_configure 'backup compression default',1
reconfigure
exec sp_configure 'cost threshold for parallelism',50
reconfigure
exec sp_configure 'remote admin connections',1
reconfigure