Contents
Basic Configuration
This page details the basic configuration steps required before your can use your Genesys Mobile Services installation. For a more general look at the configuration options available, refer to Configuration Options. Additional documentation is also available that describes considerations and configuration for:
- security and access control for your Genesys Mobile Services solution.
- load balancing suggestions for your Apache server.
Basic Configuration Overview
Genesys Mobile Services provides a set of APIs or services that require configuration before the product can be used. Depending on the volatility of their configuration, these services can either be configured in Configuration Server (when the volatility is high) or have their configuration embedded directly into a .WAR file.
This page is limited to managing configuration options using Configuration Server.
Working in Configuration Manager
Genesys Mobile Services is represented by an Application object in the Configuration Server database. This Application object is based on the "Genesys Generic Server" template and contains typical settings for a Genesys application including Server Info, Start Info, and Connections to other servers. It also includes Options that correspond to configuration details for sub-services of Genesys Mobile Services.
Configuration settings are grouped for different service types, and stored in Option sections described below:
- push Section—Notification service parameters. Not monitored at run-time, so the Genesys Mobile Server instance must be restarted for changes to take effect
- resource Section—Details about how resource groups are handled. Run-time configuration changes are supported, so changes take effect immediately.
- server Section—Cluster sub-service configuration details. Includes URL representation of this node of the cluster, consisting host, port and application name formatted in the following way: http://web_host:web_port/app_name. (Example: http://yourHostName:8080/gms). Run-time configuration changes are supported, but due to tight logical connection to the web-container configuration, a restart is needed in most cases.
- service.servicename Section—Additional configuration options for customized services.
Some services also rely on configuration details from a Transaction object in Configuration Manager that must be created and configured in your Genesys environment. Note: If setting up multiple Genesys Mobile Services nodes, the configuration options specified in the Application object must be the same for each instance. If you are familiar with working in a Genesys environment, this type of configuration should be second nature. If you require additional information about how to work with Configuration Manager to edit these configuration options, refer to the Help file included with that product.
Additional Considerations
Some parts of Genesys Mobile Services are configured outside of Genesys Configuration Server. One example is the cmd.properties file inside of the web application archive, which contains some global configuration objects such as connection parameters for accessing Configuration Server. Another would be load balancing, which relies on web server configuration.
Creating and Configuring a Resource List
Some services included with Genesys Mobile Services require a list of resources, such as a list of access numbers that can be managed. Such lists are held in a Transactions object, which is then referenced by Options set in the Genesys Mobile Services Application object. Steps required to create and populate this resource list are provided below.
Start of Procedure
- Start Configuration Manager.
- Under the tenant you are working with, open the Transactions folder.
- Right-click and select New > Transaction.
- On the General tab, configure the following fields:
- Name—This name must match the resources > resource_list_name option value from your Genesys Mobile Services Application object. The default value is GMS_Resources.
- Type—Select List from the drop down box.
- Alias—Enter an alias of your choice.
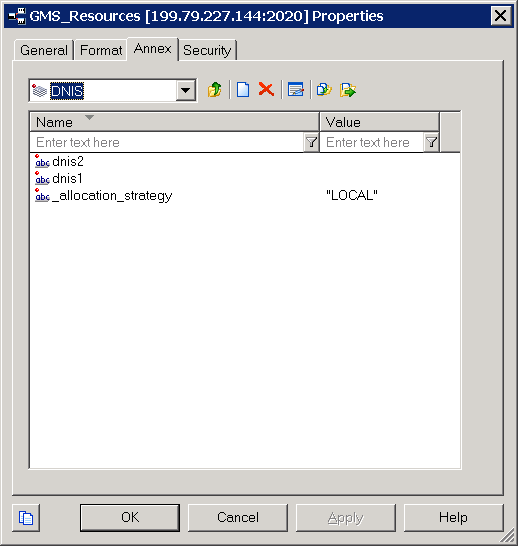
- On the Annex tab, create a new section. The section name used here must match the value of the resource_group option, located in the service.servicename section of your Genesys Mobile Services Application object.
- Add options to the newly created section to create your resource list.
- Add and set an allocation strategy option for this group.
End of Procedure
A sample resource list configuration is shown below.
Configuring Services for Genesys Mobile Services
To complete your deployment, the following services need to be configured in your Genesys Mobile Services Application object:
- Genesys Mobile Services-Based Services
- Orchestration Server-Based Services
- Native Push (Notification)
Genesys Mobile Services-Based Services
The following services need to be configured for this category:
- request-interaction
- match-interaction
- request-access
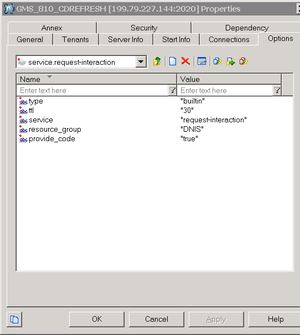
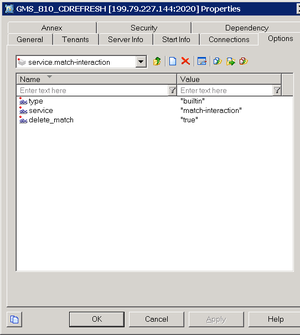
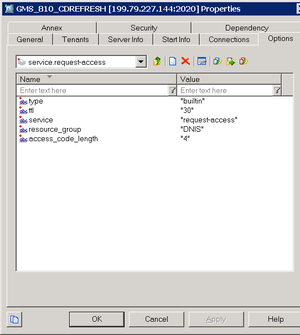
Required options are outlined below, with some sample values and screenshots provided to help you get started. For more information about configuring these services, see the Overview of Services Provided by Genesys Mobile Services.
request-interaction
| Option Name | Option Value |
|---|---|
| type | builtin |
| ttl | 30 |
| service | request-interaction |
| resource_group | (Use the section name created earlier under your GMS_Resources Transactions object.) |
| provide_code | true |
match-interaction
| Option Name | Option Value |
|---|---|
| type | builtin |
| service | match-interaction |
| delete_match | true |
request-access
| Option Name | Option Value |
|---|---|
| type | builtin |
| ttl | 30 |
| service | request-access |
| resource_group | (Use the section name created earlier under your GMS_Resources Transactions object.) |
| access_code_length | 4 |
Orchestration Server-Based Services
This page shows five sample services that can be configured:
- request-inbound-immediate
- request-inbound-delay
- request-inbound-poll
- request-outbound-immediate
- request-outbound-delay
These services are based off of sample SCXML applications that are distributed with Genesys Mobile Services. These sample files can be downloaded from the Sample Resources page. Applications should be customized to fit the business logic for applicable use cases, and then made available on an application server. The URL is then specified as the service parameter in the applicable Options section of your Genesys Mobile Services Application object.
Other services can be configured by creating similar sections with the service parameter using a different URL that points to the SCXML application hosted on the application server of your choice.
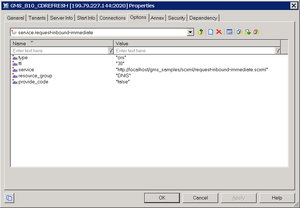
request-inbound-immediate
| Option Name | Option Value |
|---|---|
| type | ors |
| ttl | 30 |
| service | http://<your server>/gms_samples/request-inbound-immediate.scxml |
| resource_group | (Use the section name created earlier under your GMS_Resources Transactions object.) |
| provide_code | true |
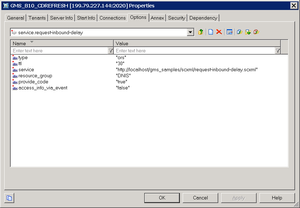
request-inbound-delay
| Option Name | Option Value |
|---|---|
| type | ors |
| ttl | 30 |
| service | http://<your server>/gms_samples/request-inbound-delay.scxml |
| resource_group | (Use the section name created earlier under your GMS_Resources Transactions object.) |
| provide_code | true |
request-inbound-poll
| Option Name | Option Value |
|---|---|
| type | ors |
| ttl | 30 |
| service | http://<your server>/gms_samples/scxml/request-inbound-poll.scxml |
| resource_group | (Use the section name created earlier under your GMS_Resources Transactions object.) |
| provide_code | true |
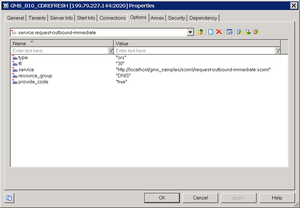
request-outbound-immediate
| Option Name | Option Value |
|---|---|
| type | ors |
| ttl | 30 |
| service | http://<your server>/gms_samples/scxml/request-outbound-immediate.scxml |
| resource_group | (Use the section name created earlier under your GMS_Resources Transactions object.) |
| provide_code | true |
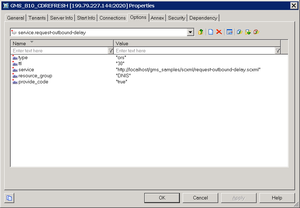
request-outbound-delay
| Option Name | Option Value |
|---|---|
| type | ors |
| ttl | 30 |
| service | http://<your server>/gms_samples/scxml/request-outbound-delay.scxml |
| resource_group | (Use the section name created earlier under your GMS_Resources Transactions object.) |
| provide_code | true |
Native push (notification service)
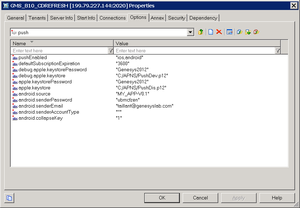
Some services, such as request-inbound-delay or request-outbound-delay, send native push messages to the mobile device. For this to work, both general and device-specific settings need to be configured correctly in the push section of your Genesys Mobile Services Application object.
Note that it is possible to configure this native push notification service for more than one type of device by using a comma-delimited string in the pushEnabled option. In this case, be sure to configure the mandatory options for all available device types.
Common Device Settings:
- pushEnabled – Device operating system.
- defaultSubscriptionExpiration -
Mandatory iOS Device Settings:
- debug.apple.keystore - Location of the debug keystore holding the certificates for push notification.
- debug.apple.keystorePassword - Password for the debug keystore.
- apple.keystore - Location of the production keystore holding the certificates for push notification.
- apple.keystorePassword - Password for the production keystore.
Note: The specified location of the Apple iOS push keystore is environment specific, and must be configured based on your environment for iOS push notification to work. Mandatory Android C2DM Device Settings:
- android.senderEmail - Name of a valid mail account. (Notifications are sent on behalf of this account.)
- android.senderPassword - Password of mail account specified in android.senderEmail.
- android.senderAccountType - Specified when initializing C2DM push service.
- android.source - Specified when sending push notifications.
- android.collapseKey - An arbitrary string used to collapse a group of like messages when the device is offline, so that only the last message gets sent to the client.
Mandatory Android GCM Device Settings:
- android.gcm.apiKey - A valid Google API key value (Notifications are sent on behalf of this API key, see http://developer.android.com/guide/google/gcm/gs.html).
- android.gcm.retryNumber- Number of retries in case of service unavailability errors.
For additional detail about these options and the allowed values, see the push Section documentation. For general information about the push notification service, refer to Push Notification Service.
Deploy DFM Files for Orchestration Server-based Services
Included with your installation are special configuration files for Orchestration Server called DFM. These files define Genesys Mobile Services-specific SCXML constructs that are required for the execution of SCXML applications used within Orchestration Server-based Services. For the Orchestration Server-based Services to function correctly, the following DFM files need to be configured in your Orchestration Server Application object:
- Storage
- Notification
- Genesys Mobile-Based Services
- Geo-coding (for location based services)
The latest DFM definition files are available to download from the Genesys Mobile Services Sample Resources page. Details about deploying these DFM in your environment are provided in Deploy DFM Files in Orchestration Server. After deploying these DFM, you can use either an actual device with the demo application or an HTTP client (such as RestClient) to send API requests to Orchestation Server-based services. Please refer to the Genesys Mobile Services API Reference for syntax of the requests.
Start of Procedure
- Download and extract the latest DFM sample files from the Genesys Mobile Services Sample Resources page.
- Start Configuration Manager.
- In Configuration Manager, select Environment > Applications.
- Locate and open the Application object for your Orchestation Server. (Note: This should be the same Application object you created a connection to when configuring your Genesys Mobile Services Application object.)
- Select the Options tab.
- Open the dfm section.
- Create and configure one option for each DFM, using the option value to specify the file path. Details are provided in the table below.
- Click OK to save your changes.
- Restart Orchestration Server.
- Restart Genesys Mobile Services.
End of Procedure
| Service | Option Name | Option Value |
|---|---|---|
| Storage | gsgStorage | file://<extraction path>\ors\drm\cfg_GSG_storage.txt |
| Notification | gsgNotification | file://<extraction path>\ors\drm\cfg_GSG_notification.txt |
| Genesys Mobile-Based Services | gsgBasedServices | file://<extraction path>\ors\drm\cfg_GSG_base_services.txt |
| Geo-coding | geocoding | file://<extraction path>\ors\drm\cfg_YahooPlaceFinder.txt |
Next Steps
With basic configuration complete, you are ready to consider more advanced configuration details.
- Understand and implement additional configuration steps to provide security and access control for your Genesys Mobile Services solution.
- Configure load balancing for your server.
- Review the sample applications included with this installation to help understand how you can leverage Genesys Mobile Services in your own development.
- Read the API Reference to get a better grasp on what type of services are available with Genesys Mobile Services.

