
Working with the Chat channel (v8)
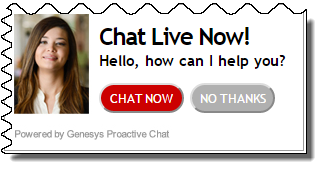
As part of the omnichannel customer experience, customers have the opportunity to chat with a live agent while browsing on your website. This proactive touchpoint with the customer enables him or her to reach out to you for assistance, if needed. The invitation that the customer sees might resemble the following pop-up window:
Chat channel overview

After you log into the adapter and navigate to the chat channel, you'll see the default view where you can accept or reject a chat.
Using the chat channel, you can:
When you log into the adapter and navigate to the chat channel, you'll see the default view where you can accept chat invitations. At first, your chat list will be empty. After you start accepting invitations, your chat list will include all active chats. To access the chat view for an interaction, select the arrow beside the chat list entry. This displays the chat view in which you can send and receive messages. This view has two main areas: chat transcript and chat details. To access other chat interaction son the list, select the Back button to return to the list and select another chat.

Chat details
The Chat details view shows you all the data the adapter has about the chat, and it provides fields that you can edit to add more information. After you view the details, you can click the Chat tab to return to your conversation or click Back to return to the main list of chats.
Case Information

The Case Information section shows you read-only information about the chat — the exact information that is displayed is determined by your administrator.
Here are a few examples of some information you might see in your details view:
- Origin
- Target
- Contact name
- Call type
- Account information
- Subject
Depending how your administrator configured your agent, you might be able to add, edit, or delete case information. For more information, see How do I edit case information?
Case information fields might contain a URL that you can click to access more information.
Notes

If configured by your administrator, you can add notes either during the chat or as part of your after-call work. To update, just enter your comments in the text field. Ensure that you don't click Mark Done first before you add a note. You can't make any further changes after you click Mark Done.
Disposition

If configured by your administrator, you can change the disposition for a call either during the chat or as part of your after-call work. You can use this field to record the business outcome of the chat. To update, just click the dropdown list and select a disposition. Ensure that you don't click Mark Done first before you select a disposition. You can't make any further changes after you click Mark Done.
Finishing a chat

When your chat is over, either because the other party left the chat or you clicked Leave Chat ![]() , you might need to update some information in the details area (such as Disposition or Notes).
, you might need to update some information in the details area (such as Disposition or Notes).
After finishing your after-chat work, you can click Mark Done, which completes the chat and sends you back to the main chat channel view. At this time, your status might automatically change to Ready, Not Ready, or another status, if configured by your administrator; otherwise, you have to change it yourself.
After you mark a chat as done, the chat list is displayed where you can choose another chat to work with.