Using the CMS to Work with Knowledge Bases
Overview
After logging in, you can use the Genesys Knowledge Center CMS to:
- Work with Knowledge Base (create, update, and delete knowledge bases)
- Work with Categories (assign categories to the documents in knowledge base)
- Work with Documents (create, update, and delete the contents of your knowledge bases by authoring questions and answers)
- Export Knowledge base to Knowledge Center Server
- Work with Customer Feedback
Logging Into the CMS
Prerequisites
- A user with Knowledge Server CMS privileges has been created in Config Server.
Start
- Enter your user name and password and press the Log In button.
End
Working with Knowledge Bases
Creating a New Knowledge Base
Prerequisites
- Knowledge.CMS.Administrator privileges have been assigned to the user.
Start
- Click the + sign on the main page.
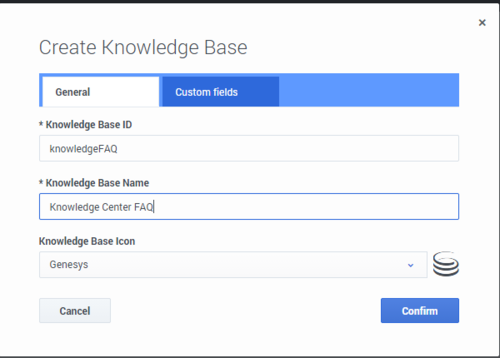
The Create Knowledge Base window appears.
On the General tab:
- Enter the unique knowledge base ID (the ID should consist only of numbers, Latin letters and underscores, with a maximum length of 50 characters).
- Enter knowledge base name (maximum length of 50 characters).
- If you want to, you can also change the default icon assigned to the knowledge base.
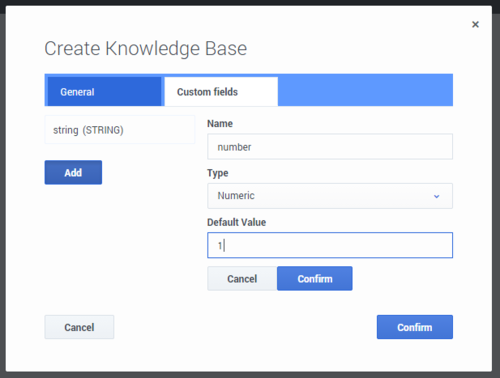
- To add custom fields, navigate to the Custom Fields tab and perform the following actions for each custom field:
- Press the Add button.
- Enter the unique name of the field (the name should consist only of numbers, Latin letters and underscores, with a maximum length of 50 characters).
- Choose the field type.
- Enter a default value, if you would like the field to have one.
- Press the Confirm button.
- Click Confirm to create the new knowledge base.
End
Deleting a Knowledge Base
Prerequisites
- The knowledge base has been defined in the CMS.
- Knowledge.CMS.Administrator privileges have been assigned to the user.
Start
- Move your mouse over the appropriate knowledge base icon on the main page.
- Click Delete and confirm the action in the dialog box.
End
Editing a Knowledge Base Definition
Prerequisites
- The knowledge base has been defined in the CMS.
- Knowledge.CMS.Administrator privileges have been assigned to the user.
Start
- Move your mouse over the appropriate knowledge base icon on the main page.
- Click Edit.
- The Edit Knowledge Base window appears.
- Press Confirm to save your changes.
End
Importing Initial Documents
Prerequisites
- The knowledge base has been defined in the CMS.
- Knowledge.CMS.Document.Author or Knowledge.CMS.Category.Author privileges have been assigned to the user.
Start
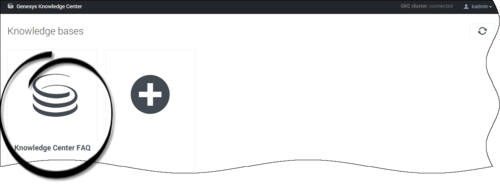
- Move your mouse over the appropriate knowledge base icon on the main page.
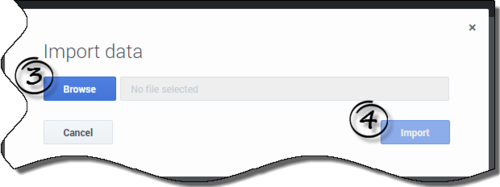
- Click Import data.
- Browse to the appropriate XML file.
- Click Import; your data be will imported into the CMS.
End
Working with Categories
Creating a New Category
Prerequisites
- The knowledge base has been defined in the CMS.
- Knowledge.CMS.Category.Author privileges have been assigned to the user.
- No category has been selected.
Start
- Move your mouse over the appropriate knowledge base icon on the main page.
- Click Categories.
- Press the Create button.
- The Create Category window appears.
- Enter your category name.
- Save your changes or cancel them, using the appropriate buttons.
End
Viewing or Modifying a Category
Prerequisites
- The knowledge base has been defined in the CMS.
- The category has already been created.
- Knowledge.CMS.Category.Author privileges have been assigned to the user.
Start
- Move your mouse over the appropriate knowledge base icon on the main page.
- Click Categories.
- Choose your category from the list and click the Edit button or double-click on the appropriate row.
- The Edit Category window appears.
- View or browse through the category changes history (using the drop-down with versions) or make changes in the category name.
- Save your changes or cancel them, using the appropriate buttons.
- Every time you make a change, a new version of the category will be created and the new version of the formerly approved category will be given a state of not approved.
End
Deleting Categories
Prerequisites
- The knowledge base has been defined in the CMS.
- The category has already been created.
- Knowledge.CMS.Category.Author privileges have been assigned to the user.
- A connection to Genesys Knowledge Center is available.
Start
- Move your mouse over the appropriate knowledge base icon on the main page.
- Click Categories.
- Select one or more categories from the list.
- Press the Delete button.
- Confirm your action in the pop-up.
End
Approving Categories
Prerequisites
- The knowledge base has been defined in the CMS.
- The categories have already been created.
- Knowledge.CMS.Approver privileges have been assigned to the user.
Start
- Move your mouse over the appropriate knowledge base icon on the main page.
- Click Categories.
- Choose one or more categories from the list.
- Click the Approve button.
- Confirm your action in the pop-up.
End
Working with Documents
Creating a Document
Prerequisites
- The knowledge base has been defined in the CMS.
- The appropriate categories have been created.
- Knowledge.CMS.Document.Author privileges have been assigned to the user.
Important
The maximum size of attachments is 20MB.Start
- Move your mouse over the appropriate knowledge base icon on the main page.
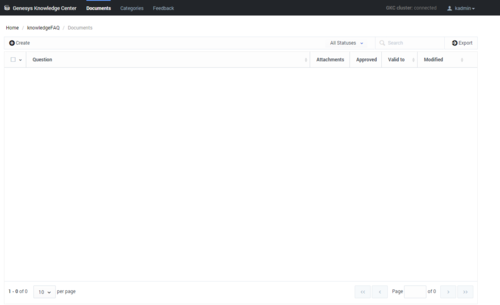
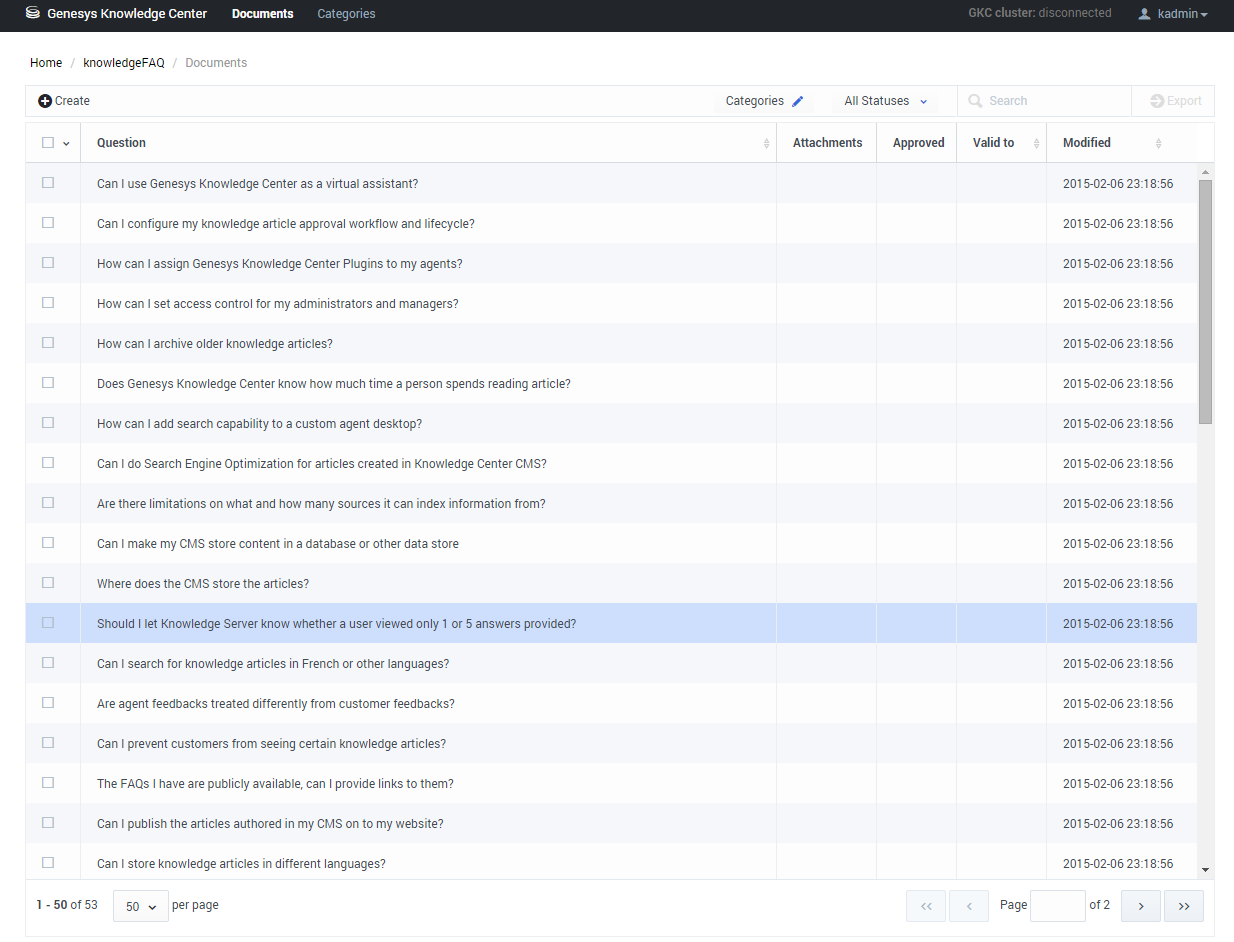
- Click Documents; a list of documents appears.
- Click the Create button; the Create Document window appears.
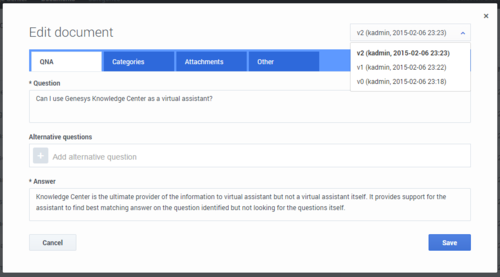
- Fill in the QNA tab by adding Question and Answer (required) and alternative wordings of the question (by pressing the + sign in the Alternative questions field).
- Fill in the Categories tab by selecting the appropriate categories from the list on the left and moving them to the right.
- Fill in the desired Custom fields values.
- Add Attachments by pressing the Add button and then the Upload button. To remove attachments, press the Remove button.
- Fill in the Other tab, as needed.
- Save your changes or cancel them, using the appropriate buttons.
Important
Maximum file size: 20 MB.End
Viewing or Modifying a Document
Prerequisites
- The knowledge base has been defined in the CMS.
- The appropriate categories have been created.
- The Document has already been created.
- Knowledge.CMS.Document.Author privileges have been assigned to the user.
Start
- Move your mouse over the appropriate knowledge base icon on the main page.
- Click Documents; a list of documents appears.
- Choose a Document from the list and click Edit, or double-click the appropriate row.
- View or browse through the category changes history (using the drop-down with versions), or make changes in the editor.
- Save your changes or cancel them, using the appropriate buttons.
- Every time you make a change, a new version of the document will be created and the new version of the formerly approved document will be given a state of not approved.
End
Deleting a Document
Prerequisites
- The knowledge base has been defined in the CMS.
- The Document has already been created.
- A connection to Genesys Knowledge Center is available.
- Knowledge.CMS.Document.Author privileges have been assigned to the user.
Important
You cannot delete a document from the knowledge base on the CMS if Genesys Knowledge Center Server does not contain a knowledge base with the same name.Start
- Move your mouse over the appropriate knowledge base icon on the main page.
- Click Documents.
- Select one or more Documents from the list.
- Click the Delete button.
- Confirm your action in the pop-up.
End
Approving Documents
Prerequisites
- The knowledge base has been defined in the CMS.
- The Document has already been created.
- Knowledge.CMS.Approver privileges have been assigned to the user.
Start
- Move your mouse over the appropriate knowledge base icon on the main page.
- Click Documents.
- Select one or more Documents from the list.
- Click the Approve button.
- Confirm your action in the pop-up.
End
Exporting Knowledge base to Knowledge Center Server
Important
Only approved documents and categories will be exported to the Knowledge Center Server.Prerequisites
- The knowledge base has been defined in the CMS.
- The categories have already been created and approved.
- Your Documents have been created and approved.
- A connection to Genesys Knowledge Center is available.
- Knowledge.CMS.Approver privileges have been assigned to the user.
Start
- Move your mouse over the appropriate knowledge base icon on the main page.
- Click Documents.
- Click the Export button; the Export documents window appears.
- Choose the desired export mode in the pop-up and click Export; all approved documents from the CMS will be exported into Genesys Knowledge Center Server.
End
Working with Customer Feedback
Processing a "No answer" Item
Prerequisites
- The knowledge base has been defined in the CMS.
- A connection to Genesys Knowledge Center is available.
- Knowledge.CMS.Document.Author privileges have been assigned to the user.
Start
- Move your mouse over the appropriate knowledge base icon on the main page.
- Click Feedback.
- Choose the No answer tab.
- Choose one or more items from the list.
- Process each item:
- Search for similar existing questions using the Search button.
- Click the Create document button and create a new document based on the No answer item.
- Delete unnecessary items using the Delete button.
End
Processing Positive Votes
Prerequisites
- The knowledge base has been defined in the CMS.
- A connection to Genesys Knowledge Center is available.
- Knowledge.CMS.Document.Author privileges have been assigned to the user.
Start
- Move your mouse over the appropriate knowledge base icon on the main page.
- Click Feedback.
- Choose the Positive votes tab.
- Choose one or more items from the list.
- Process each item:
- Add a search query as an alternative question for the upvoted document using the Add as alternative button.
- Delete appropriate items using the Delete button.
End
Processing Negative Votes
Prerequisites
- The knowledge base has been defined in the CMS.
- A connection to Genesys Knowledge Center is available.
- Knowledge.CMS.Document.Author privileges have been assigned to the user.
Start
- Move your mouse over the appropriate knowledge base icon on the main page.
- Click Feedback.
- Choose the Negative votes tab.
- Choose one or more items from the list.
- Process each item:
- Review or edit downvoted documents using the Edit document button.
- Create new documents using the Create document button.
- Delete appropriate items using the Delete button.
End
This page was last edited on July 21, 2015, at 10:48.
Comments or questions about this documentation? Contact us for support!


