Create the HTML Version
To create the HTML version of your Standard Response, use the HTML tab of the New/Edit Standard Response window.
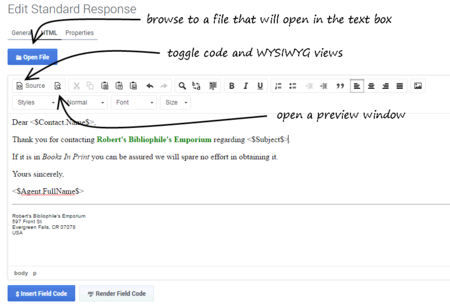
Most of the buttons provide commonly-used editing functionality, including the option to insert a link to an image. If you aren't sure what a button does, hover over it to open a tooltip.
The figure below explains buttons with more specialized functionality.
Add Text Content
You can
- Type or paste in any text as plain text.
- Paste formatted content from Microsoft Word.
- Type or paste HTML code into the code view.
- Import an existing HTML file by clicking Open File.
Important
- Links to resources that are used in the content, such as image files, must use absolute URLs; embedded graphics or relative links are not supported. Also, these resources must be available on the web through an HTTP server at the time that the standard response containing this HTML is sent to the customer.
- Make sure that the content of the HTML version, including field codes, matches the plain text version that you created on the main configuration page tab. This is important because e-mail clients may display multipart e-mails in varying ways. For example, if Microsoft Outlook has AutoPreview turned on, the preview may show the plain text version whereas the full display shows the HTML version. For this reason you should be careful that the plain text and HTML versions have identical content.
Warning
Apostrophes and other special characters in HTML standard responses might be corrupted in non-UTF-8 encodings. This is a known problem:
http://www.i18nqa.com/debug/bug-iso8859-1-vs-windows-1252.html.
As a workaround, when there is mixed encoding, convert the whole HTML file to a single encoding, or manually edit the standard response in eServices Manager to replace any question marks (?) with the intended special character.Add an Image
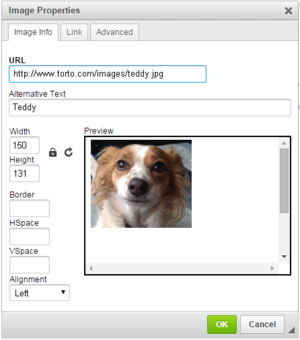
To add an image, click the ![]() button, then configure the dialog box that opens:
button, then configure the dialog box that opens:
Next Steps
This page was last edited on October 12, 2018, at 22:43.
Comments or questions about this documentation? Contact us for support!


