Contents
Recording Lifecycle Scheduler
The Recording Lifecycle Scheduler enables you to create rules and tasks for easier management of your voice and screen recordings.
Using the Recording Lifecycle Scheduler
- Using Genesys Administrator Extension, navigate to Administration > Recording Lifecycle Scheduler. The Recording Lifecycle Scheduler Nodes screen appears.
This screen lists the Interaction Recording Web Services node paths (or Web Services node paths if you're using version 8.5.210.02 or earlier), and the rules associated with each.ImportantWhen configuring the Recording Lifecycle Scheduler for a specific tenant, you must log into GAX using a user account belonging to the tenant. - Select the GWS Node Path to view the details of the rules applied to the node.

Creating a Rule
- From the Recording Lifecycle Scheduler Rules window, click
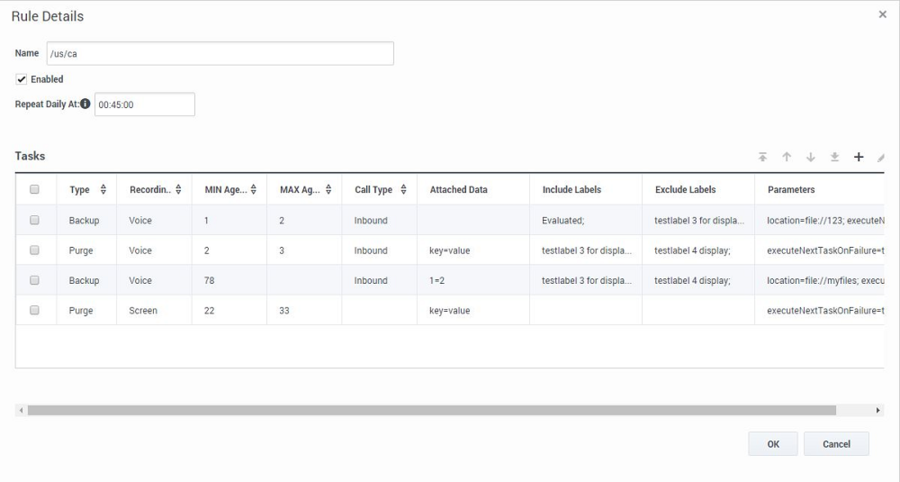
 to open the Rule Details dialog:

- Enter Name.
- Select Enabled.
- Select the time, in UTC, to run the rule.
- To add a new task to the rule, click
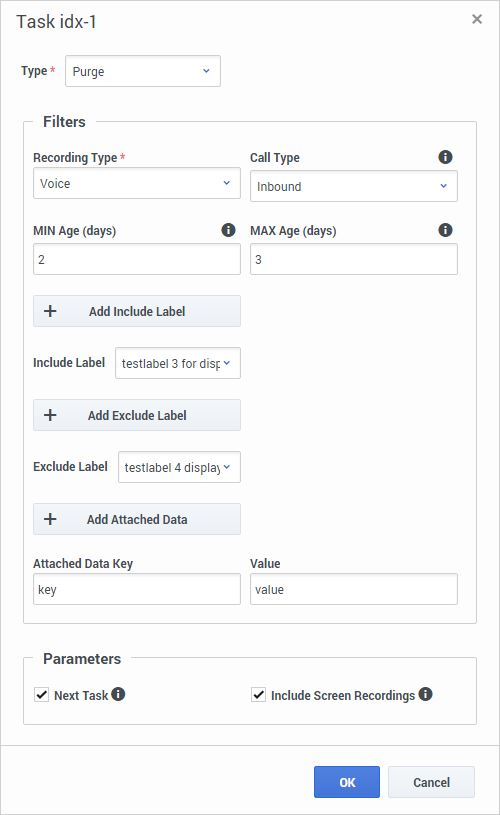
 . The New dialog appears:

- Select the Recording Type.
- If you choose Voice for the Recording Type, select the Call Type.
- Select the labels from the Include Label or Exclude Label list. When an include label is added, the task will run against only the recordings that contain the label. When an exclude label is added, the task will exclude all the recordings that contain the specified label. Click Add Include Label or Add Exclude Label to add an include or exclude label field.
Note: Applicable only when Recording Type is Voice. - Fill in the Filters including the attached data if required (select
 for each key/value pair required).
 - Fill in the Parameters. For more information about Filters and Parameters, see Recording Lifecycle Scheduler Parameters.
- Click OK.
Important
Only HTML supported characters are allowed in the fields, Attached Data Key and Value.Important
Recordings that are protected from deletion (using the Non-Deletion API or SpeechMiner) will not be deleted by Media Lifecycle Management purge tasks.What Else Can You Do With Tasks?
- To move the order of the task in the Rules Details window, select one of the directional arrows.
- To delete the task, click
 .
. - To edit the task, click
 .
.
This page was last edited on April 1, 2024, at 12:48.
Comments or questions about this documentation? Contact us for support!

