Contents
Chat Support
| Introduced in release: 8.1.100.14 |
| Internal poke introduced in release: 8.1.100.28 |
| chat_endpoint option introduced in release: 8.1.100.28 |
This page details the specific configuration steps required to use the Chat API included with Genesys Mobile Services. For a more details about this API, refer to Genesys Mobile Services Chat API.
Configuration Overview
Prerequisite: Before beginning the steps described here, you should have completed the basic configuration process. To use the Chat API with your Genesys Mobile Services deployment, you must specify configuration details in the Application objects for the following objects:
- Genesys Mobile Services
- Web API Server
- Chat Server
Note: For Genesys Mobile Services configuration, it is assumed that you already have Web API Server and Chat Server installed and configured. Refer to documentation for those products if you require additional details. The following sections provide details about configuration changes required to use chat with your Genesys Mobile Services deployment. Procedures and illustrations on this page use Genesys Administrator, although the configuration can also take place using Configuration Manager.
Genesys Mobile Services Configuration
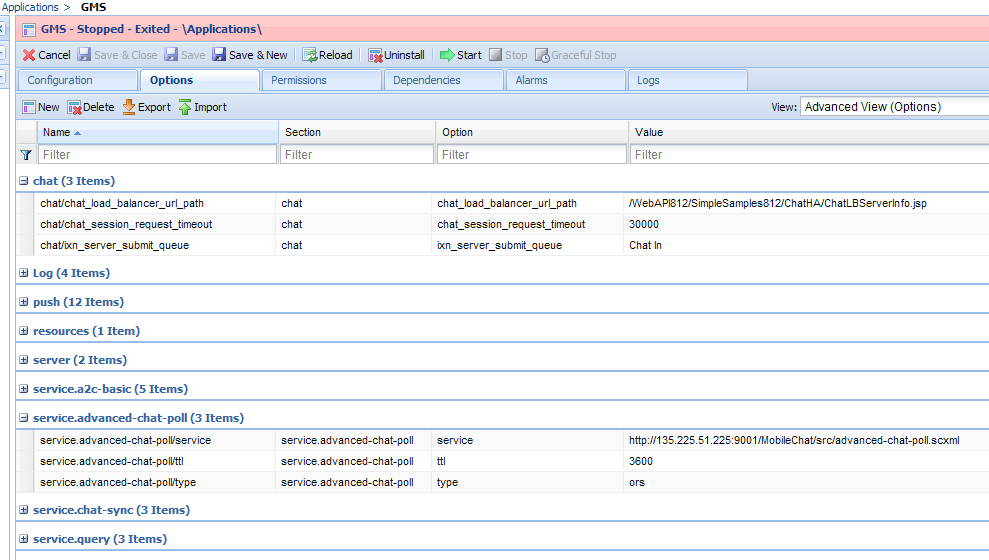
The following configuration options must be specified in your Genesys Mobile Services Application object:
- Open Genesys Administrator in a web browser.
- Locate and view the Genesys Mobile Services Application object you previously created and configured.
- Under the General section of the Configuration tab, add a connection to the Web Server API Application object that will be used with your Genesys Mobile Services deployment.
- Under the Options tab, include the mandatory configuration options described in the table below.
| Section: chat | |||
|---|---|---|---|
| Option Name | Required | Option Value | Description |
| chat_load_balancer_url_path | true | WebAPI812/SimpleSamples812/ChatHA/ChatLBServerInfo.jsp | Url to the load balancer (WebAPI) for Chat servers |
| chat_session_request_timeout | true | 30000 | Duration after which the chat interaction gets deleted |
| ixn_server_submit_queue | true | default | Queue to which the chat interaction placed. "default" implies, use the default queue specified in the Chat server options->endpoint:1. Any value specified here should be defined in the Chat server options->endpoints:1. |
| Section: service.request-chat-poll | |||
| Option Name | Required | Option Value | Description |
| service | true | <url to SCXML application request-chat-poll.scxml> | URL to the scxml application to be fetched by ORS |
| ttl | true | 3600 | Duration after which service will time out and exit |
| type | true | ors | Should always be ors since this is an advanced service |
| chat_endpoint | false | <endpoint defined in chat server> | The endpoint configured on the Chat server on which the new chat interactions from GMS will arrive. Any value specified here should also be defined in the Chat server options > endpoints:1. When this value is not specified, GMS will use the value of "ixn_server_submit_queue" configured in options > chat. The endpoint should be associated with a queue configured to execute an ORS workflow (inbound_chat.scxml). This workflow is responsible to forward the chat interaction to the GMS service for advanced routing. |
| internal_api_url_base | false | http://<gmshost>:<gmsport> | Base url used to generate and attach the poke url to be used by agent desktop. Required if poke feature is required. |
| default_poke_message | false | <your poke message> | Default poke message to be sent on an internal-poke request without the poke_message parameter. Required if poke feature is used. |
The following configuration options can be used to test the poke capability using the Interaction Workspace test plugin, which is available as a download: ![]() Genesys Mobile Services Interaction Workspace Test Plugin
Genesys Mobile Services Interaction Workspace Test Plugin
| Section: service.request-chat-poll | |||
|---|---|---|---|
| Option Name | Required | Option Value | Description |
| iws_plugin_url | false | <url to the plugin.jsp> | URL to the JSP page to be fetched by Interaction Workspace. Plugin.jsp is provided in the samples for test purposes. |
| iws_plugin_view_name | false | <name of the view in Interaction Workspace> | Name of the view (tab) that displays the plugin page. |
Web API Server Configuration
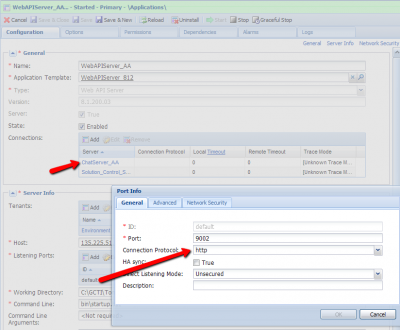
To configure the Web API Server, at least one Chat Server must be added and configured as an active connection. There can be multiple "primary" chat servers added as connections, in which case the Web API Server will balance between them. However, each chat server should have a warm standby backup server configured for reliability. The Web API Server Application object being used by your Genesys Mobile Services deployment can be updated using the following procedure:
Start of Procedure
- Open Genesys Administrator in a web browser.
- Locate and view the Web Server API Application object associated with your Genesys Mobile Services deployment.
- View the Configuration tab.
- In the General section, find the Connections table and click Add.
- Locate and select the Chat Server Application object that you want to use.
- Click on the Chat Server connection you plan to use to edit Port Info.
- Ensure the Connection Protocol associated with the Chat Server is http.
- Repeat this procedure to add additional Chat Sever instances, as necessary.
End of Procedure
Note:
Chat Server Configuration
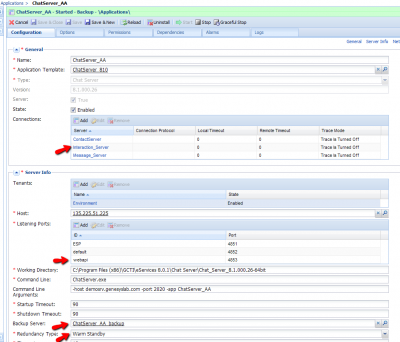
The Chat Server Application object being used by your Genesys Mobile Services deployment should have the following configuration updates:
- Add a connection to Interaction Server.
- Listen for Web API Server traffic on the appropriate port.
- Set a backup server and specify the redundancy type.
Detailed steps are provided below:
Start of Procedure
- Open Genesys Administrator in a web browser.
- Locate and view the Chat Server Application object associated with your Genesys Mobile Services deployment.
- View the Configuration tab.
- In the General section, find the Connections table and click Add.
- Locate and select the Interaction Server Application object that you want to use.
- In the Server Info section, find the Listening Ports table and click Add.
- Add the port being used by the Web API Server that you configured previously to work with this Chat Server Application object.
- Repeat this procedure for each Chat Server associated with your Genesys Mobile Services deployment.
End of Procedure
Setting Chat Server HA-Specific Options
The following procedure should be followed to enable high availability (Requires Chat Server 8.1.000.20 or higher):
Start of Procedure
- Open Genesys Administrator in a web browser.
- Locate and view the Chat Server Application object associated with your Genesys Mobile Services deployment.
- View the Server Info section on the Configuration tab.
- Specify a Backup Server value.
- Set the Redundancy Type to Warm Standby.
- Under the Options tab, include the mandatory configuration options described in the table below.
- Repeat this procedure for each (primary) Chat Server associated with your Genesys Mobile Services deployment.
End of Procedure
| Section: endpoints:1 | |
|---|---|
| Option Name | Option Value |
| default | Chat In |
| Section: settings | |
| Option Name | Option Value |
| session-restoration-mode | simple |
| transcript-auto-save | 2 |


