Prerequisites
Contents
The following prerequisites must be met before you can install and configure Workspace Web Edition & Web Services:
- The Genesys Platform has been installed, configured, and tested.
- Review the Deployment Scenarios.
- Jetty has been installed and configured.
- Cassandra has been installed and configured.
Genesys Platform Support
Required Components
- Management Framework 8.1
Optional Components
The following Genesys components are required to support the specified features:
| Feature | Component |
|---|---|
| Voice API |
|
| Multimedia API |
|
| Reporting |
|
Deployment Scenarios
There are generally three common Cassandra topologies used for Workspace Web Edition & Web Services:
- Development — 1 Cassandra node (appropriate for a development or lab environment)
- Single Datacenter — 1 datacenter with a minimum of three Cassandra nodes
- Two Datacenters — 2 datacenters with a minimum of three Cassandra nodes in each datacenter
The number of Workspace Web Edition & Web Services nodes in your deployment scenario depends on a variety of factors. Please consult with Genesys for help to determine the correct number of nodes for your solution.
For Development scenarios, you can install Cassandra and Workspace Web Edition & Web Services on the same host. For Single Datacenter and Two Datacenter scenarios, you must install Cassandra and Workspace Web Edition & Web Services on separate hosts.
Installing and Configuring Jetty
Jetty version 8 is a mandatory component that must be installed and configured on each Workspace Web Edition & Web Services node prior to starting the installation and configuration of Workspace Web Edition & Web Services.
Prerequisites
- You have installed the latest Java 1.7 JDK 64bit for Linux. For more information, refer to the Java documentation.
Start of Procedure
- Download Jetty version 8 from Eclipse.
- Copy the Jetty archive to the installation directory. For example, /opt/jetty
- Use a tar utility to extract the files. For example, tar -zxvf jetty-distribution-8.1.14.v20131031.tar.gz
- Start Jetty to confirm it has been installed correctly:
[java_path]/java -jar [jetty_path]/start.jar
- [java_path] — The path to your Java installation. For example, /user/bin.
- [jetty_path] — The path to your Jetty installation. For example, /opt/jetty.
- [host] — The host name (fully qualified domain name) or IP address where you installed Jetty.
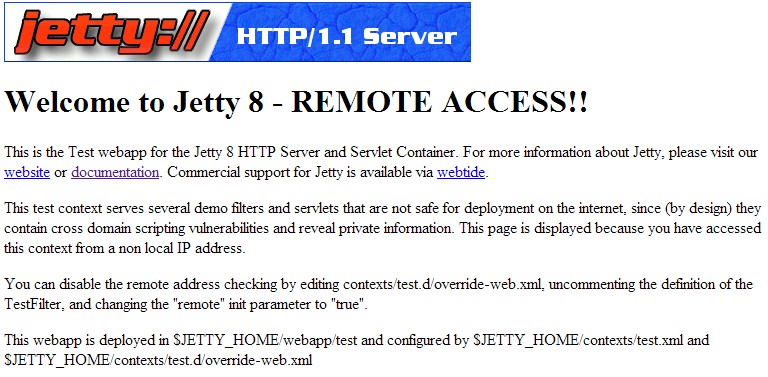
You should see a Jetty Test application page similar to the following:
End of Procedure
Installing and Configuring Cassandra
Cassandra 1.1 is mandatory for Workspace Web Edition & Web Services and must be installed and configured prior to starting the installation and configuration of Workspace Web Edition & Web Services.
The following steps are intended to serve as a quick guide to installing and configuring Cassandra.
Installing Cassandra
Complete this procedure for each Cassandra node.
Prerequisites
- You have installed the latest Java 1.7 JDK 64bit for Linux. For more information, refer to the Java documentation.
Start of Procedure
- Download the latest 1.1.x version of Cassandra.
- Copy the Cassandra archive to the installation directory. For example, /usr/local
- Use a tar utility to extract the files. For example, tar -zxvf apache-cassandra-1.1.11-bin.tar.gz
- Add directories for data, commitlog, and saved_caches. You can create these directories anywhere or in the default locations configured in the cassandra.yaml. For example:
- /var/lib/cassandra/data
- /var/lib/cassandra/commitlog
- /var/lib/cassandra/saved_caches
- Add a directory for logging. You can create this directory anywhere, such as /var/log/cassandra/.
End of Procedure
Next Steps
Configuring Cassandra
This procedure shows you how to configure a three-node Cassandra cluster in a single datacenter.
Start of Procedure
Complete the following steps for each Cassandra node:
- Modify the cassandra.yaml file:
- Set the cluster_name. It must be the same name on all nodes.
- Set the initial_token according to the node's place in ring. It must be one of the following:
- Set seeds to the list of host names of all nodes. For example: -seeds: “node1, node2, node3”
- Set listen_address and rpc_address to the host name.
- Set data_file_directories, commitlog_directory, and saved_caches_directory to the directories you created in Step 4 of the Installing Cassandra procedure.
- Change endpoint_snitch to PropertyFileSnitch.
- Save your changes and close the file.
- Open the log4j-server.properties file and set the log4j.appender.R.File property to the directory you created in Step 5 of the Installing Cassandra procedure.
- Save your changes and close the file.
- Open the cassandra-topology.properties file and update for you cluster topology. For each node in your cluster, add the following line:
Node #1:                                        0
Node #2:   56713727820156410577229101238628035242
Node #3:  113427455640312821154458202477256070484
[node]=[datacenter]:[rack]
- [node] — The IP address of the node
- [datacenter] — The name of the datacenter for this node.
- [rack] — The name of the rack for this node.
The following is a sample cassandra-topology.properties file for a Single Datacenter scenario:
192.0.2.10=datacenter1:rack1
192.0.2.11=datacenter1:rack1
192.0.2.12=datacenter1:rack1
End of Procedure
Next Steps
Verifying the Cassandra Installation
Start of Procedure
- Start all Cassandra nodes using the following command:
- Use the nodetool utility to verify that all nodes have connected by entering the following command:
[cassandra install dir]/bin/cassandra
[cassandra install dir]/bin/nodetool -h [cassandra host] ring
The following is sample output for a Single Datacenter scenario:
/genesys/apache-cassandra-1.1.6/bin$ ./nodetool ring
Address     DC           Rack   Status  State   Load      Owns     Token
192.0.2.10  datacenter1  rack1  Up      Normal  14.97 MB  100.00%  0
192.0.2.11  datacenter1  rack1  Up      Normal  14.97 MB  100.00%  56713727820156410577229101238628035242
192.0.2.12  datacenter1  rack1  Up      Normal  14.97 MB  100.00%  113427455640312821154458202477256070484
End of Procedure
Next Steps

