
Customization Examples
- Modifying the Styling of the Chat Messages
- Substituting the Genesys Logo with a Custom Image
- Setting the Ground to Create Your Own Chat Widget (popup mode)
- Adding Extra Content to the Chat Widget
- Using the ui.onBeforeMessage Hook to Add Desktop Notifications
- Displaying a confirmation alert when users close the chat widget
- Implementing a client-side chat session timer
- Inserting a new line with Shift+Enter
- Automatically opening a URL pushed by the agent
- Showing the number of unread messages in a minimized chat widget
- Showing an agent typing notification in the minimized chat widget
- Displaying a character counter in the message area
- Replace Skip Registration button with Exit button
- Automatically expand text area based on user input
In the examples below we use Google Chrome as the web browser, but you can find similar developer features in any other modern browser.
Procedure: Modifying the Styling of the Chat Messages
Purpose: Customization Type: CSS-based
In this example we play with the styling of the messages that appear in the chat widget. This should give you a taste of what a CSS-based customization might look like.Prerequisites
- You must have basic knowledge of CSS and HTML.
Steps
- Launch a web page that is instrumented with the chat widget.
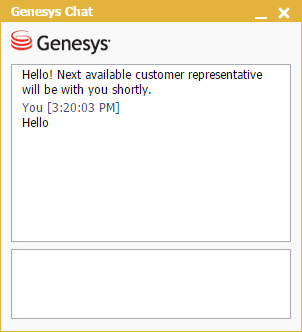
- Start a chat session and send a chat message. You will see something like this:
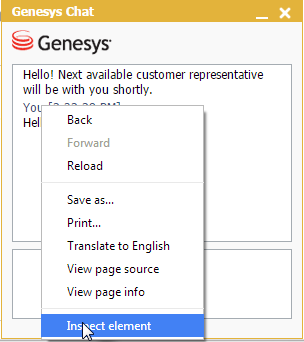
- Right-click the message and choose "Inspect Element" to start the Chrome developer tools.
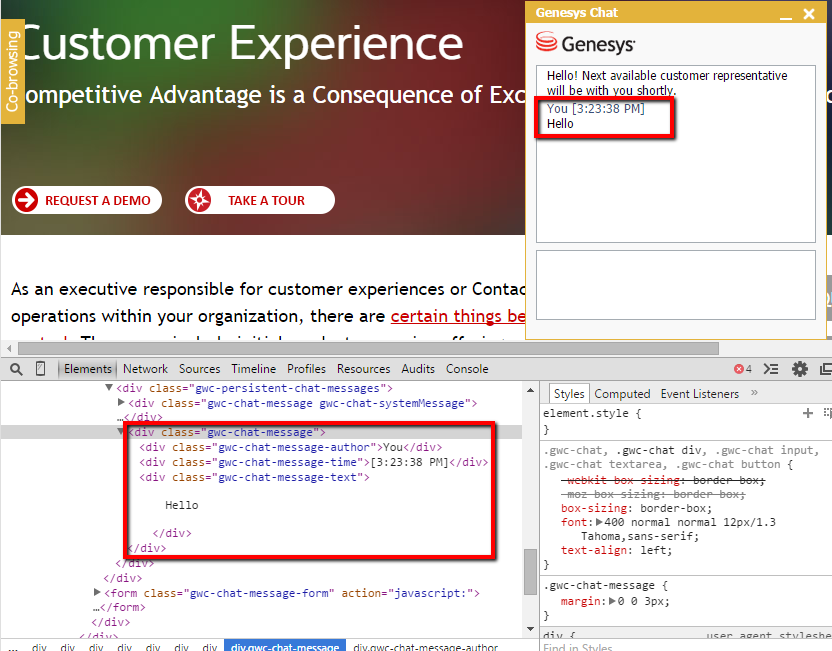
We can see that the chat message consists of three elements, each with its own dedicated CSS class. We will use this information to create new styling for these elements.
- Next, we create our custom CSS to modify the colors of some of the text and the font used for the author name.
/* 1. Make the name stand out */ div.gwc-chat-message-author { font-family: Georgia; font-style: italic; font-weight: bold; } /* 2. Make the date more subtle */ div.gwc-chat-message-time { font-family: Georgia; color: #bdc3c7; } /* Make the body of a message a bit less contrast */ div.gwc-chat-message-text { color: #7f8c8d; } - Add this CSS to your web page.
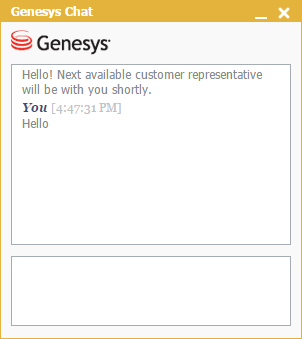
- Reload the page. The chat message has the new look and feel we defined in the CSS.


.gwc-chat-message-container {
    background: #000;
    border-color: #0f0;
}
.gwc-chat-message > div {
    font-family: monospace;
    color: #0f0;
}
And the result:

Procedure: Substituting the Genesys Logo with a Custom Image
Purpose: Customization Type: Template-based
In this example we customize the Genesys logo that appears in the chat widget.Prerequisites
- You must have basic knowledge of CSS and HTML.
Steps
- Get the default chat templates HTML (see templates) and save it in a place where it is convenient for you to edit.
- Start a chat. You will see something like this:
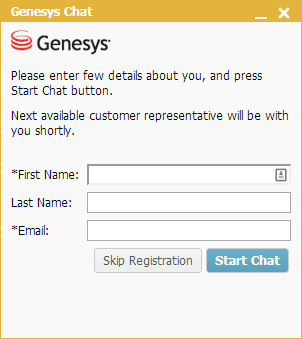
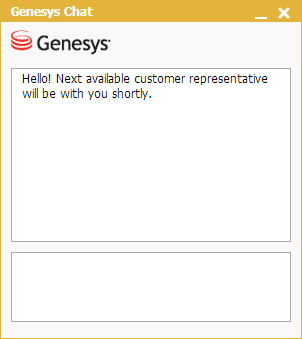
Or this, if registration is disabled:
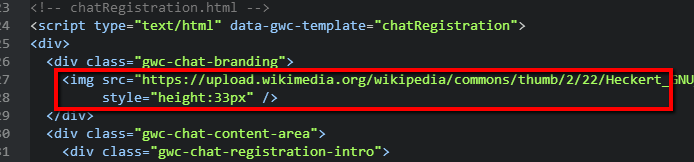
- Right-click the Genesys logo and choose "Inspect Element". The Chrome developer tools open and highlight the corresponding DOM element.
Now that we know the CSS class of the element, we can look for it in the templates.

- Open the templates HTML file in your favorite text editor and replace the <div> that has the gwc-chat-logo class with an image element. In this example, we use the publicly available logo of the
GNU project:
 ImportantThere are two logo elements in the templates: one in the chatRegistration template and another in the chatView template.
 - Save the modified templates file and "host" it somewhere that is accessible via HTTP.
- Configure the chat to use the modified template file by providing the URL of the file to the templates option:
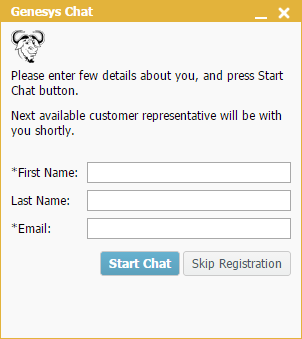
<script> var _genesys = { chat: { templates: 'http(s)://example.com/chatTemplates.html' } }; </script> <INSTRUMENTATION_SNIPPET>ImportantThis example uses the Integrated JavaScript Application to add chat to the page. See Configuring Chat for instructions on configuring the chat widget using the Integrated Application. - Start a new chat. You will see something like this:


Procedure: Setting the Ground to Create Your Own Chat Widget (popup mode)
Purpose: To customize the chat UI in popup mode, you can create an HTML page for the chat widget and then use the Chat Widget JS API to add functionality.Prerequisites
- You must have basic knowledge of CSS and HTML.
Steps
- Make the chat open the window using this calling code on your web page:
chat.startChat({ widgetUrl: <URL_OF_YOUR_HTML_PAGE_HERE>, ui: false }); - Inside the widget HTML, start the chat and hook your UI to the API:
<!DOCTYPE html>
<html>
<head>
  <title>My Custom Chat Widget</title>
</head>
<body>
<script src="<PATH_TO_chatWidget.js>"></script>
<script>
  chat.startChatInThisWindow().done(function(session) {
    // Implement your own UI using session API
  });
</script>
</body>
</html>
Procedure: Adding Extra Content to the Chat Widget
Purpose: Customization Type: Template-based and CSS-based
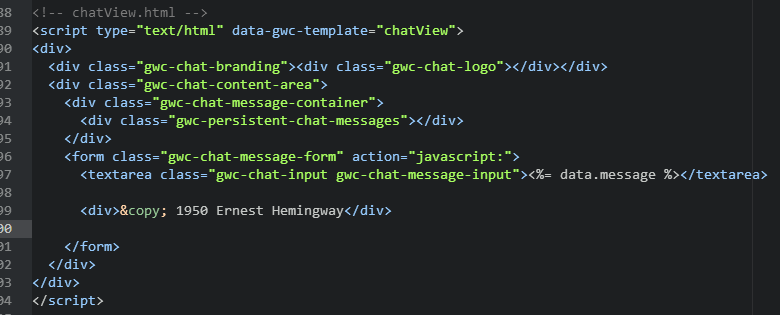
In this example we add extra content to the chat widget: a "Copyright" notice at the bottom of the widget. We use the templates for this because they are a great fit for adding anything extra to the widget. We will also need to to adjust the CSS to make our changes look good.
Here is a look at the end result we are trying to achieve:

Prerequisites
- You must have basic knowledge of CSS and HTML.
- Some experience with web browser developer tools would be helpful.
- You have read the templates section.
Steps
- Get the default chat templates HTML (see templates) and save it in a place where it is convenient for you to edit.
- Open the file in your favorite text editor and find the chatView template. This template is responsible for the general structure of the widget (the area that displays the messages and the input area) and this is where we will add our new content.
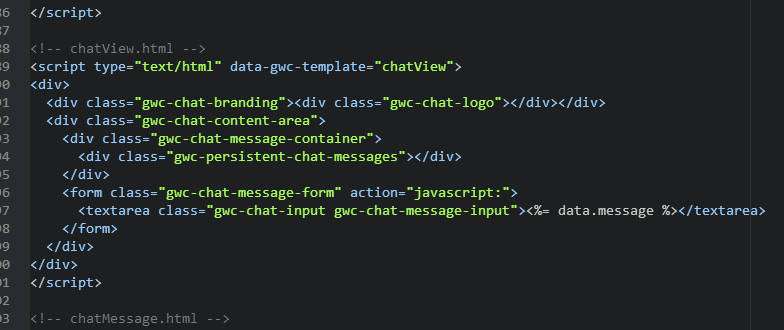
- Add the new content to the template. In this example, we add it to the <form> below the input area. This is not semantic, but makes further CSS-related work a bit easier.
- Save the modified templates file and "host" it somewhere that is accessible via HTTP.
- Configure the chat to use the modified template file by providing the URL of the file to the templates option:
<script> var _genesys = { chat: { templates: 'http(s)://example.com/chatTemplates.html' } }; </script> <INSTRUMENTATION_SNIPPET>ImportantThis example uses the Integrated JavaScript Application to add chat to the page. See Configuring Chat for instructions on configuring the chat widget using the Integrated Application. - Start a new chat. You will see something like this:
The content is there, but the layout looks a bit broken. To fix it, we're going to use some CSS.

- Follow the same algorithm that is used for every CSS customization:
- Inspect an element with your browser's developer tools.
- See if it has the styling you need.
- If no, try its parents or children until you find the right element.
- Modify the CSS rules for the element until you're satisfied with the results.
- Save all your modifications as separate CSS.
- Add this CSS to your page; it will override the initial CSS of the widget.
For this particular example, we can use the following simple CSS rule:
.gwc-chat-message-form {
    bottom: 3px;
}
Essentially, we are moving the form a bit closer to the bottom edge because it now contains an additional <div> that occupies the space that was previously occupied by the margin.
- Add the CSS to your web page.


Procedure: Using the ui.onBeforeMessage Hook to Add Desktop Notifications
Purpose: Customization Type: JavaScript-based
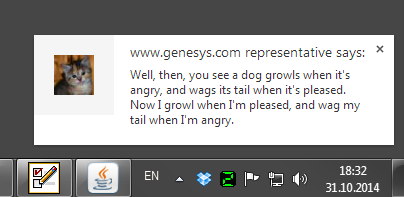
In this example we use the browser Notification API and Page Visibility API to show a notification when a user receives a chat message while on another browser tab.
The purpose of the example is to show how you can use the UI hooks to add the functionality to the chat widget.
Prerequisites
- You must have basic knowledge of JavaScript.
Steps
- Create a function that shows a notification in the browser (if the browser supports the APIs) and add it to our instrumentation:
var _genesys = { chat: { ui: { onBeforeMessage: function(messageEl, messageText) { // If page is in focus or page visibility API is not supported, quit. if (!document.hidden) { return; } // If notification API is not supported, quit. if (!Notification) { return; } if (Notification.permission === 'granted') { var notification = new Notification(document.location.host + ' representative says:', { icon: 'http://placekitten.com/51/50', // add an avatar body: messageText // include text entered by agent }); // When notification is clicked, bring the tab with chat into focus. notification.onclick = function() { window.focus(); } } } } } } // When page is loaded, ask the user permission to show notifications if (Notification) { Notification.requestPermission(); }ImportantThis example uses the Integrated JavaScript Application to add chat to the page. The Integrated Application makes sure that the option is passed to the startChat() and restoreChat() methods. This means the modification is applied whether the chat is started on the current page or restored after the navigation/page reload See Configuring Chat for instructions on configuring the chat widget using the Integrated Application. - Load a page on your site. You should see a request to allow the notifications (see the last line of the code snippet in Step 1). For example, in Chrome the request might look like this:

- Click Allow.
- Start a chat session and join as an agent (or wait for the agent to join if you do not control the environment).
- Switch to another tab in the browser
- Send a message from the agent (or wait for the agent to send the message).
- A notification appears on your desktop:
- Click the message. The page with the chat widget gets the focus.


Procedure: Displaying a confirmation alert when users close the chat widget
Purpose: In this example we make users confirm they want to close the chat widget. The example applies to embedded mode as popup mode does this out-of-the-box.
Customization Type: JavaScript-basedPrerequisites
You must have basic knowledge of JavaScript.
Steps
- Write a javascript function that asks user to confirm they want to close the chat. This function should return true if users answer "Yes" and false otherwise. For example:
function() { return confirm('Do you really want to close the chat?'); } -
Add your function as a click handler for the element with class gwc-chat-control-close. This element is the close button of the chat widget. You must add your function only after the element exists on the page.
If registration is enabled, add your functions to the ui.onBeforeRegistration handler. You must also wrap your functions in setTimeout so your function executes after the chat renders. Your instrumentation should look like this:
var _genesys = { debug: true, chat: { ui: { onBeforeRegistration: function () { setTimeout(function() { document.querySelectorAll('.gwc-chat-control-close') .addEventListener('click', function() { return confirm('Do you really want to close the chat?'); }, false); }, 0); } } }; - If registration is not enabled, add your function to ui.onBeforeChat instead of ui.onBeforeRegistration:
var _genesys = {
    debug: true,
    chat: {
        ui: {
            onBeforeChat: function () {
                setTimeout(function() {
                    document.querySelectorAll('.gwc-chat-control-close')[0]
                        .addEventListener('click', function() {
                            return confirm('Do you really want to close the chat?');
                        }, false);
                }, 0);
        }
    }
};
Now, when users try to close chat, they see a standard notification:

If they click OK the chat closes but persists otherwise.
Procedure: Implementing a client-side chat session timer
Purpose: In this example we implement a simple code snippet that ends the chat if the user has not sent or received any messages for a period of time.
Customization Type: JavaScript-basedPrerequisites
You must have basic knowledge of JavaScript.
Steps
-
Add a hook to your instrumentation to access the Chat APIs:
var _genesys = { chat: { onReady: function(chat) { } } };ImportantThis example uses the integrated javascript application to add chat to the page. -
After you access the Chat Widget API, add an onSession handler to access the Chat Service API:
var _genesys = { chat: { onReady: function(chat) { chat.onSession(function(session) { }); } } } -
Implement a function that triggers the timer. For example:
chat.onSession(function(session) { var timeout = 30000, // 30 seconds sessionTimeout; function startCountdown() { sessionTimeout = setTimeout(function() { // session timed out }, timeout); } }); -
Now, connect the timing functionality to the onMessageReceived chat event. We restart the countdown as soon as the user receives a message. When the countdown ends, we leave the session. A user's own messages also trigger onMessageReceived. The timer expires when neither the user or agent send any messages in the time period.
chat.onSession(function(session) {
    var timeout = 30000,  // 30 seconds
        sessionTimeout;
    function startCountdown() {
        sessionTimeout = setTimeout(function() {
            session.leave();
        }, timeout);
    }

    session.onMessageReceived(function(event) {
        clearTimeout(sessionTimeout);
        startCountdown();
    });
});
The whole example now looks like this:
var _genesys = {
    chat: {
        onReady: function(chat) {

            chat.onSession(function(session) {
                var timeout = 30000,  // 30 seconds
                    sessionTimeout;

                function startCountdown() {
                    sessionTimeout = setTimeout(function() {
                        session.leave();
                    }, timeout);
                }

                session.onMessageReceived(function(event) {
                    clearTimeout(sessionTimeout);
                    startCountdown();
                });
            });

        }
    }
};
Procedure: Inserting a line break with Shift+Enter
Purpose: By default, the chat widget sends a message with Enter and Ctrl+Enter inserts a line break. In this example, we make Shift+Enter also insert a line break.
Customization Type: JavaScript-basedPrerequisites
- You must have basic knowledge of JavaScript.
- This examples uses the jQuery library.
Steps
-
Use the ui.onBeforeChat hook to access the textarea element used to enter messages.
var _genesys = { chat: { ui: { onBeforeChat: function(chatElement) { var textarea = jQuery(chatElement).find('.gwc-chat-message-input'); } } } }; -
Bind a handler to the keypress event of the textarea:
var textarea = jQuery(chatElement).find('.gwc-chat-message-input'); textarea.keypress(function (e) { }); -
In the event handler, insert a line break at the current textarea value when the user presses the Enter and Shift keys. Return false to prevent default behavior of sending the message.
If the user does not press the Shift and Enter keys, the handler passes through and triggers default behavior.
var textarea = jQuery(chatElement).find('.gwc-chat-message-input');
textarea.keypress(function (e) {
    // Enter key was pressed
    if (e.which === 13 || e.which === 10) {


        // If Shift was pressed, break line.
        if (e.shiftKey) {
           textarea.val(textarea.val() + '\\n');
           return false;
        }
    }
});
The complete configuration looks like this:
var _genesys = {
    chat: {
        ui: {
            onBeforeChat: function(chatElement) {
                var textarea = jQuery(chatElement).find('.gwc-chat-message-input');
                textarea.keypress(function (e) {

                    // Enter key pressed
                    if (e.which === 13 || e.which === 10) {

                        // If Shift key pressed, insert break line and prevent default behavior
                        if (e.shiftKey) {
                           textarea.val(textarea.val() + '\\n');
                           return false;
                        }
                    }
                });
            }
        }
    }

};
Procedure: Automatically opening a URL pushed by an agent
Purpose: In some desktops, the agent can push a URL instead of sending plain text. By default, the chat widget renders a pushed URL using the a tag, making it a link. In this example, we make links pushed by the agent open automatically.
Customization Type: JavaScript-basedPrerequisites
- You must have basic knowledge of JavaScript.
- This example requires Integrated JavaScript Application version 850 and above.
Steps
-
In your instrumentation, configure anytime access to the Chat Widget API:
<script>
var _genesys = {
  chat: {
    onReady: []
  }
};
Learn more about his snippet here, Integrated JavaScript Application—Obtaining Chat and Co-browse APIs
-
Somewhere in your code, access the Chat Widget API:
_genesys.chat.onReady.push(function(chatWidgetApi) { }); -
Use the Chat Widget API to subscribe to the chat session. The chat session object implements the Chat Service API:
_genesys.chat.onReady.push(function(chatWidgetApi) { chatWidgetApi.onSession(function(chatSession) { }); }); -
Use the chat session to subscribe to the onMessageReceived event:
_genesys.chat.onReady.push(function(chatWidgetApi) { chatWidgetApi.onSession(function(chatSession) { chatSession.onMessageReceived(function(event) { }); }); }); -
If the incoming event is of type URL, open the URL in the current window:
_genesys.chat.onReady.push(function(chatWidgetApi) { chatWidgetApi.onSession(function(chatSession) { chatSession.onMessageReceived(function(event) { if (event.content.type === 'url') { window.location = event.content.text; } }); }); }); -
If you use chat in pop-up mode where the chat widget opens in a separate browser window, you must modify the code to open the URL in the parent window instead of the chat widget window. You must also place the code in the chatWidget.html file linked in the widgetUrl option.
chatWidget.html<!DOCTYPE html> <html lang="en"> <head> <meta charset="utf-8"> <meta http-equiv="X-UA-Compatible" content="IE=edge"> <meta name="viewport" content="width=device-width, initial-scale=1"> <title>Genesys Chat</title> </head> <body> <script src="js/chatWidget.js"></script> <script> chat.startChatInThisWindow().done(function(session) { session.onMessageReceived(function(event) { if (event.content.type === 'url') { window.opener.location = event.content.text; } }) }); </script> </body> </html>
Procedure: Showing the number of unread messages in a minimized chat widget
Purpose: In this example, we add a simple counter that notifies the user of any unread messages. This example applies to embedded mode where the widget is rendered on the web page directly.
Counter example:
![]()
Prerequisites
- You must have basic knowledge of JavaScript.
- This example assumes you are using chat as part of the Integrated JavaScript Application.
- The example uses the jQuery library.
Steps
-
Add an HTML element to the ebeddedWindow template. to use as our counter. For example, below we add <span class="gwc-chat-counter"></span>. See Template-based Customization for more details.
<script type="text/html" data-gwc-template="embeddedWindow"> <div class="gwc-chat-embedded-window"> <div class="gwc-chat"> <div class="gwc-chat-head gwc-drag-handle"> <div class="gwc-chat-window-controls"> <div class="gwc-chat-control gwc-chat-control-minimize"> <div class="gwc-chat-icon gwc-chat-icon-minimize"></div> </div> <div class="gwc-chat-control gwc-chat-control-close"> <div class="gwc-chat-icon gwc-chat-icon-close"></div> </div> </div> <div class="gwc-chat-title"><span class="gwc-chat-counter"></span> <%= data.chatTitle %></div> </div> <div class="gwc-chat-body"></div> </div> </div> </script> -
Configure you instrumentation for anytime access to the Chat Widget API:
<script>
var _genesys = {
  chat: {
    onReady: []
  }
};
Learn more about his snippet here, Integrated JavaScript Application—Obtaining Chat and Co-browse APIs
-
Somewhere in your code, access the Chat Widget API:
_genesys.chat.onReady.push(function(chatWidget) { }); -
Create a variable to hold the number of unread messages and set it to 0. Use the Chat Widget API to subscribe to the chat session. The chat session object implements the Chat Service API.
_genesys.chat.onReady.push(function(chatWidgetApi) { var messageCount = 0; chatWidgetApi.onSession(function(chatSession) { }); }); -
In the session API, use the onMessageReceived method to subscribe to new messages. When a message comes in, increment the counter and update your counter. Use the isMinimized() method from the Chat Widget API to check if the widget is minimized.
_genesys.chat.onReady.push(function(chatWidgetApi) { var messageCount = 0; chatWidgetApi.onSession(function(chatSession) { session.onMessageReceived(function(event) { if (chat.isMinimized()) { messageCount++; $('.gwc-chat-counter').text('(' + messageCount + ')'); } }); }); }); -
Use the onMiminized method from the Chat Widget API to reset the counter when the user restores the chat widget.
_genesys.chat.onReady.push(function(chatWidgetApi) {
    var messageCount = 0;

    chatWidgetApi.onSession(function(chatSession) {
        session.onMessageReceived(function(event) {
            if (chat.isMinimized()) {
                messageCount++;
                $('.gwc-chat-counter').text('(' + messageCount + ')');
            }
        });
    });
    chatWidgetApi.onMinimized(function(isMinimized) {
        if (!isMinimized) {
            messageCount = 0;
            $('.gwc-chat-counter').text('');
        }
    });
});
- Use the restored property in the onMessageReceived callback to determine if the message is new or replayed.
- Use browser storage (for example, sessionStorage) to save and restore the counter value.
Procedure: Showing an agent typing notification in the minimized chat widget
Purpose: Building on the previous example, in this example we show a notification in the minimized widget when the agent is typing. This example only applies to embedded mode.
Prerequisites
- You must have basic knowledge of JavaScript.
- You completed the previous example, Showing the number of unread messages in a minimized chat widget.
Steps
-
Use the onAgentTyping method in the session API to subscribe to the agent typing event.
session.onAgentTyping(function(event) { }); -
Create new content for your counter element. When the agent starts typing, append ... to the unread messages counter. If there are no unread messages, display .... When the agents stops typing, just show the number of unread messages, if any.
session.onAgentTyping(function(event) { var text; if (event.isTyping) { text = messageCount ? '(' + messageCount + '...)' : '(...)'; } else { text = messageCount ? '(' + messageCount + ')' : ''; } }); -
Add the content to the counter only when the chat is minimized:
session.onAgentTyping(function(event) {
    var text;
    if (!chat.isMinimized()) {
        return;
    }
    if (event.isTyping) {
        text = messageCount ?  '(' + messageCount + '...)' : '(...)';
    } else {
        text = messageCount ? '(' + messageCount + ')' : '';
    }
    $('.gwc-chat-counter').text(text);
});
The whole snippet, including code from the previous example:
_genesys.chat.onReady.push(function(chatWidgetApi) {
    var messageCount = 0;

    chatWidgetApi.onSession(function(chatSession) {
        session.onMessageReceived(function(event) {
            if (chat.isMinimized()) {
                messageCount++;
                $('.gwc-chat-counter').text('(' + messageCount + ')');
            }
        });
        session.onAgentTyping(function(event) {
            var text;
            if (!chat.isMinimized()) {
                return;
            }
            if (event.isTyping) {
                text = messageCount ?  '(' + messageCount + '...)' : '(...)';
            } else {
                text = messageCount ? '(' + messageCount + ')' : '';
            }
            $('.gwc-chat-counter').text(text);
        });
    });
    chatWidgetApi.onMinimized(function(isMinimized) {
        if (!isMinimized) {
            messageCount = 0;
            $('.gwc-chat-counter').text('');
        }
    });
});
Now, when the agent begins to type the user sees:

or

Procedure: Displaying a character counter in the message area
Purpose: This example adds a 140 character message limit and displays the number of remaining characters.
Character Counter:

Prerequisites
- You must have basic knowledge of JavaScript.
- This example assumes you are using chat as part of the Integrated JavaScript Application.
- The example uses the jQuery library.
Steps
- Access the default chatView template. See Template-based Customization
-
Modify the template to set a limit on the text area and add a counter element. We use the class name gwc-input-counter.
<script type="text/html" data-gwc-template="embeddedWindow"> <div> <div class="gwc-chat-branding"><div class="gwc-chat-logo"></div></div> <div class="gwc-chat-content-area"> <div class="gwc-chat-message-container"> <div class="gwc-persistent-chat-messages"></div> </div> <form class="gwc-chat-message-form" action="javascript:"> <textarea class="gwc-chat-input gwc-chat-message-input" maxlength="140"><%= data.message %></textarea> </form> <div class="gwc-input-counter">140</div> </div> </div> </script>ImportantWe use the maxlength property to limit the input on the <textarea>. The maxlength property is part of the HTML5 spec and may be unavailable in older browsers such as IE9 and below. For older browsers, you must use a JavaScript solution like the one described here, http://stackoverflow.com/a/12131507/697388. -
At this point, the character counter is not visible in the chat widget. To make the counter visible, add we the following CSS:
<style> .gwc-input-counter { position: absolute; bottom: 16px; right: 14px; color: #999; font-weight: bold; text-shadow: 1px 1px 1px lightgrey; } </style> -
Now we add an event listener to the text area. Use the ui.onBeforeChat hook to access the text area element within chat:
var _genesys = {
    chat: {
        ui: {
            onBeforeChat: function(chatHtml) {
                $(html).find('textarea'); // our textarea
            }
        }
    }
};
Use the event listener to calculate the number of characters remaining and update the counter element:
var _genesys = {
    chat: {
        ui: {
            onBeforeChat: function(chatHtml) {
                $(html).find('textarea').on('input', function () {
                    var charsLeft = this.maxLength - this.value.length;
                    $('.gwc-input-counter').text(charsLeft);
                });
            }
        }
    }
};
Procedure: Replace Skip Registration button with Exit button
Purpose: In this example we replace the Skip Registration button with an Exit button. Clicking Exit closes the chat widget.
Exit button:

Prerequisites
- You must have basic knowledge of JavaScript.
- This example assumes you are using chat as part of the Integrated JavaScript Application.
- The example uses the jQuery library.
Steps
-
Add the Exit string to the localization bundle. You can do this in different ways, see Chat Widget API—Localization. In this example, we create a regExit key with value Exit and pass the key-value pair to the localization option. By doing so, we extend the built-in localization with our new key:
<script> var _genesys = { chat: { localization: { 'regExit': 'Exit' } } }; <script> -
Modify the template to render our new text instead of Skip Registration. Copy and paste the default chatRegistration template into your page, see more about templates in Chat Widget API—Template-based Cusomization. Substitute <%= data.nls.regSkip %> with <%= data.nls.regExit %>.
The updated template looks like this:
<script type="text/html" data-gwc-template="chatRegistration"> <div> <div class="gwc-chat-branding"><div class="gwc-chat-logo"></div></div> <div class="gwc-chat-content-area"> <div class="gwc-chat-registration-intro"> <p class="gwc-chat-registration-intro-p"> <%= data.nls.regWelcomePart1 %></p> <p class="gwc-chat-registration-intro-p"> <%= data.nls.regWelcomePart2 %></p> </div> <form> <div class="gwc-chat-controls-container"> <div class="gwc-chat-control-group gwc-chat-control-group-required"> <label for="gcbChatFirstName" class="gwc-chat-label"> *<%= data.nls.regFirstName %> </label> <div class="gwc-chat-controls"> <input id="gcbChatFirstName" name="FirstName" class="gwc-chat-registration-input" type="text"/> <div class="gwc-chat-validation-error"></div> </div> </div> <div class="gwc-chat-control-group"> <label for="gcbChatLastName" class="gwc-chat-label"> <%= data.nls.regLastName %> </label> <div class="gwc-chat-controls"> <input id="gcbChatLastName" name="LastName" class="gwc-chat-registration-input" type="text"/> <div class="gwc-chat-validation-error"></div> </div> </div> <div class="gwc-chat-control-group gwc-chat-control-group-required"> <label for="gcbChatEmail" class="gwc-chat-label"> *<%= data.nls.regEmail %> </label> <div class="gwc-chat-controls"> <input id="gcbChatEmail" name="EmailAddress" class="gwc-chat-registration-input" type="email"/> <div class="gwc-chat-validation-error"></div> </div> </div> </div> <div class="gwc-chat-registration-buttons"> <div class="gwc-chat-registration-skip"> <button class="gwc-chat-button gwc-chat-button-light" id="gcbChatSkipRegistration" type="button"> <%= data.nls.regExit %> </button> </div> <div class="gwc-chat-registration-submit"> <button class="gwc-chat-button" id="gcbChatRegister" type="submit"> <%= data.nls.regSubmit %> </button> </div> </div> </form> </div> </div> </script> -
Use the ui.onBeforeRegistration hook along with jQuery and the close() method to add the button's behavior:
<script>
var _genesys = {
    chat: {
        localization: {
            'regExit': 'Exit'
        },
        ui: {
            onBeforeRegistration: function(regForm) {
                var $skipBtn = jQuery(regForm).find('#gcbChatSkipRegistration');
                $skipBtn.on('click', function() {
                    chat.close();
                    return false; // prevent default behavior
                });
            }
        }
    }
};
<script>
Now, when the user clicks on the Exit button, the chat widget closes.
Procedure: Automatically expand text area based on user input
Purpose: In this example we automatically expand the text input area in the chat widget as the user enters text.
Prerequisites
- You must have basic knowledge of JavaScript.
- This example assumes you are using chat as part of the Integrated JavaScript Application.
- The example uses the jQuery library.
Steps
-
Access the textarea element using the ui.onBeforeChat hook:
<script> var _genesys = { chat: { ui: { onBeforeChat: function(html) { var $textarea = jQuery(html).find('textarea'); } } } }; </script> -
Add a listener to the textarea. When the textarea receives input, the listener checks the textarea size and increases the size as needed:
//... var $textarea = jQuery(html).find('textarea'); $textarea.on('input', function () { if (this.clientHeight < this.scrollHeight) { this.style.height = this.scrollHeight + 'px'; } });ImportantThis example uses the input event which may be unavailable in older browsers. You may want to use keyup or another event instead. -
At this point, when the textarea grows it covers the message area. We fix this by shrinking the messages as we expand the textarea:
//... if (this.clientHeight < this.scrollHeight) { this.style.height = this.scrollHeight + 'px'; $('.gwc-chat-message-container').css({ bottom: this.scrollHeight + 25 }); } -
As a final adustment, we limit how large the textarea can grow. We set a height limit of 150 px:
if (this.clientHeight < this.scrollHeight && this.scrollHeight < 150) {
  //...
The full code snippet now looks like this:
<script>
var _genesys = {
    chat: {
        ui: {
            onBeforeChat: function(html) {
                var $textarea = jQuery(html).find('textarea');
                $textarea.on('input', function () {
                    if (this.clientHeight < this.scrollHeight && this.scrollHeight < 150) {
                        this.style.height = this.scrollHeight + 'px';
                        $('.gwc-chat-message-container').css({
                            bottom: this.scrollHeight + 25
                        });
                    }
                });
            }
        }
    }
};
</script>